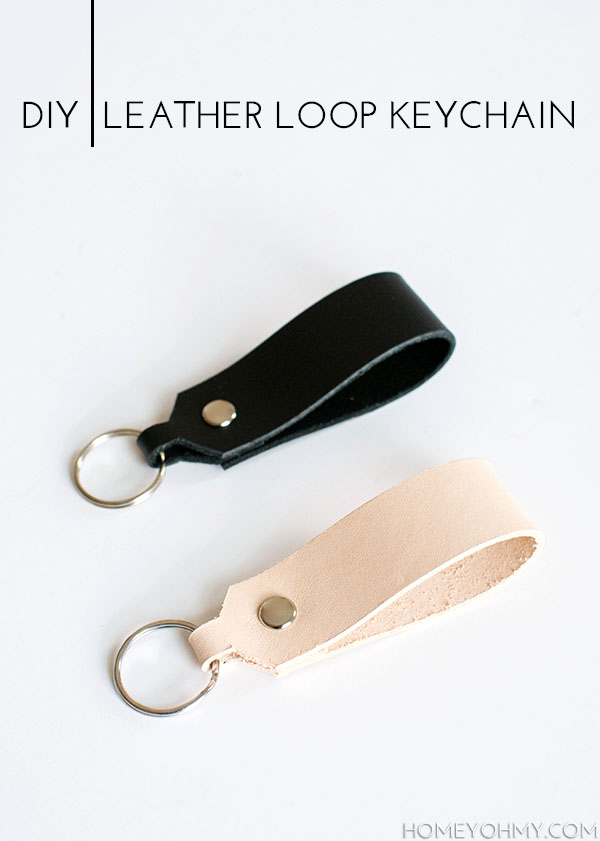
 I’ve been meaning to do another leather DIY after how much I loved my first encounter with the stuff, but even better about this one is that it was boyfriend requested! Just a simple and sleek leather keychain to help carry around keys. Happy to do it, sir. I was already feeling inspired by these key rings from The Everygirl, so it was meant to be.
I actually made three, but the first one was a complete disaster because I was rushing to beat sundown (blogger. problems.) so I’ll share a couple morsels of cautionary tips as I go on with the instructions. In general though, this is a fairly simple DIY and a great beginner project for anyone wanting to get into leather crafting.
Materials:
tooling leather
ruler
rotary cutter
X-ACTO knife
leather awl
leather punch (Kind of. I’ll explain this in the steps.)
rivet kit
key ring
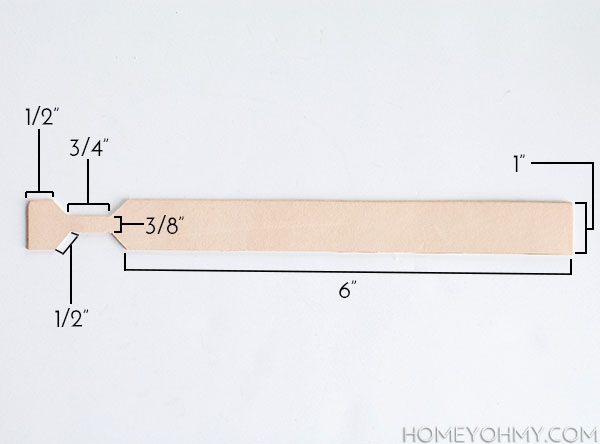 Here are the rough measurements for the leather piece. I used a rotary cutter and ruler to cut off a one inch wide strip, then used a pencil to draw out the little trapezoid shaped cut-outs shown above. Those smaller pieces were cut with an X-ACTO knife, and was probably the most difficult part. Getting those corners cut clean takes patience, guys.
Mistake #1: I didn’t think at all at first about how long I wanted the loop to be so I just left it the length that it was, only to find out later that it was awkwardly long. The next time around I measured and cut the loop length to 6″ as marked above, but the actual leather in the photos of all the steps is longer, so just an FYI for anyone that was detailed enough to notice that it didn’t look like 6″. Anyone?
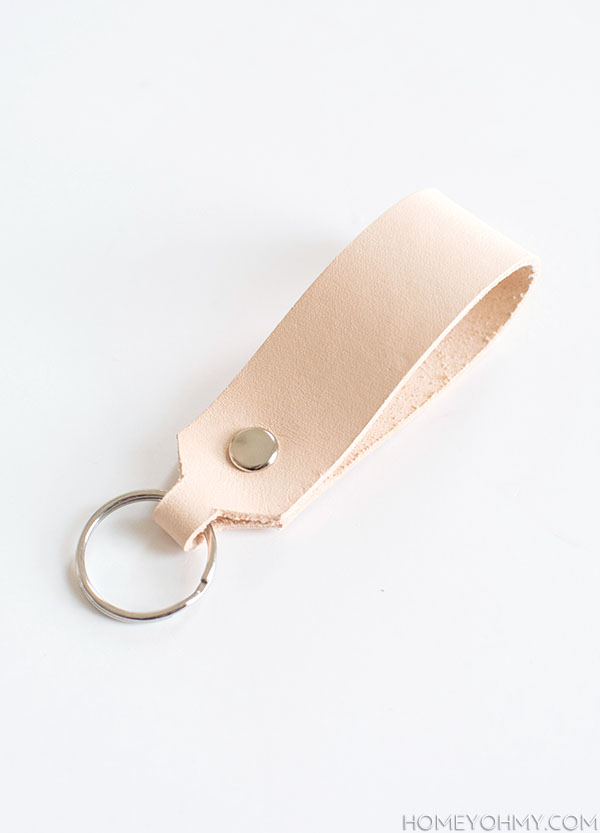
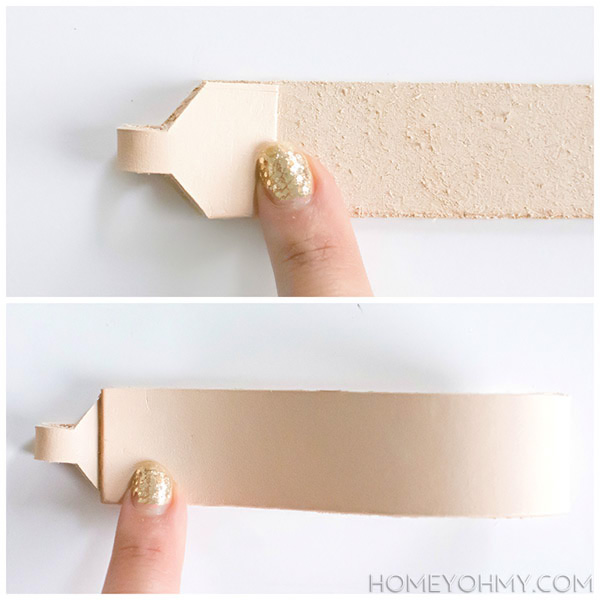 The trapezoid cut-outs are there to make a thinner loop for the key ring to go, which becomes more obvious when folding the short end over, then the long end over on top. This is how the leather strap will be constructed.
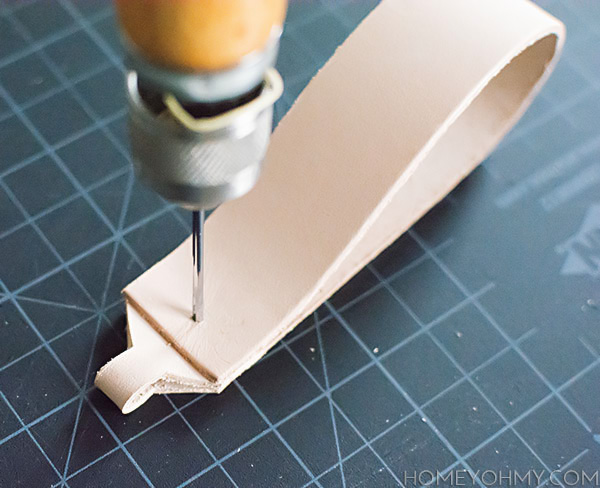 So this part is a little weird. I already had this leather awl and thought it would be enough to poke a hole big enough for the rivets, but it wasn’t. This is where I want to say that it’s best to use a leather punch for the holes after first marking where they should go, then to punch out a hole in each layer of the leather. Buuuuuut if you’re like me and want to avoid getting a leather punch, I improvised by poking the awl through all three layers of leather, then enlarging each hole by sticking an X-ACTO knife through in a cross formation. It isn’t neat and it’s a bit tricky, but it worked. Just need to be careful not to push the knife too far into the hole or else it will cut a slit that’s too big (Mistake #2 from my first time around).
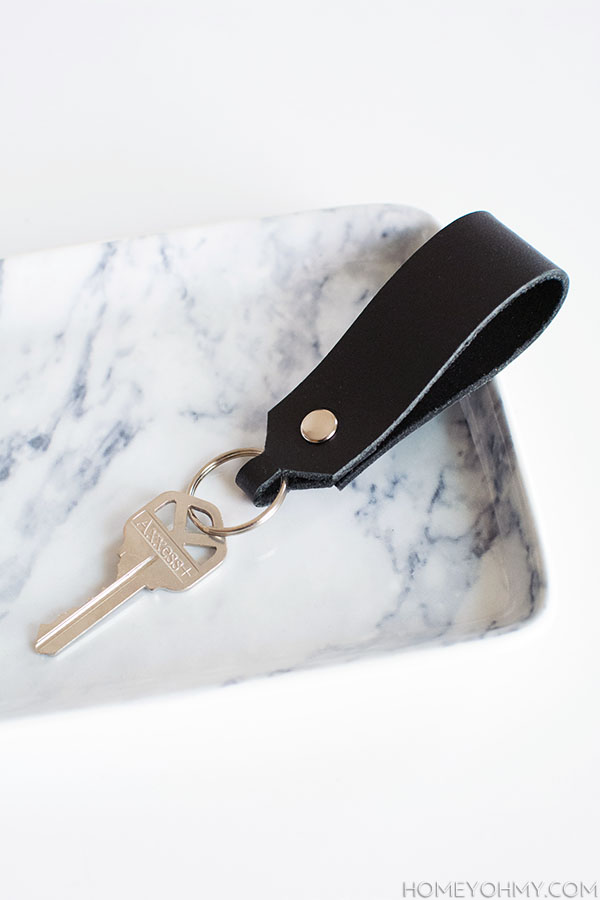
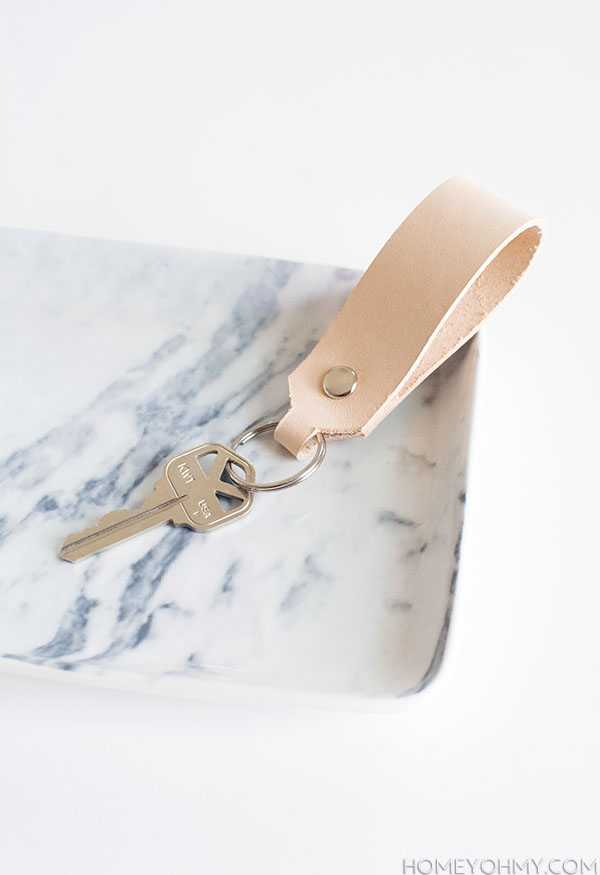
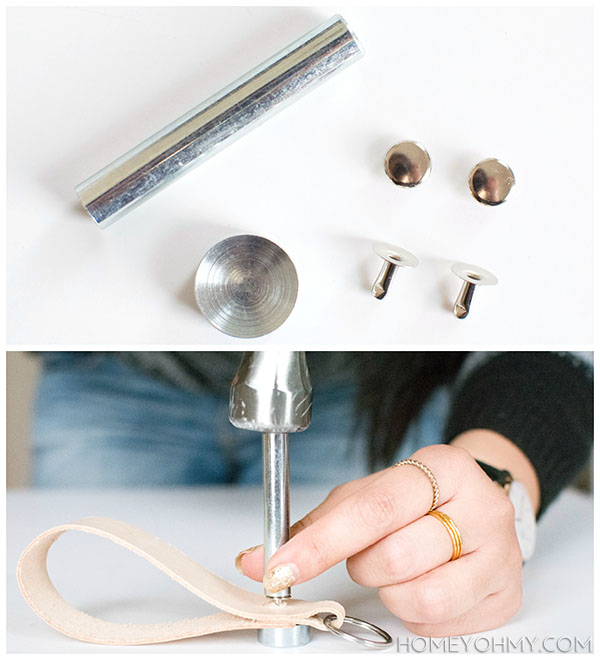 The best part. Have you used rivets for anything? They’re amazing, and this rivet kit is spectacular. After slipping the key ring through and pushing the rivet backing through the holes, I hammered the rivet shut.
Mistake #3: Maybe it was the adrenaline from rushing, but for the first keychain I made, I bashed the life out of the rivet. This somehow misaligned the top and bottom and it shut diagonally and off-center, which wasn’t cute at all. Bashing is completely unnecessary. Light taps with the hammer are sufficient, and you can go progressively harder if needed, but not too hard.
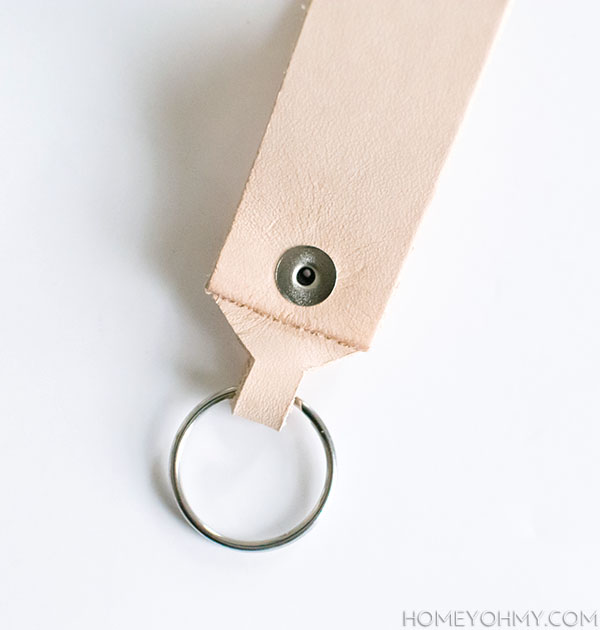 Here’s the back side of the keychain. SO satisfying to see how good the rivet shut. I sincerely hope you’ll soon know what that joy feels like if you don’t already.
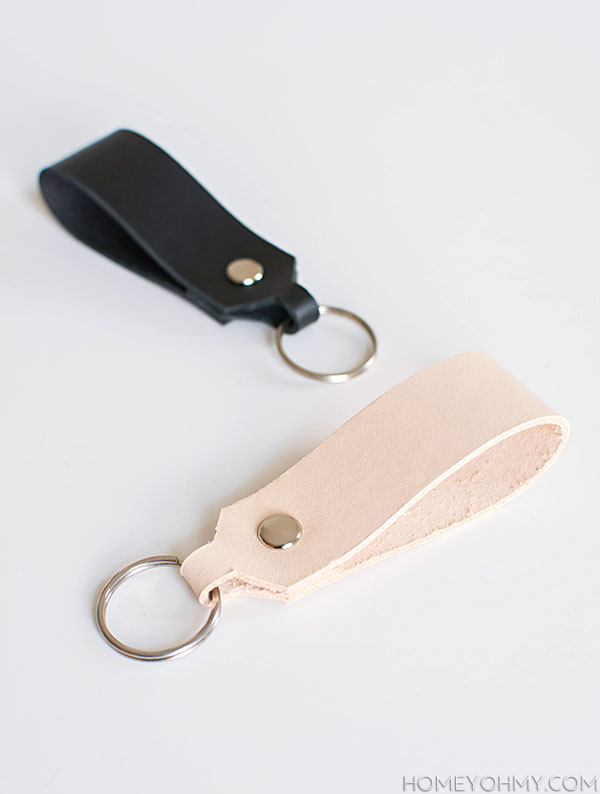
 One for him.
 One for me!
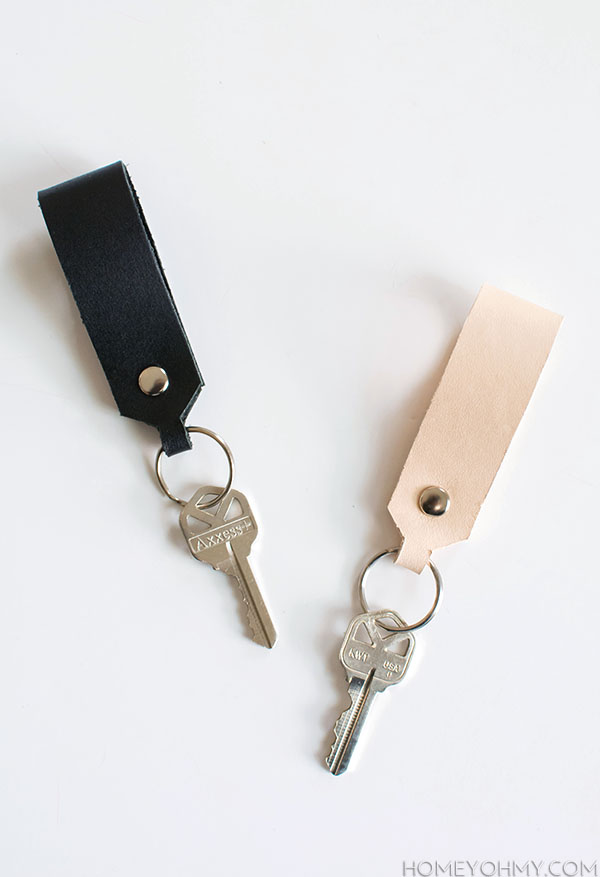 I’ve totally been in this kind of color mood lately, namely no color. Is it the winter? Neutrals are a favorite forever, but just even more so lately. Also, I guess tooling leather only comes in so many colors, ha! Boyfriend initially requested brown, but I couldn’t even find that. Poor him. Which of these two colors do you prefer?
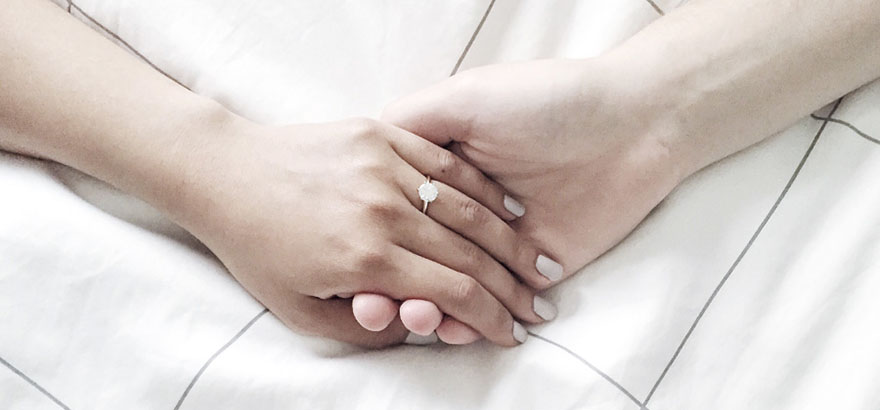
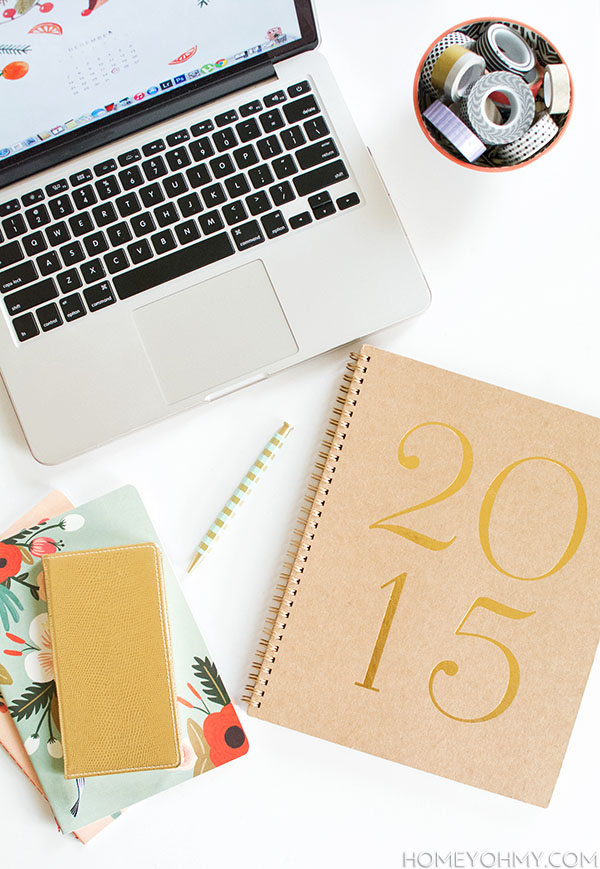 Well guys, I had this New Year post drafted for a month, but tossed around on what I wanted to say and it started getting stressful, to the point where I had thrown the idea out all together, until now.
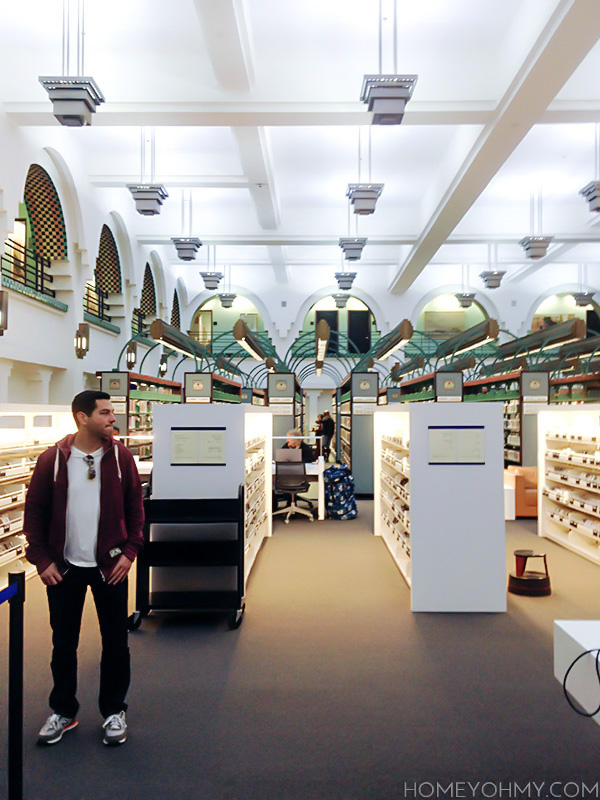 We were in sweats and sneaks because we walked here. It’s (on the longer side of) walking distance! How did this not happen sooner? We spent the walk there and back listening to Serial together (I think Adnan did it, but I also think he didn’t.) That also transitions nicely into the next thing.
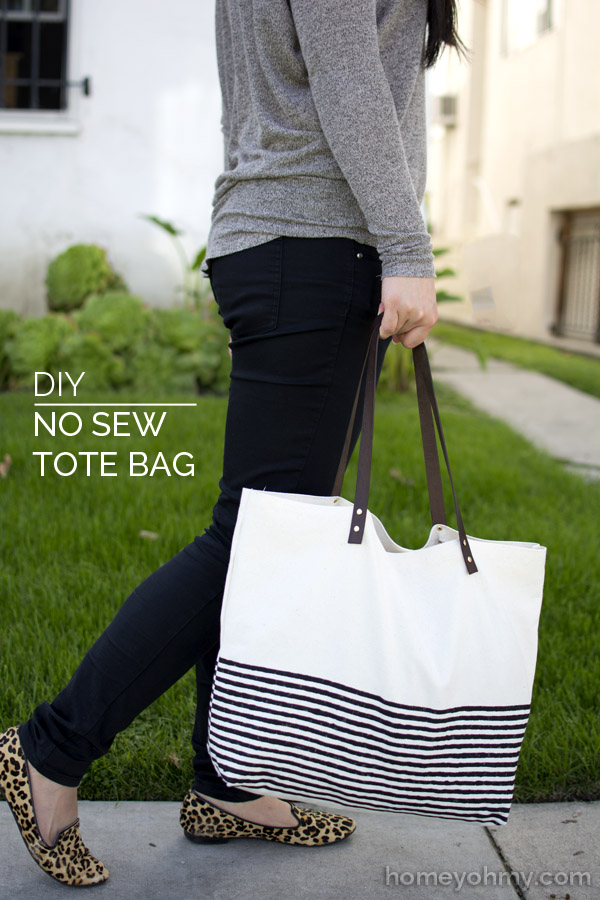
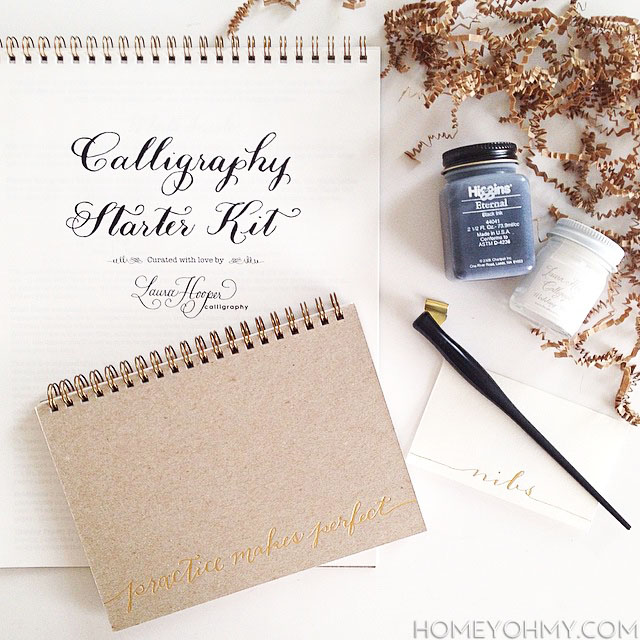 I was really surprised at the response to this. Turns out there are so many of you wanting to learn too, so do it!!! This is the
 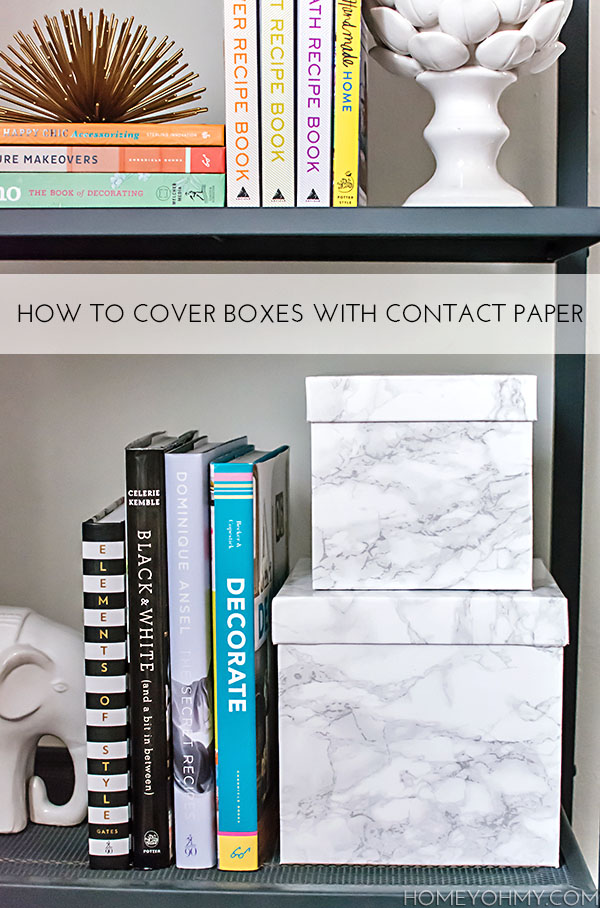 I believe in two things: 1) beautiful storage is exciting and 2) a good, sturdy box should never be tossed. I was reminded of this after receiving a couple gifts this past Christmas that came in some nice boxes, and I was almost more excited about how I was going to re-use the boxes for storage. Call it weird, because it kind of is, but it’s also fun (and useful!), and maybe you kept some boxes from this past holiday season too and need a simple idea on how to make them prettier. Try this one out!
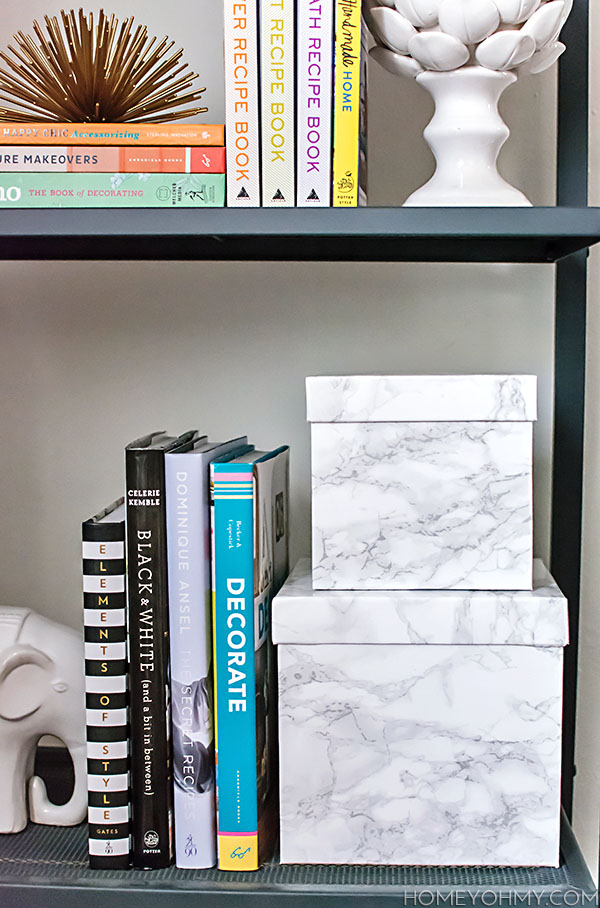
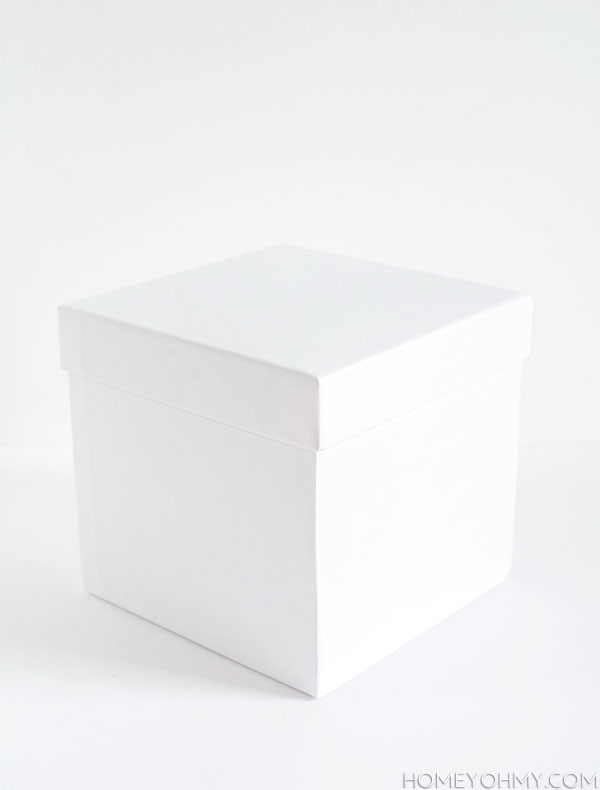 I already liked that the boxes were all white, but I had this
 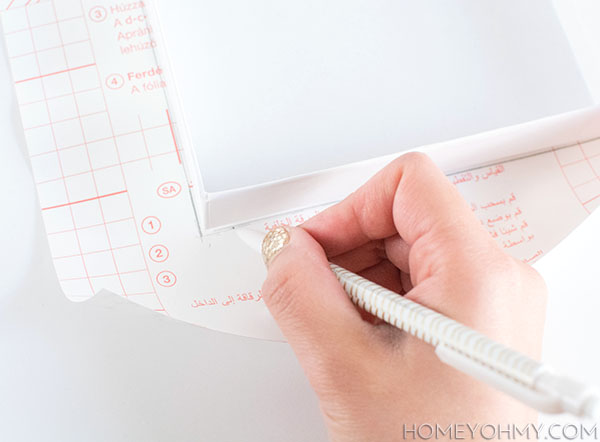 Trace the lid of the box on the contact paper, then measure around the box about twice the height of the side of the lid.
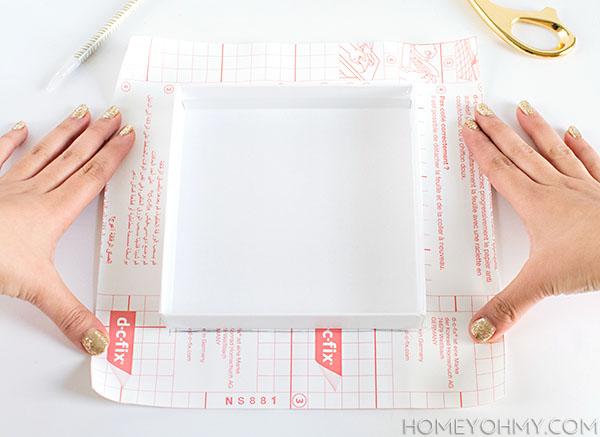 So for example, the height of my box lid is 3cm, so I measured and cut the contact paper about 6cm further out from the lid on each side, as shown in the photo above. Since the lid is shallow, twice the height was appropriate, but for something deeper, like the bottom of my box, I measured out the height of the box + 6cm. Twice the height of the box would’ve been unnecessarily long, so keep that in mind for your box.
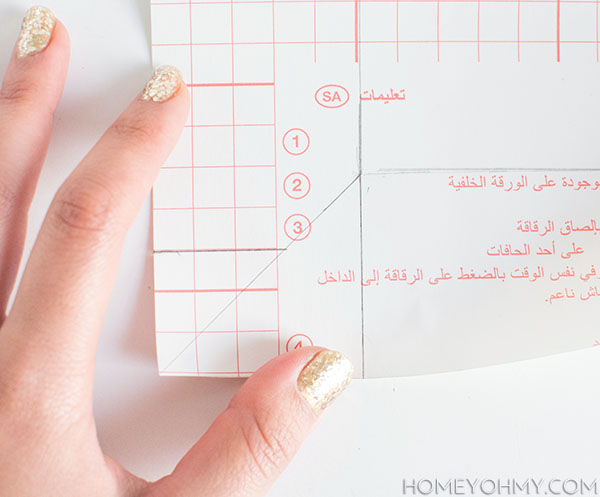 Use a pencil to draw three lines at each corner of the contact paper as shown above- a diagonal line, a horizontal line, and a vertical line. This creates a tab to wrap around the corner of the lid, which I’ll show you in a little bit.
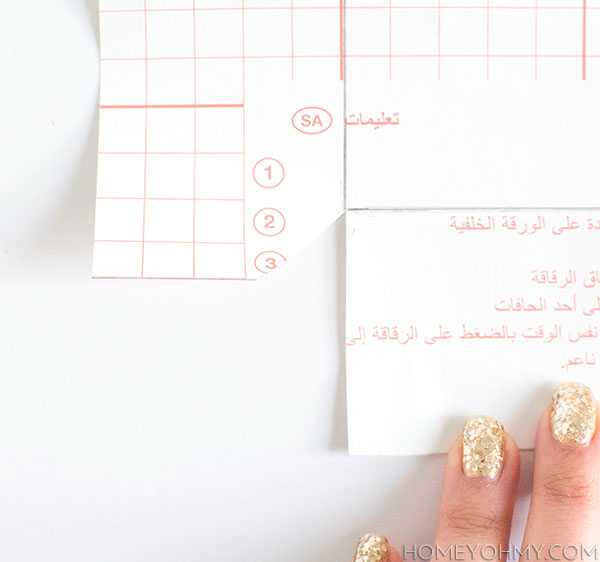 Once cut along the lines, each corner should look like this.
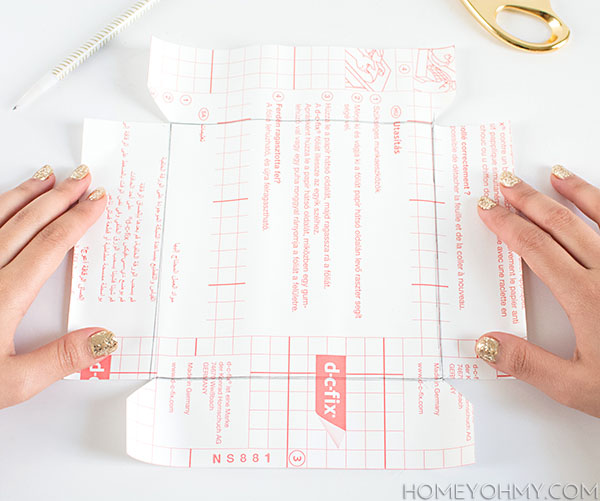 Make sure that the opposite ends of the contact paper are mirror images of each other, meaning that the tabs are on opposite ends of the paper, as shown above.
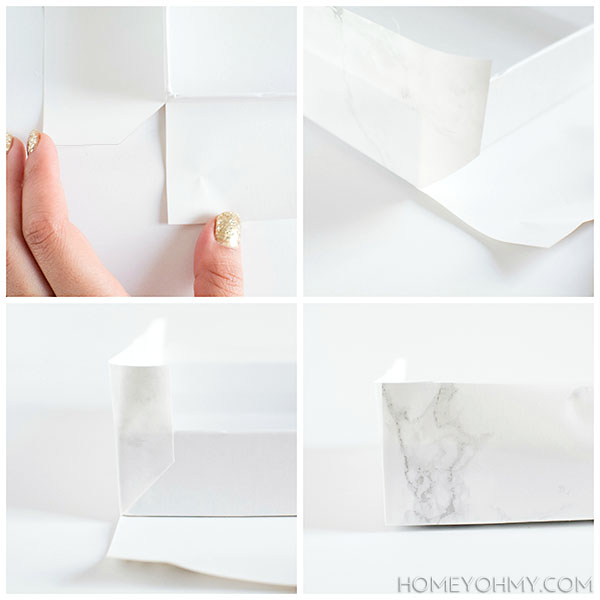 The fun part. Peel the backing off the paper and lay it face down. Press the top of the lid onto the center of the adhesive, making sure the corners of the lid line up with the inner corners of the paper. Fold the sides of adhesive with the tabs straight up and smooth it over to stick firmly onto the side of the lid, then fold the tabs over each corner. Next, fold the other sides up, which will effectively cover the tabs and give you nice, clean corners.
 To fold the the adhesive over the edges (that extra 6cm I measured out), cut a slit down each corner, then fold each side over.
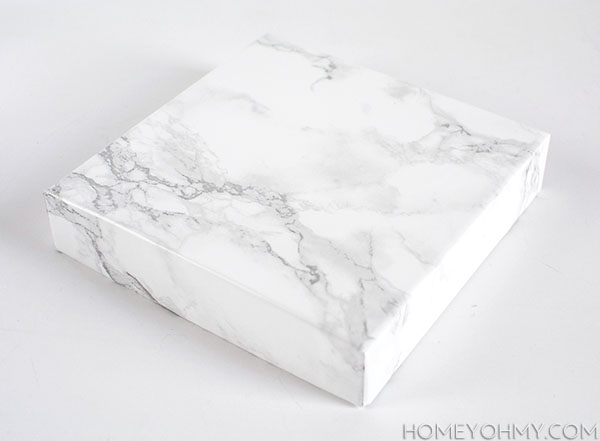 Lid complete. Repeat with the bottom of the box and the transformation is done.
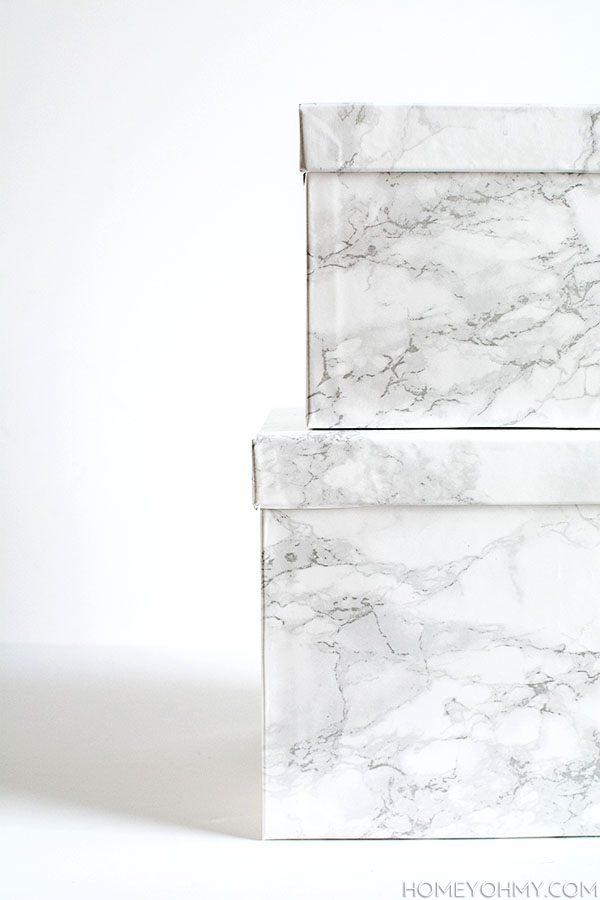
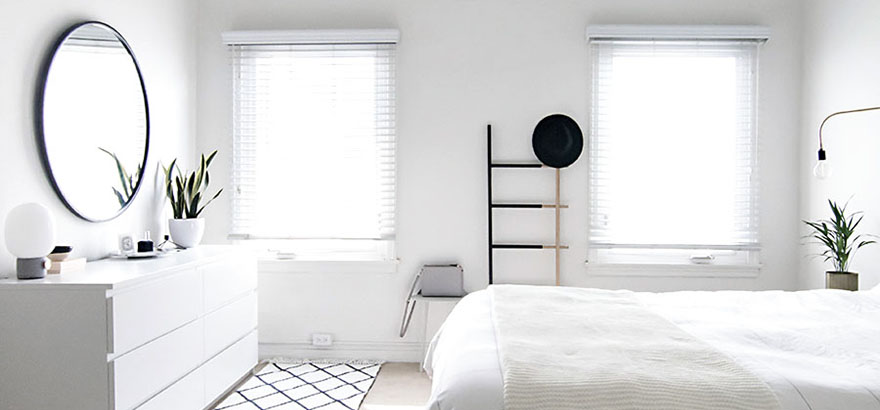
 10.
10.  9.
9.  8.
8.  7.
7. 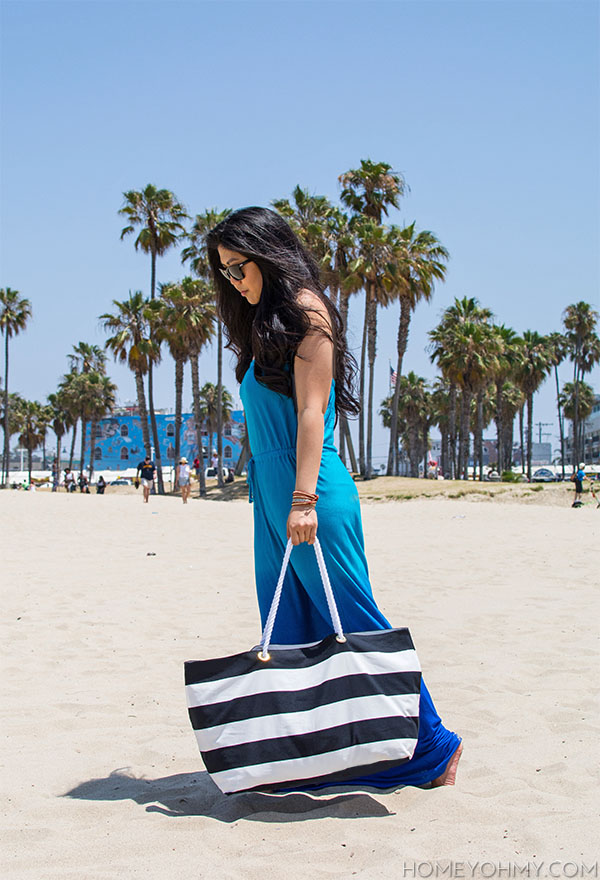 6.
6.  5.
5.  4.
4.  3.
3.  2.
2.  1.
1.