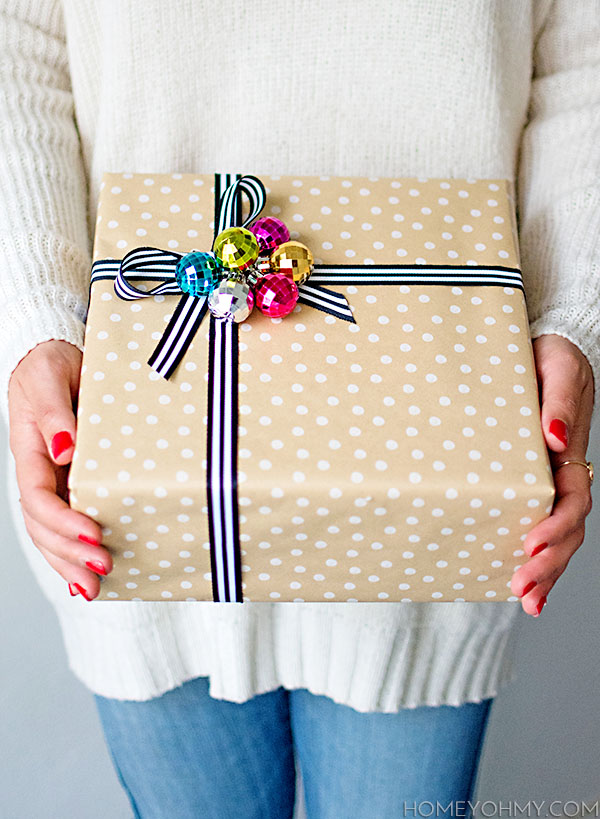
The best part of gift giving? Wrapping. Ok, also that warm fuzzy feeling of spreading joy, but it’s that extra teensy step of wrapping that makes it a whole lot more special. The simplest embellishments can make the biggest difference, and while I’m all for adding personal touches, I also believe these things should be fairly quick and easy to leave us more time for things like hanging out with loved ones, drinking hot chocolate, or watching The Voice (Damien is incredible!)
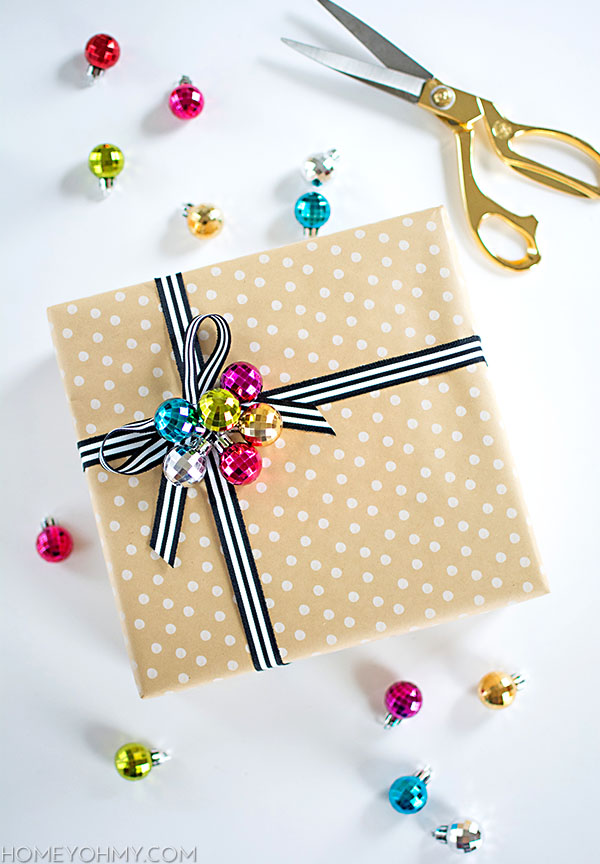
This ornament cluster gift topper takes 8.35 seconds to make, which is also how long it will take me to explain how to make it. Adorable, easy, let’s go.
I strung these mini disco ball ornaments in a row like this.
Then I double knotted the ends of the string together to create a small loop.
That’s it for the cluster part. Now for the attachment.
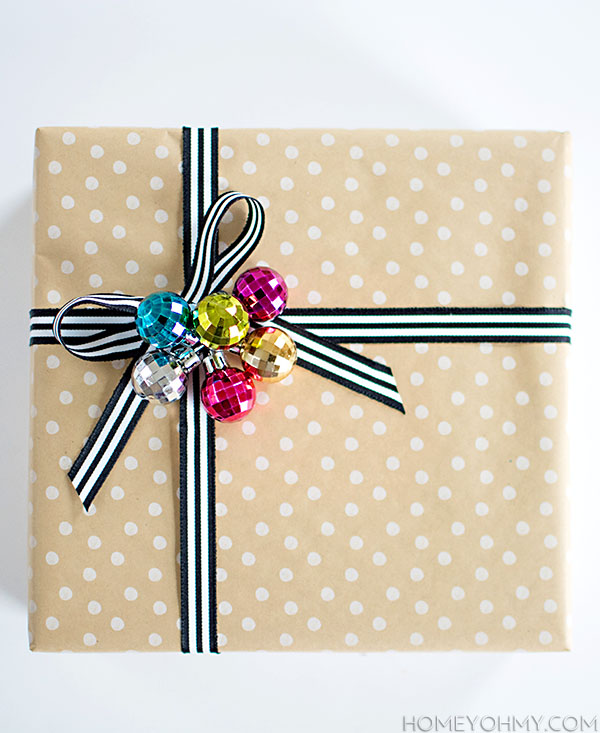
I tied this black and white ribbon around the box and double knotted it off center to one corner.
I strung one end of the ribbon through the string loop in the ornament cluster.
Tied the ribbon into a bow, cut off the excess at the ends, all done.
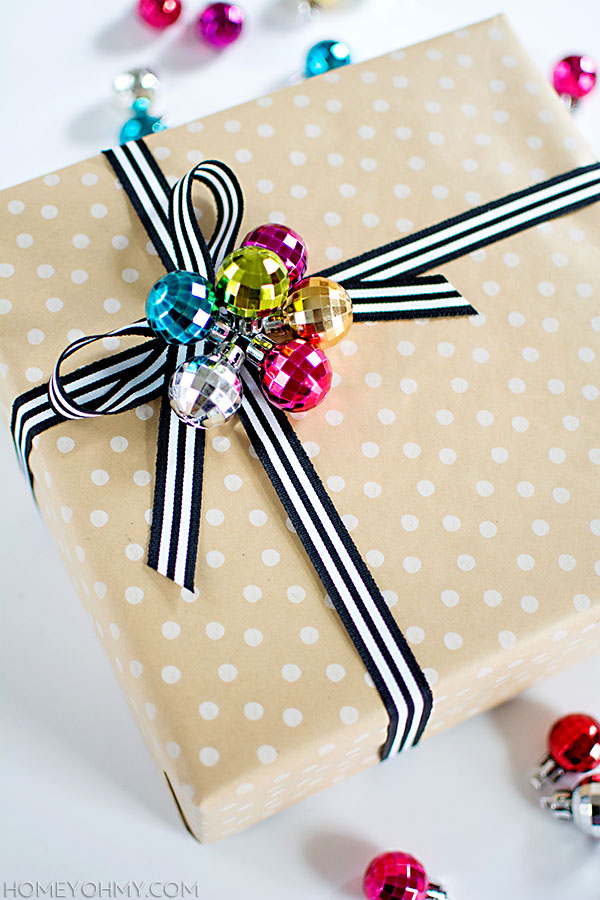
If I received a gift wrapped like this, I’d for sure save the ornaments and repurpose them, maybe like how I used them for my Washi Tape Tree. :D
More gift wrapping and holiday fun to come! Still working on those ornaments for the mystery supply challenge, and am reeeallllyyy close to becoming satisfied with my Christmas tree, which I’ll share here soon!
It’s as fun as it sounds, guys, maybe even more. Anyone who has ever gotten caught up in marathons of the TV show Chopped will know what the idea behind this challenge is, but let me fill everyone in on what’s going on!
For this Christmas Edition Mystery Supply Challenge, each participant is given the same list of supplies to make ornaments, and any additional supplies desired can be used Already you can imagine how the results are going to be so diverse, right? Looking at the roster of participants, which include crazy talented bloggers that I adore, there’s guaranteed to be some amazingly creative ornament ideas.
The supply list for the challenge:
– 1 pack of clear glass/plastic ornaments
– 1 Sharpie paint pen, any color
– 1 bag of faux snow
– 1 roll of ribbon, any color and width
The first thing I decided right away was my color scheme, which I’m SURE you can guess if you’ve been following me for any amount of time. I’m really curious to know though- how would you use these supplies? Got any ideas for any particular supply from this list?
We’ll all be sharing our ornaments in a week on Monday, December 8th. I know. The suspense is unbearable. You might want to go ahead and follow these ladies to make sure you don’t miss a thing. Of course, you’ll see it here on Monday, so don’t go anywhere!
PS.
Completely unrelated- I’ve been hearing from you guys even more lately about how you’re trying some of my DIY’s! Some of you have shared photos with me, which is my favorite thing in the world. If you end up doing any Homey Oh My! DIY, PLEASE let me know about it!!! I LOVE seeing what you guys create. Tag me, tweet me, leave a comment, send me an email, whatever you want to do. I don’t have a designated hashtag yet, but maybe I’ll set one? We’ll see. Love you guys.
By “for her,” we could really say “for me.” I don’t know how else to shop for a sister other than to get her something I’d want for myself (granted that she likes the same kind of stuff, of course). That’s also why I end up shopping for myself while shopping for gifts. I know that happens to you, too! Unless you have self-control, which I immensely commend you for.
With the biggest shopping weekend coming up ahead of us, I thought it would be fun and helpful to share a gift guide. Even with Black Friday being my least favorite “holiday” ever (congested parking lots + long lines + big crowds = I’ll stay at home in my PJ’s thanks), the buzz of this weekend is a good reminder to get started on gifts for the holidays.
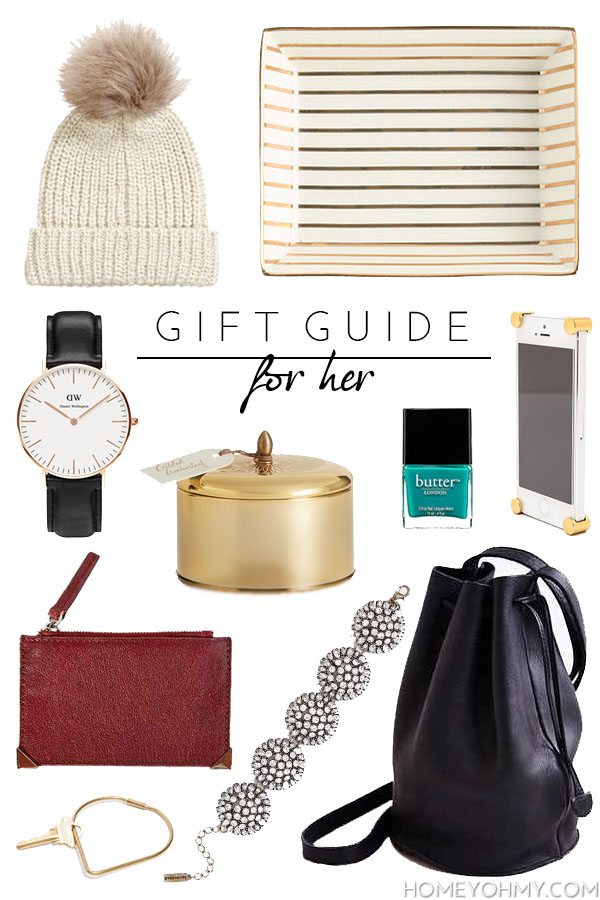
Ranging from big to small, here are a few things the ladies in your life might love:
1) Faux fur pom hat– I’ve been seeing these everywhere, and I love that they can be both cute and chic.
2) Jewelry tray- agh, after I put this all together I saw that it sold out, but there’s a similar one here OR you can DIY one like I did here.
3) Daniel Wellington Watch– Sweet Thing blog shared that the code “sweetthingblog” will take 15% off through the end of November! I definitely will be doing that, because this one has been on my wish-list forever.
4) Gilded Amberleaf candle– What’s better than a candle is a candle in a gorgeous gold container that can be repurposed once the candle is used up.
5) Butter London nail polish– One of, if not the best nail polish brand I’ve used, but a bit pricier than what I’d like to spend on nail polish, so I find that gifting this would make a lovely treat for any nail polish lover.
6) Gold iPhone corners– For the girl that doesn’t like bulky cases, and loves gold.
7) Cornered zip pouch– A pouch for traveling light is a must. The color is perfect for this season, and the corner details really make it special.
8) Contour key ring– Useful, unique shape, brass: sold.
9) Crystal Dandelion bracelet– I’m a long time fan of BaubleBar because they do not disappoint. I imagine this bracelet being worn to a holiday party for that extra glam.
10) Bucket bag– I adore this bag style, and it’s very on trend right now.
Alright guys, I’m heading out early for the week to be with family for Thanksgiving, so I want to wish you all a very Happy Thanksgiving! Every single one of you and the time we spend together on this blog is something I’m very grateful for this year <3. Have a restful weekend, and see you all back here on Monday!
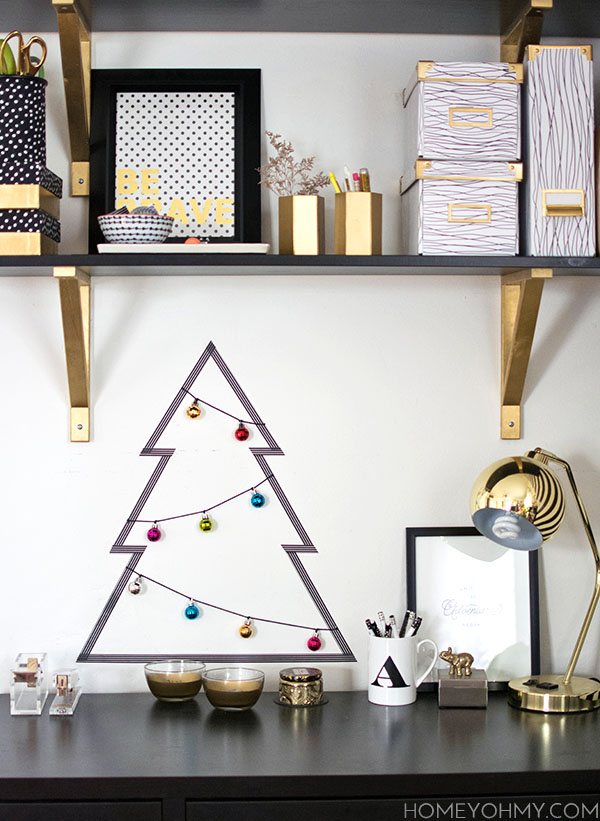
Here’s a really easy holiday DIY for you guys! A Washi tape tree was something I was itching to do, and it was just a matter of where. I did consider doing a gigantic one in place of a real tree (excellent small space solution), but instead decided to go for Christmas-ifying my desk. My desk is becoming more and more an area for regular decorating, and I like the idea of always changing things up as long as it’s simple. This one for sure is very simple and a quick way to add a little Christmas cuteness to any blank wall or nook. Cubicles are welcome as well.
It’s pretty straightforward and very customizable, which makes this a DIY that doesn’t need much explanation (yay). I cut out pieces of Washi tape and taped them to the wall. Boom. The corners were a little tricky and I had to re-do them a few times, but the key was to use scissors in order to have clean and precise corners.
I tied these adorable mini disco ball ornaments (sneak peeked on Instagram) to string and taped the ends with clear tape to the edges of the tree.
I wouldn’t describe these ornaments as my typical style, but I’m always attracted to anything with a metallic shine, and I love taking advantage of the holidays to add a pinch of whimsy. You can find me staring at them when I’m at my desk and completely forgetting that Thanksgiving hasn’t even passed yet.
So who has put up their Christmas tree already?? I meant to put mine up by now, but life happened, and that’s when Washi tape helps me feel like I’m on top of it for the holidays.
I’m signing off on all the gallery wall talk with one final topic, which is about my favorite source for art ever. If you’ve already seen my gallery wall and looked at the sources, you might have noticed that a good amount of the art is from Artfully Walls which, you guessed it, is my favorite source for art. Ever.
I first came across Artfully Walls through my obsession with Britt Bass Turner’s work. All I was looking for was the Navy Geo print, then somehow I got lost in browsing the entire stock of art on the site. I felt it right away, that there’s something so thoughtful and unique in every piece and in the way collections were curated. That, in addition to some nifty features, created an experience with art I’ve never had before. In short, it rocked my world.
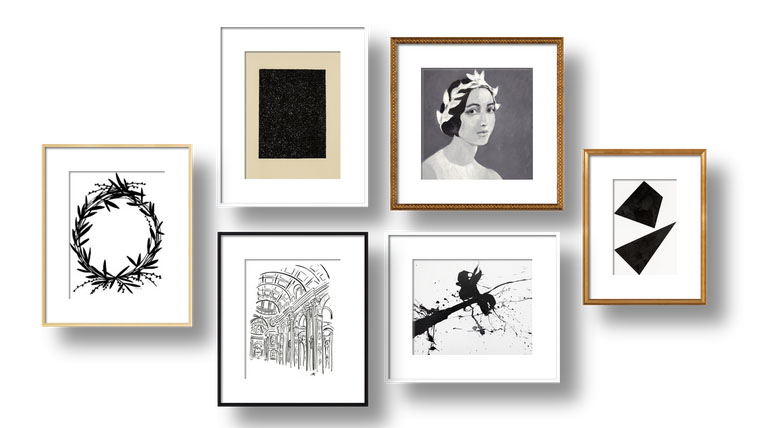
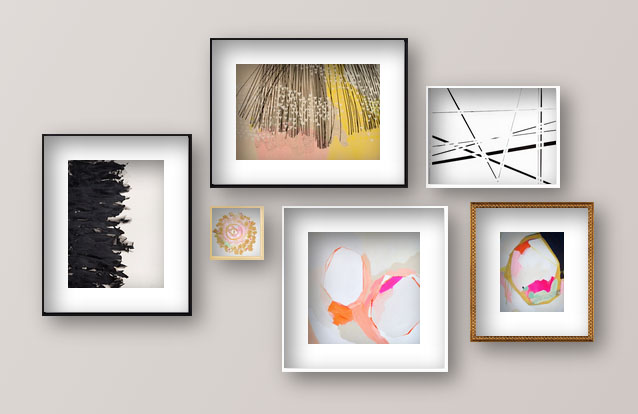
The wall designer is by far the most helpful tool I came across for planning my gallery wall. It allows you to add any art from the site to a mock wall, choose a frame and mat for each piece, and move the art around so you can figure out an arrangement you like. I did that here with the art I picked for my wall-
Even though my wall wasn’t going to be entirely made up of Artfully Walls pieces, doing this really helped give direction for the rest of my wall. I also mostly used the wall designer to narrow down my picks because I had way too many favorites. The mobile app especially helped with this.
Logging in to the mobile app automatically loaded the work I did in the wall designer. After specifying how far I was standing from the wall, the art appeared on the screen for me to drag around and position, as if it were really on my wall. So cool, right?? I love it whenever tech and design join forces.
My initial plans for my gallery wall included incorporating soft blues, then somewhere along the line that got knocked out by pink, which is so strange for me because I have never considered pink a favorite color of mine. Still, there’s some pink in some of these pieces and I really dig the way it pairs with blue.
One more wall, this time by Artfully Walls, and I had to share because it’s stunning and in my favorite colors.
Early on I had also considered going completely black and white with my gallery wall, and it’s walls like these that make me sure I’ll have to do it in the future. I want all of it!! These pieces are from a collection recently curated by Michelle Adams, which I also love every single one of her picks. The theme here, clearly, is that I love everything.
What do you think, guys? Even if you’re not on the hunt for new art, it’s so much fun just browsing and creating one-of-a-kind digital gallery walls. Hopefully my idea of a good time isn’t too far off from yours ;). Give the wall designer a try, and let me know about any favorites you see!
Thanks to Artfully Walls for partnering with me! Check out more of my favorites in the widget below.
 The best part of gift giving? Wrapping. Ok, also that warm fuzzy feeling of spreading joy, but it’s that extra teensy step of wrapping that makes it a whole lot more special. The simplest embellishments can make the biggest difference, and while I’m all for adding personal touches, I also believe these things should be fairly quick and easy to leave us more time for things like hanging out with loved ones, drinking hot chocolate, or watching The Voice (Damien is incredible!)
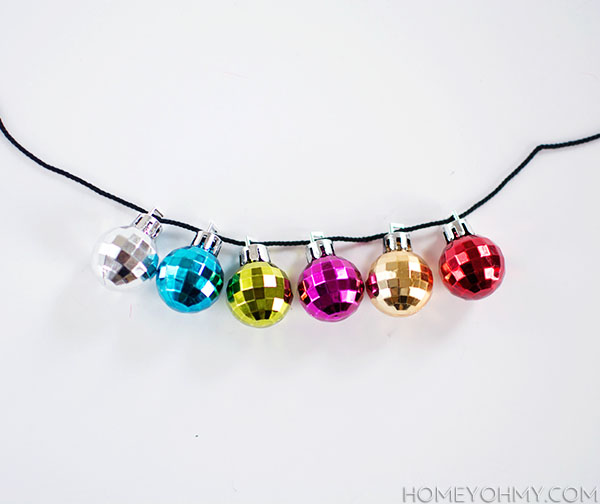 I strung these mini disco ball ornaments in a row like this.
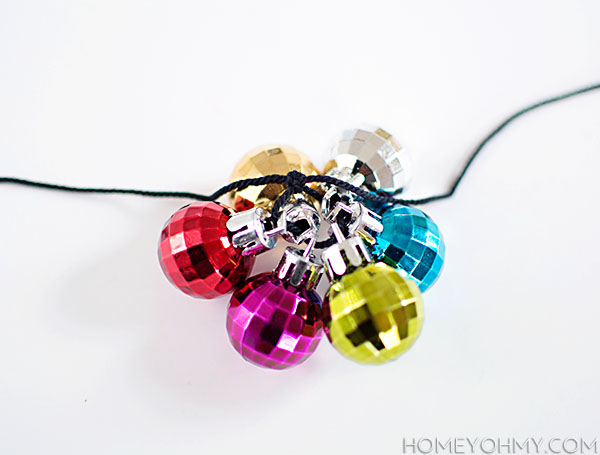 Then I double knotted the ends of the string together to create a small loop.
 I tied this black and white ribbon around the box and double knotted it off center to one corner.
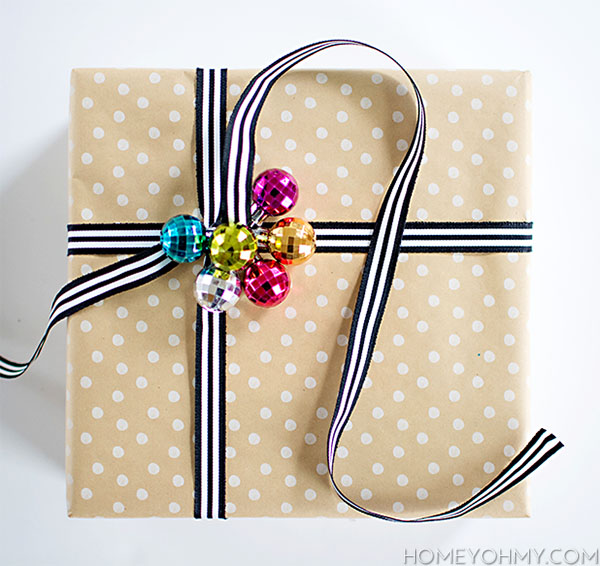
 Tied the ribbon into a bow, cut off the excess at the ends, all done.
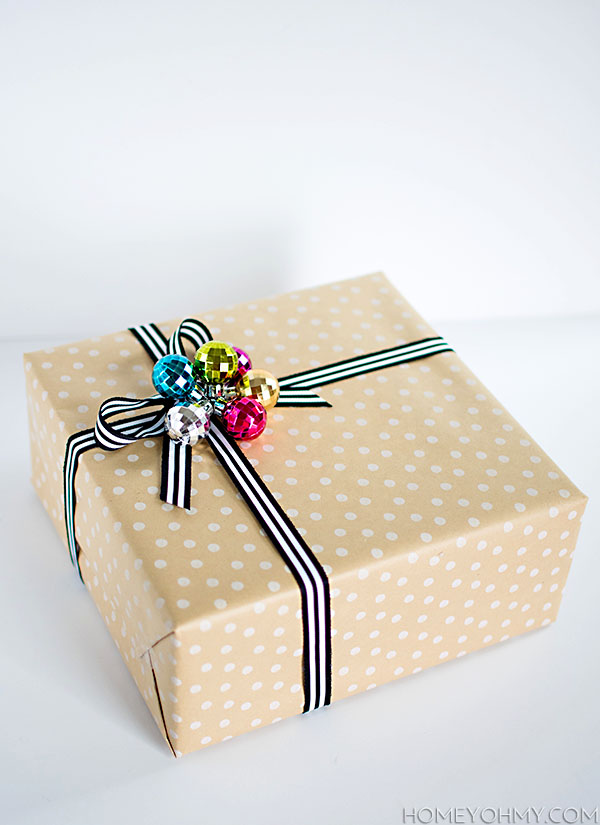
 If I received a gift wrapped like this, I’d for sure save the ornaments and repurpose them, maybe like how I used them for my Washi Tape Tree. :D
 By “for her,” we could really say “for me.” I don’t know how else to shop for a sister other than to get her something I’d want for myself (granted that she likes the same kind of stuff, of course). That’s also why I end up shopping for myself while shopping for gifts. I know that happens to you, too! Unless you have self-control, which I immensely commend you for.
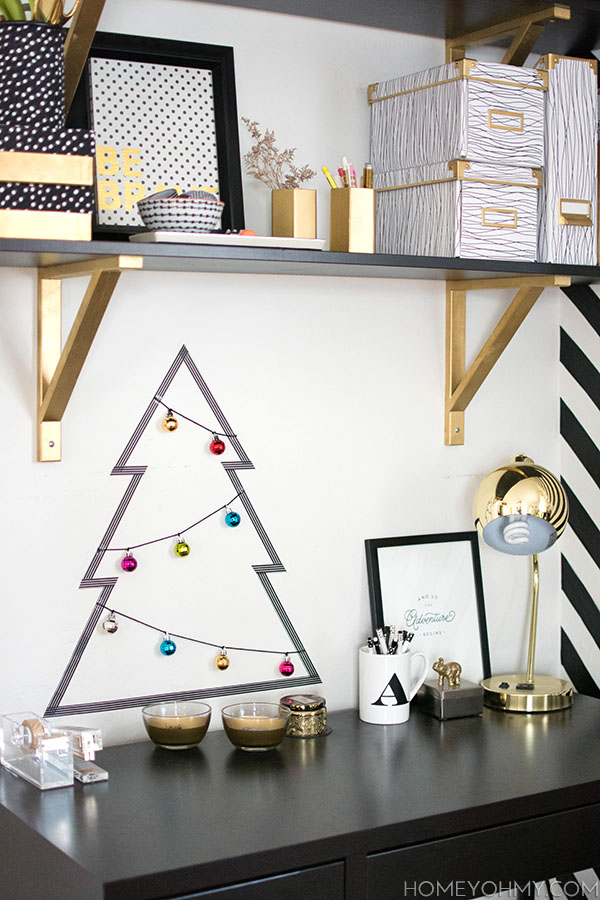 Here’s a really easy holiday DIY for you guys! A Washi tape tree was something I was itching to do, and it was just a matter of where. I did consider doing a gigantic one in place of a real tree (excellent small space solution), but instead decided to go for Christmas-ifying my desk. My desk is becoming more and more an area for regular decorating, and I like the idea of always changing things up as long as it’s simple. This one for sure is very simple and a quick way to add a little Christmas cuteness to any blank wall or nook. Cubicles are welcome as well.
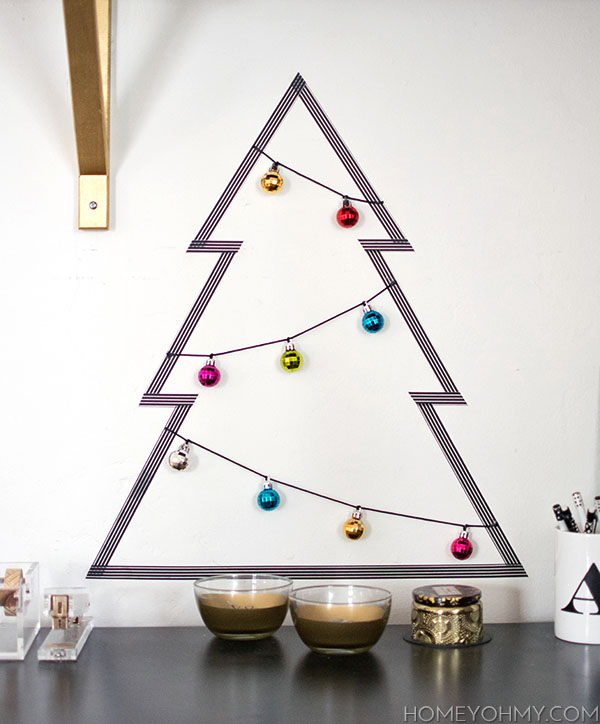 It’s pretty straightforward and very customizable, which makes this a DIY that doesn’t need much explanation (yay). I cut out pieces of Washi tape and taped them to the wall. Boom. The corners were a little tricky and I had to re-do them a few times, but the key was to use scissors in order to have clean and precise corners.
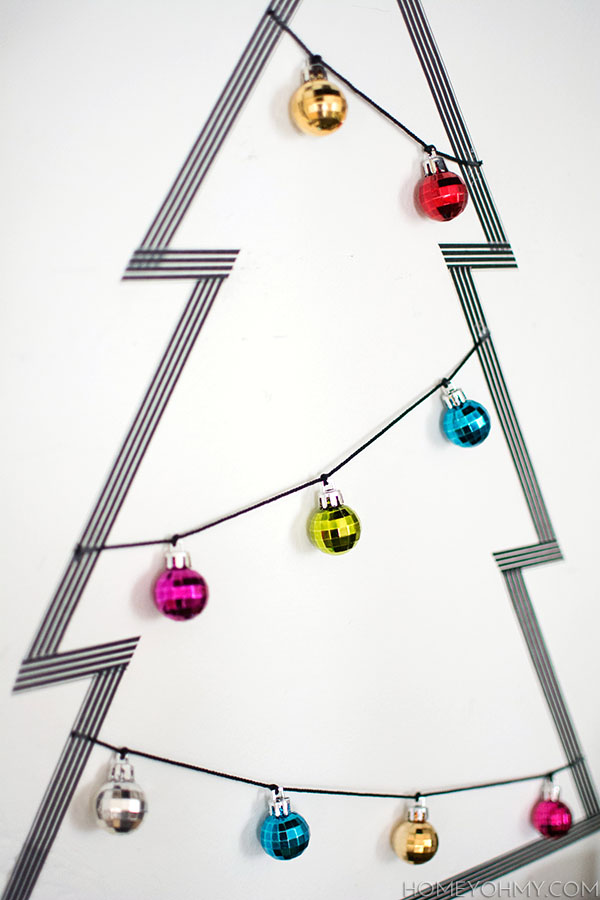
 I wouldn’t describe these ornaments as my typical style, but I’m always attracted to anything with a metallic shine, and I love taking advantage of the holidays to add a pinch of whimsy. You can find me staring at them when I’m at my desk and completely forgetting that Thanksgiving hasn’t even passed yet.
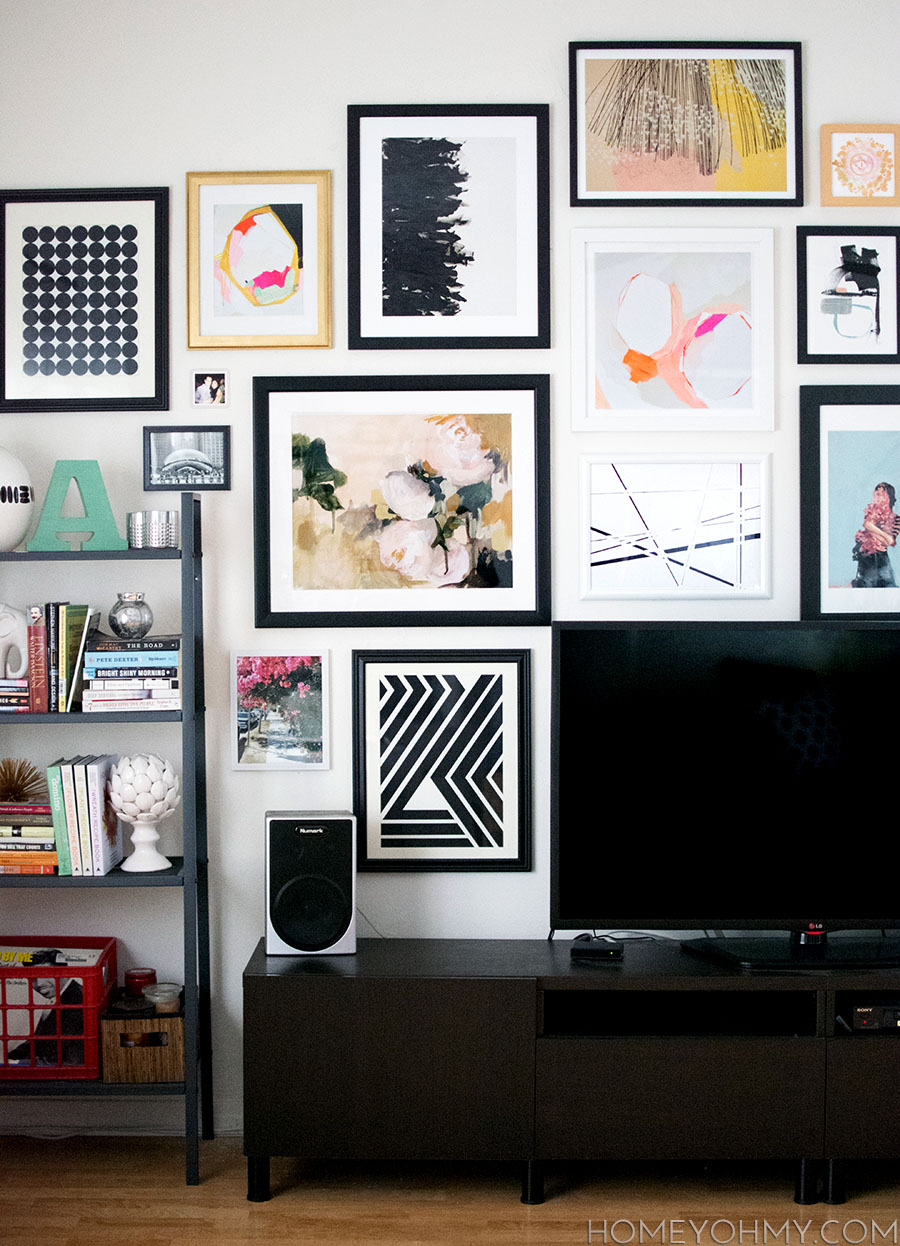 I’m signing off on all the gallery wall talk with one final topic, which is about my favorite source for art ever. If you’ve already seen
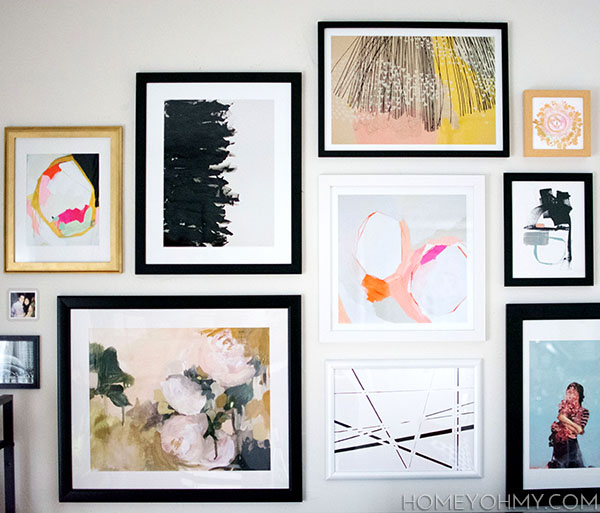
 Sources:
  Logging in to the mobile app automatically loaded the work I did in the wall designer. After specifying how far I was standing from the wall, the art appeared on the screen for me to drag around and position, as if it were really on my wall. So cool, right?? I love it whenever tech and design join forces.
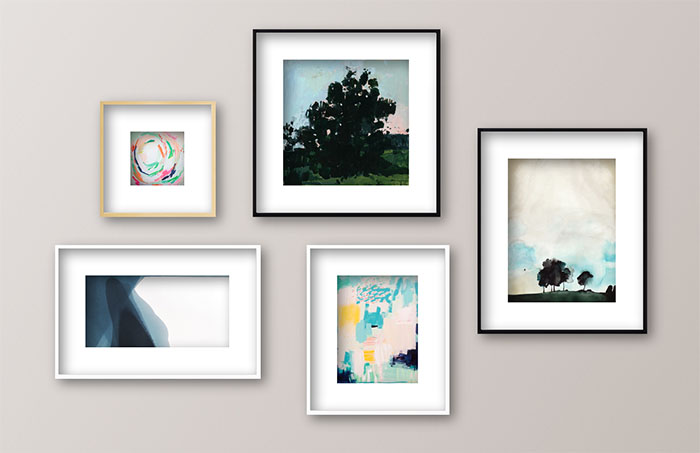 Sources: