I ADORE beautiful and well-thought-out tablescapes, so I was really looking forward to creating one myself for this fall entertaining season. The details really do make these celebrations even more special, but my “detailed” approach this time is a little different than most. Let me take a moment to explain.
This is my current reality: I don’t have any matching dinnerware sets, cloth napkins, napkin rings, matching flatware (mine are a mix of hand-me-downs), chargers, placemats, nada. You could maybe say this happened out of my defiance to enter into “adulthood”, but the less exciting answer is that I have yet to justify having all those things since I’ve never hosted a formal dinner party. My entertaining style up until this point has remained very casual, where paper plates and napkins have worked perfect enough for me (less dish-washing, hey!)
Despite all of that, I still want to join in on the tablescaping fun, and took this all as a challenge to show that it is more than possible to create something special if you are like me and lacking any or all of the same tablescape materials that I previously listed. And if you do have all those things, then MAN they’d make amazing additions to the ideas I’ve got going on for my table ;).
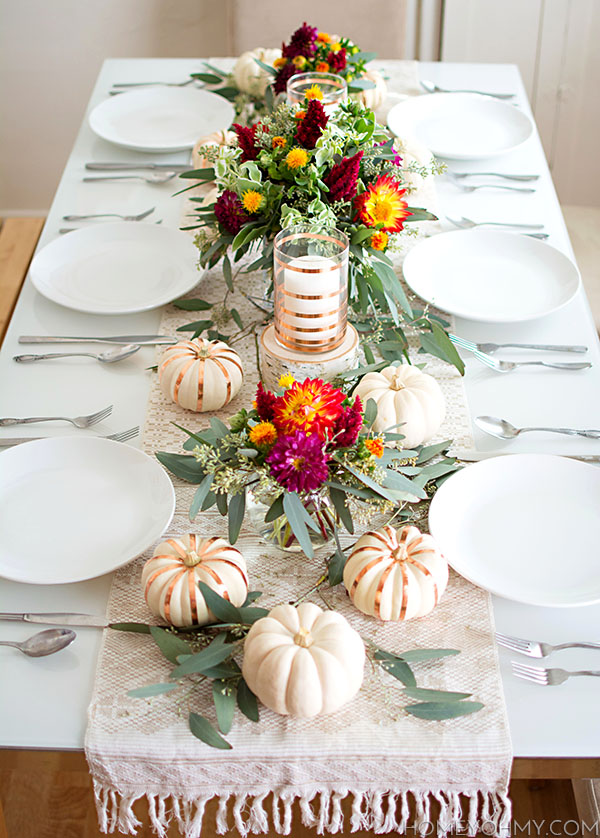
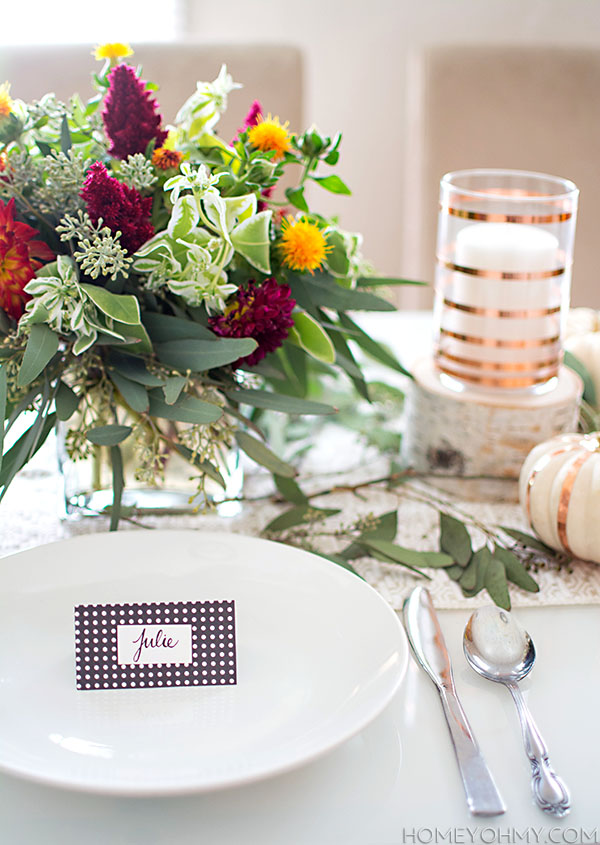
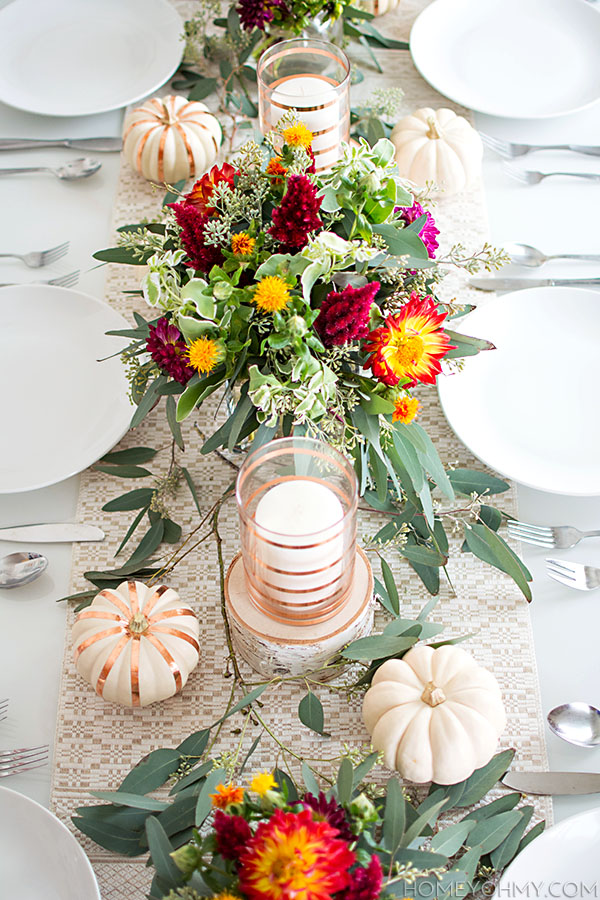 So all the details I went into had everything to do with the decor down the middle of the table. The beautiful table runner is from my boyfriend’s grandma, and everything on top is something I made or put together myself.
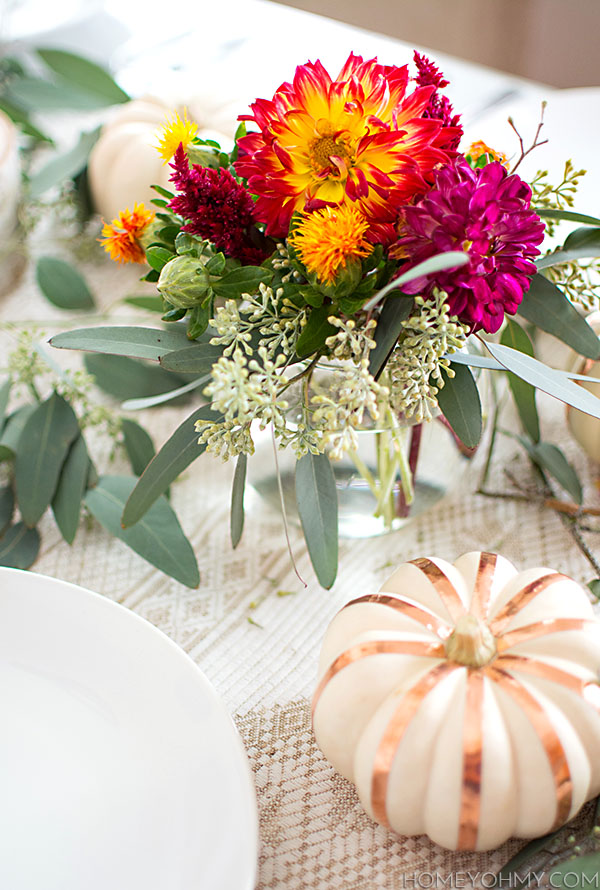
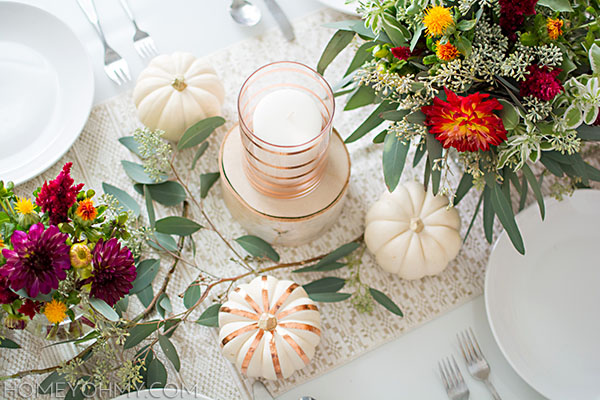 I placed mini white pumpkins and my copper striped pumpkins all along the runner, in between three floral arrangements that I arranged using flowers from my favorite florist, Trader Joe.
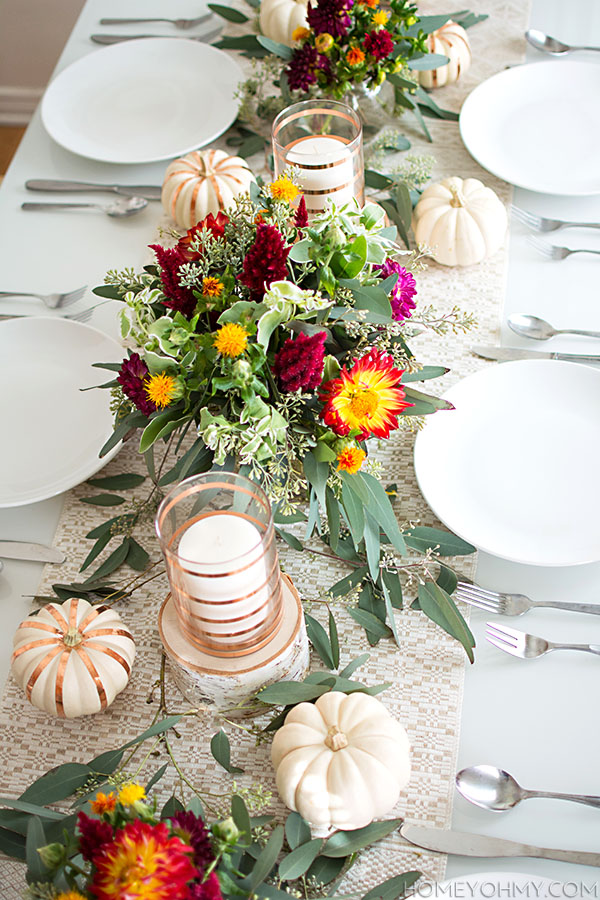 On each side of the floral centerpiece are my copper striped candle holders sitting on top of birchwood slices. All in between everything, I laid down branches of seeded eucalyptus on the runner.
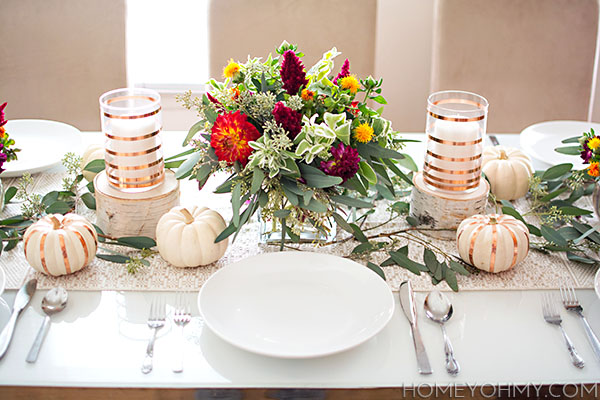 The plates are looking a little empty, huh? For that, I came up with a reeeaaally easy, simpler than simple place card that takes seconds to make.
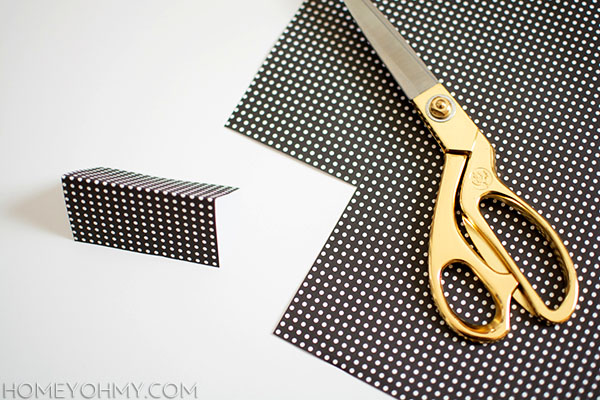 All I did was cut out a square from this black and white polka-dot paper and fold it in half.
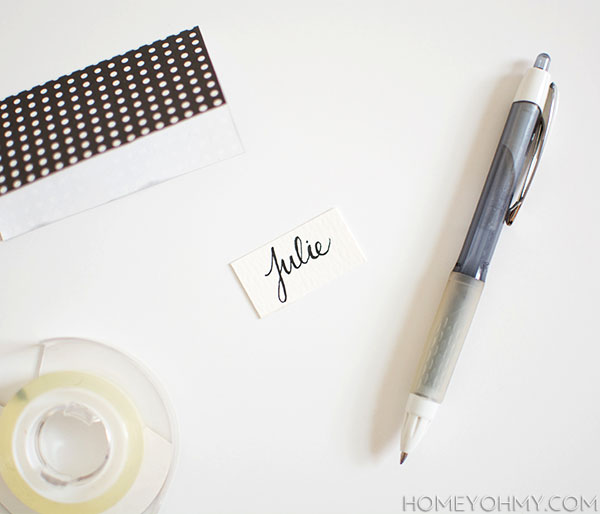 Then on a small piece of white card stock, I wrote a guest’s name on it with pen and used double-sided tape to attach it to the center of one side of the polka dot paper.
 Fuss-free, minimal, chic, the perfect little detail for a place setting. For as small and simple as it is, it really does so much to add a finishing touch!
Here’s another major bonus, guys.
This tablescape is a part of the Be Our Guest blog hop, meaning there are 24 other beautiful tablescapes for you to browse and find inspiration from! Click around and check them all out at the following blogs:
My Fabuless Life | Live Laugh Rowe | Brepurposed
The Crafted Sparrow | Anderson & Grant | Julie Blanner | Shabby Creek Cottage
City Farmhouse | Eighteen25 | Love Grows Wild | A Night Owl Blog
Homey Oh My | Blooming Homestead | Delineate Your Dwelling | Primitive & Proper
Ella Claire Inspired | Design Dining & Diapers | The Golden Sycamore
Lolly Jane | Clean & Scentsible | Unskinny Boppy | Thistlewood Farms
At The Picket Fence | The 36th Avenue | Persia Lou

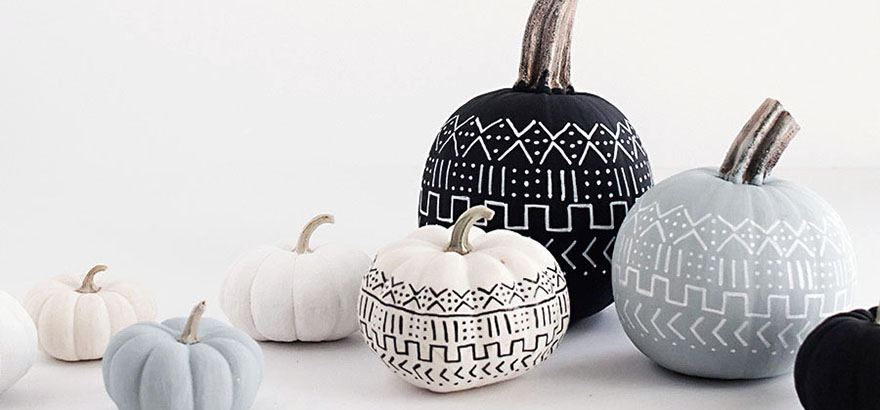
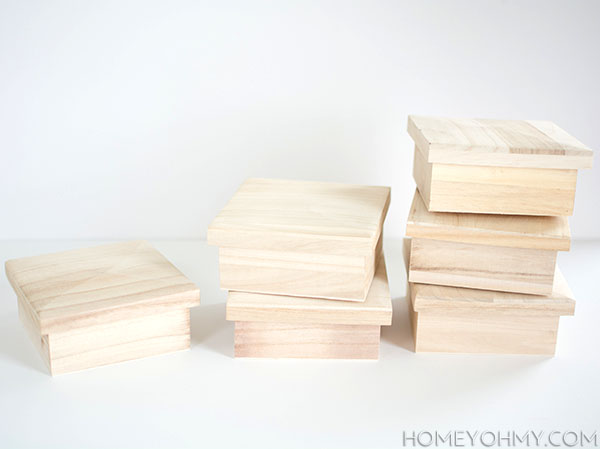 The idea really started when I found these wood boxes at JoAnn, and my initial reaction was to stack them into pedestals. I was thinking outside the box. *insert cheesy smile*
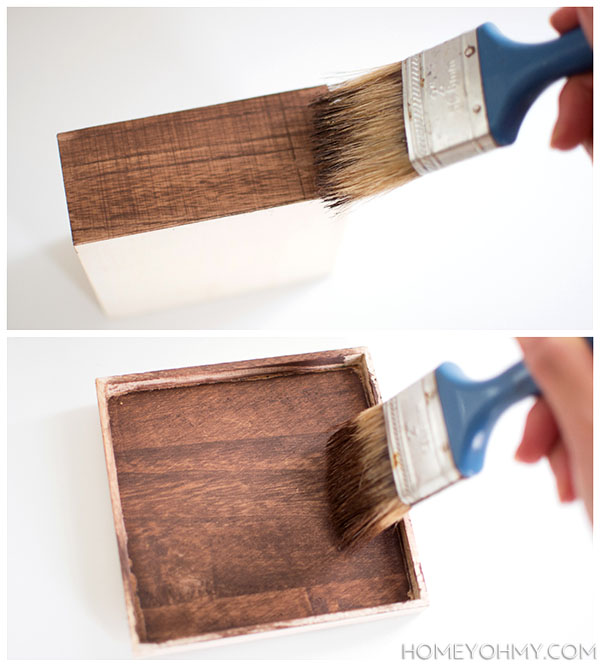
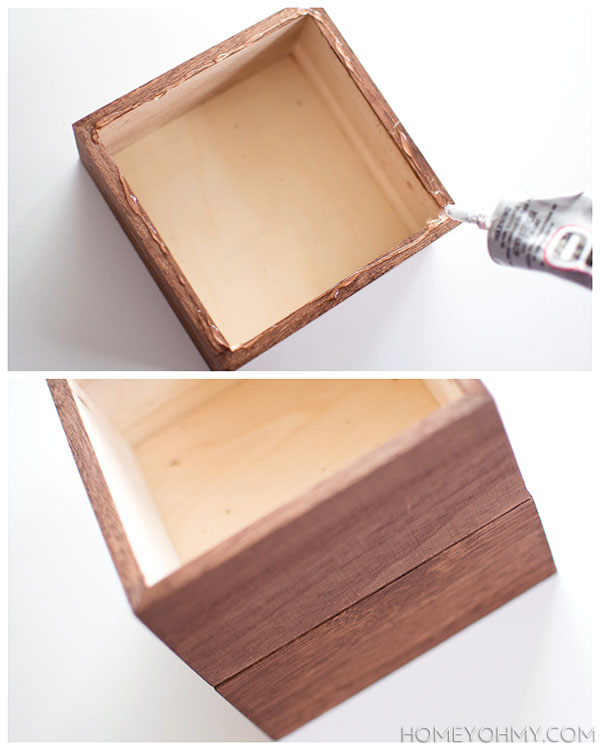 I applied
 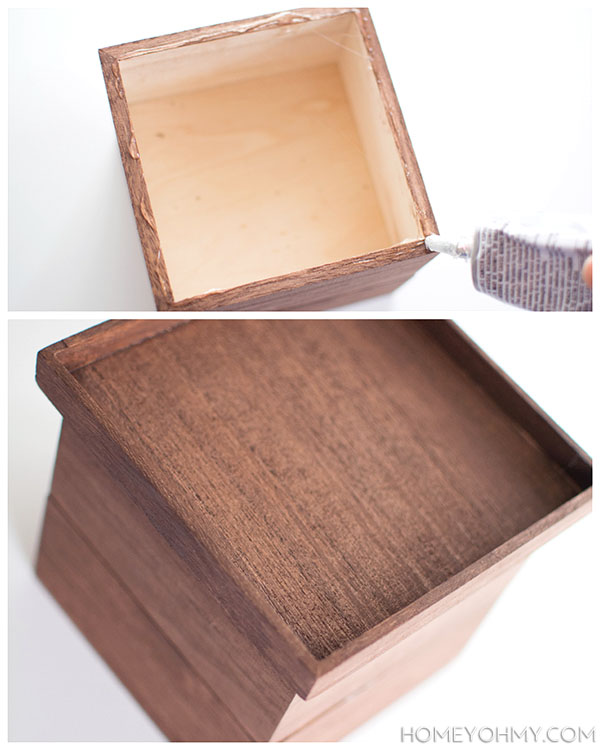 I applied the glue again on the top edge of the box, then placed a lid upside down on top of it. Because the lids for my boxes had a bit of a dome shape, they needed to rest on top of the box opening in order to sit flat. Make sense?
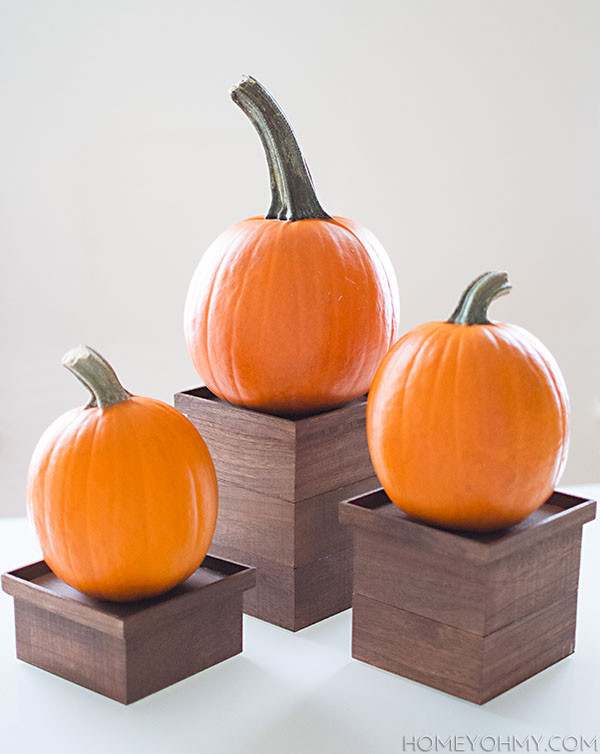 I contemplated all kinds of color options, metallic embellishments, the usual, but opted to keep them really simple and rustic in texture. Traditional fall style trumped over all, but these would be easy to makeover if I were to change my mind later.
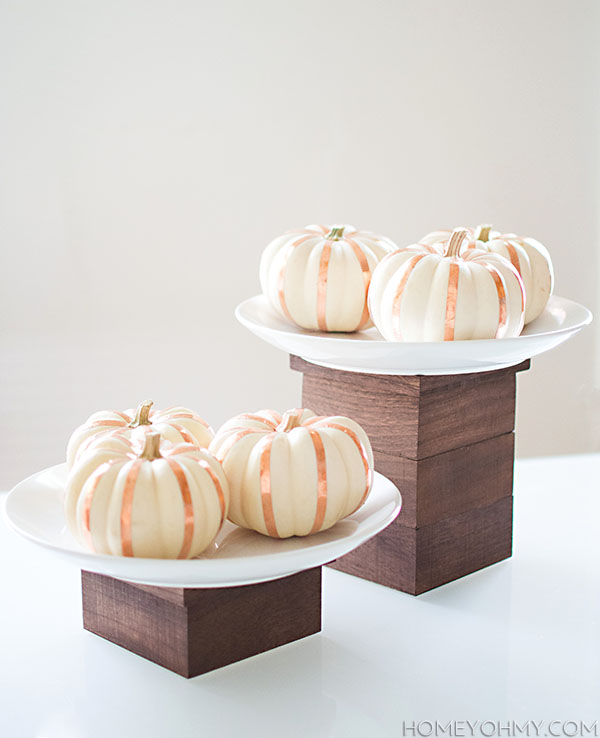 Another reason I decided to make pedestals was because I was potentially in the market for a cake stand, and I knew these pedestals could double as cake stands with the simple addition of plates. Neat, yea? We can pretend my
 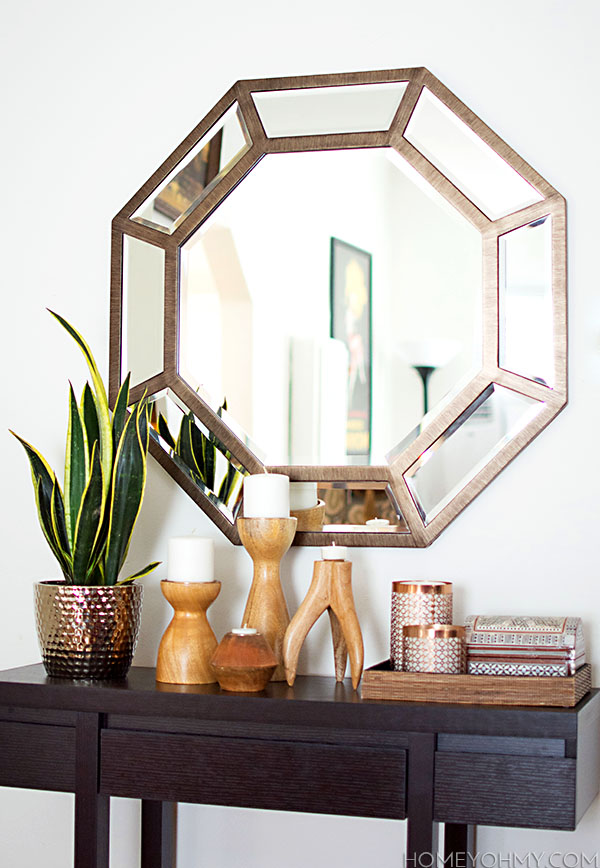 I do this thing where I clap my hands profusely while screaming when I really like something. That’s what I did right after I hung up this mirror.
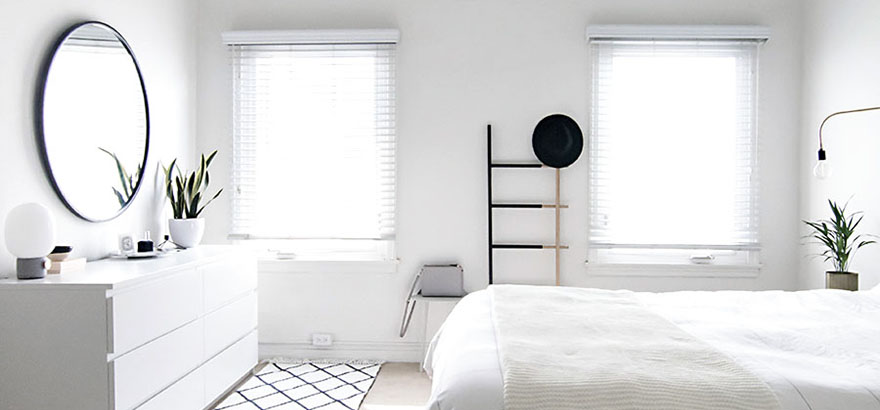
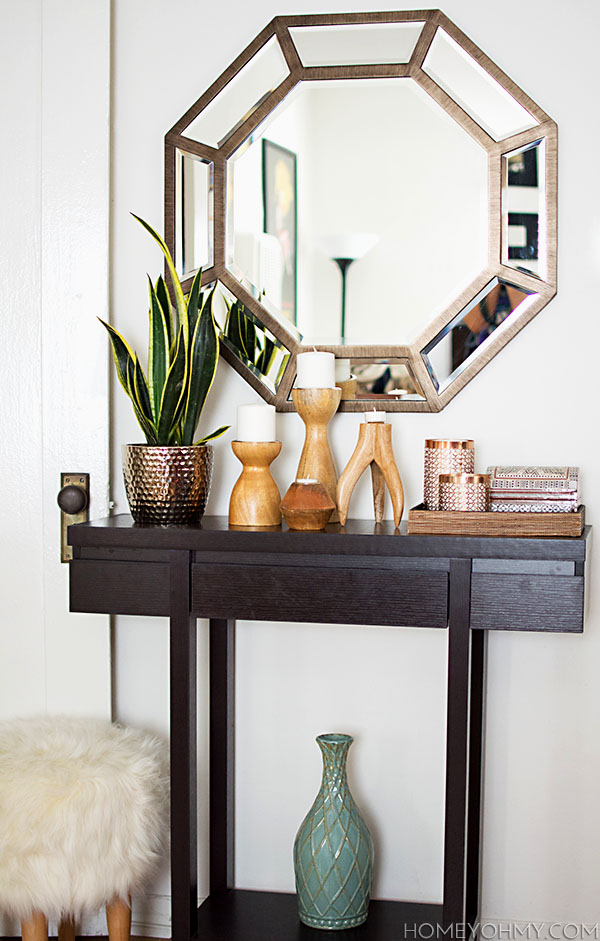 A bigger mirror, guys. I love the impact of the size, but even more is that I love the clean, simple lines of the octagon shape. I’m also realizing that the starburst mirror I had before was too busy and I’m much preferring the simplicity of this one. A complete light bulb moment.
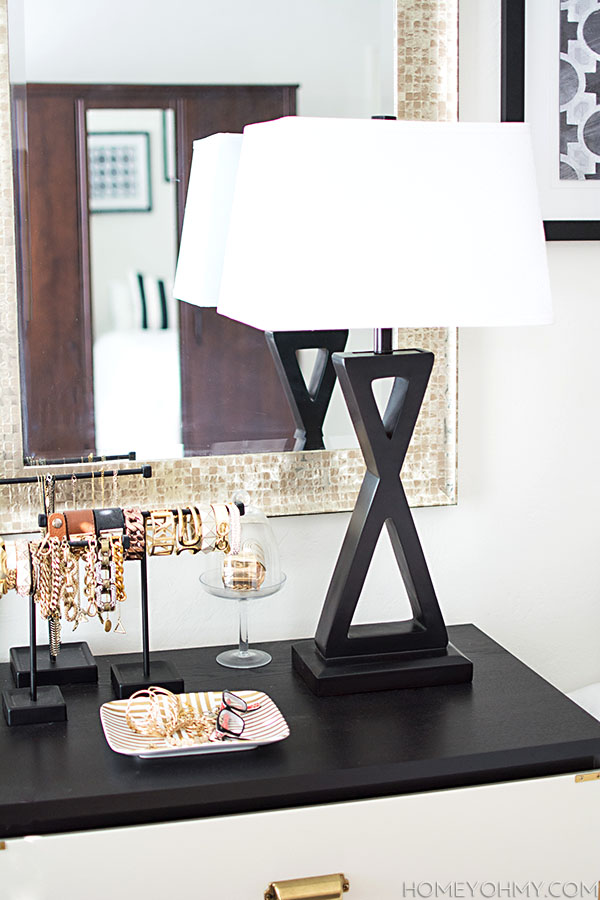 I thought these lamps would look about 2/3 of their actual size in this space, but once seeing them on top of our dressers, I immediately felt that their size was too overpowering. They compete with the mirrors above our dressers too much, so I think if those weren’t there, these lamps would work much better, but alas, the mirrors aren’t going anywhere.
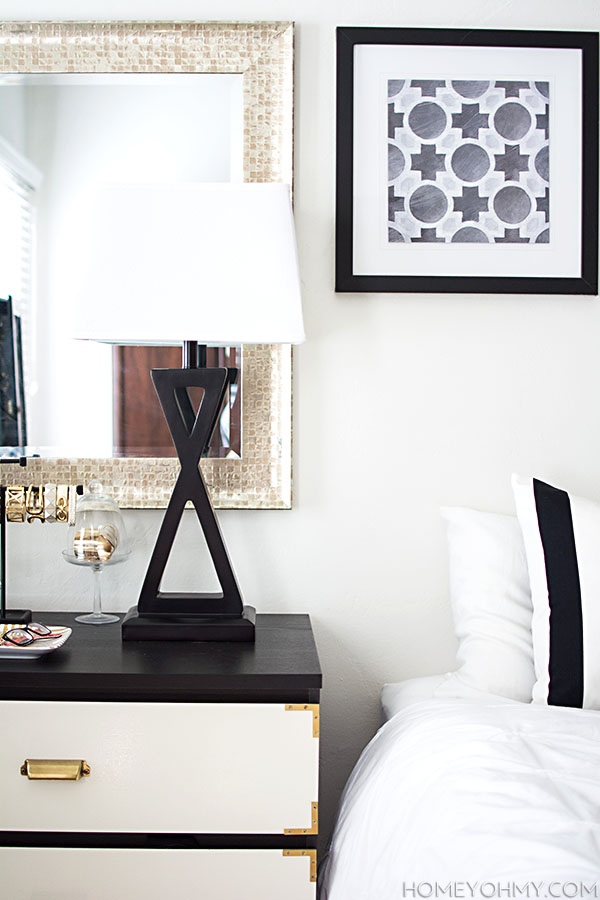 These lamps would look amazing at the opposite ends of something like a large credenza. Sleek, simple, clean lines, all things I’m a fan of, and in the right space they’d be stunning. They just don’t work in my bedroom as well as I had envisioned, sadly. What do you think?
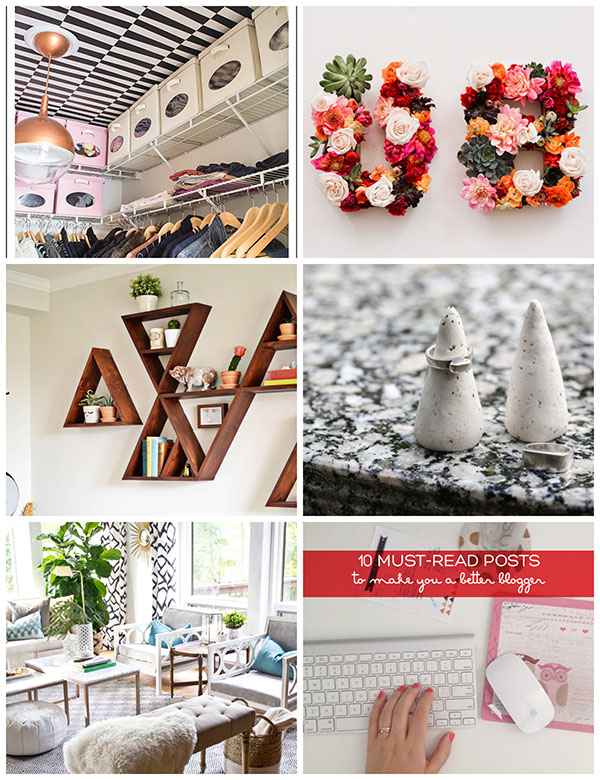 I gotta let this one out, guys- I’ve been stressed as hell lately. With this being the busy season for entertaining, collabs, and trying to get ahead with projects for the holidays, I’ve been scrambling to put up posts for this blog until all that madness is revealed. I guess it’s not much of a surprise to me that as a result, I haven’t been as present in everyday moments as I’d like to be. I frequently find myself worrying about the next thing and what’s after that, and we all know what they say about how worthless worrying is.
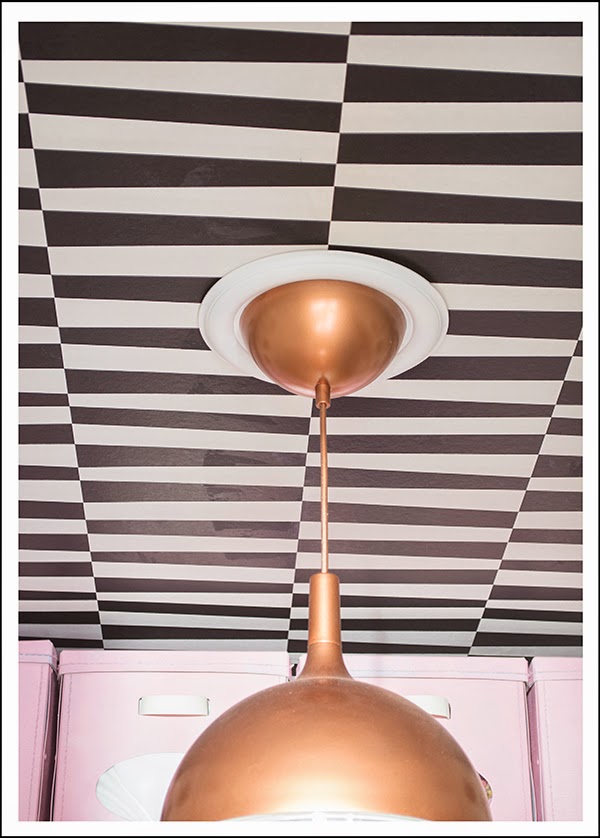 Julia from Cuckoo 4 Design revealed her
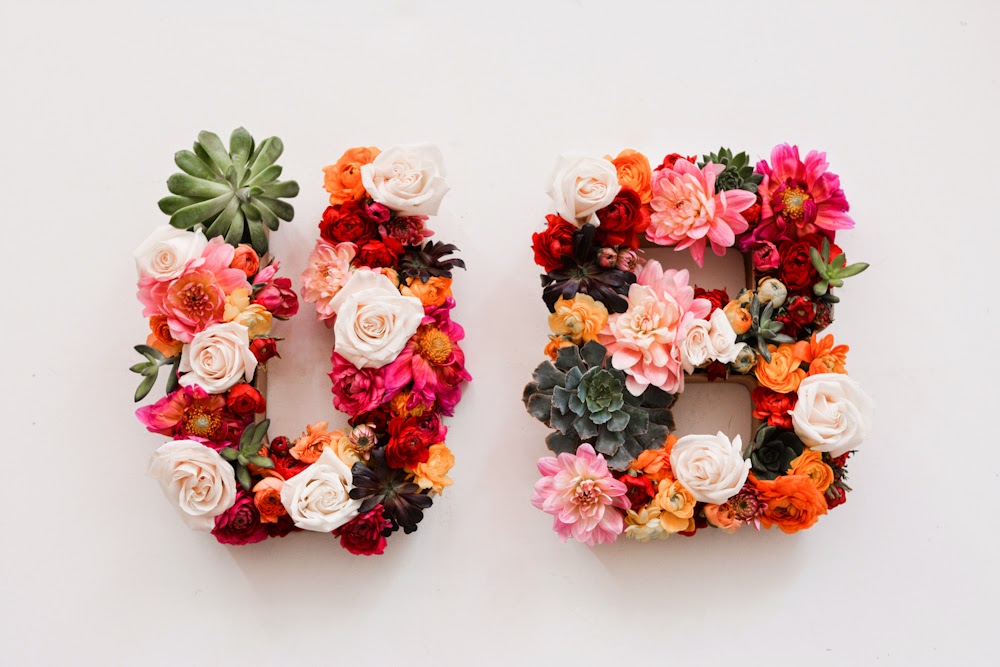
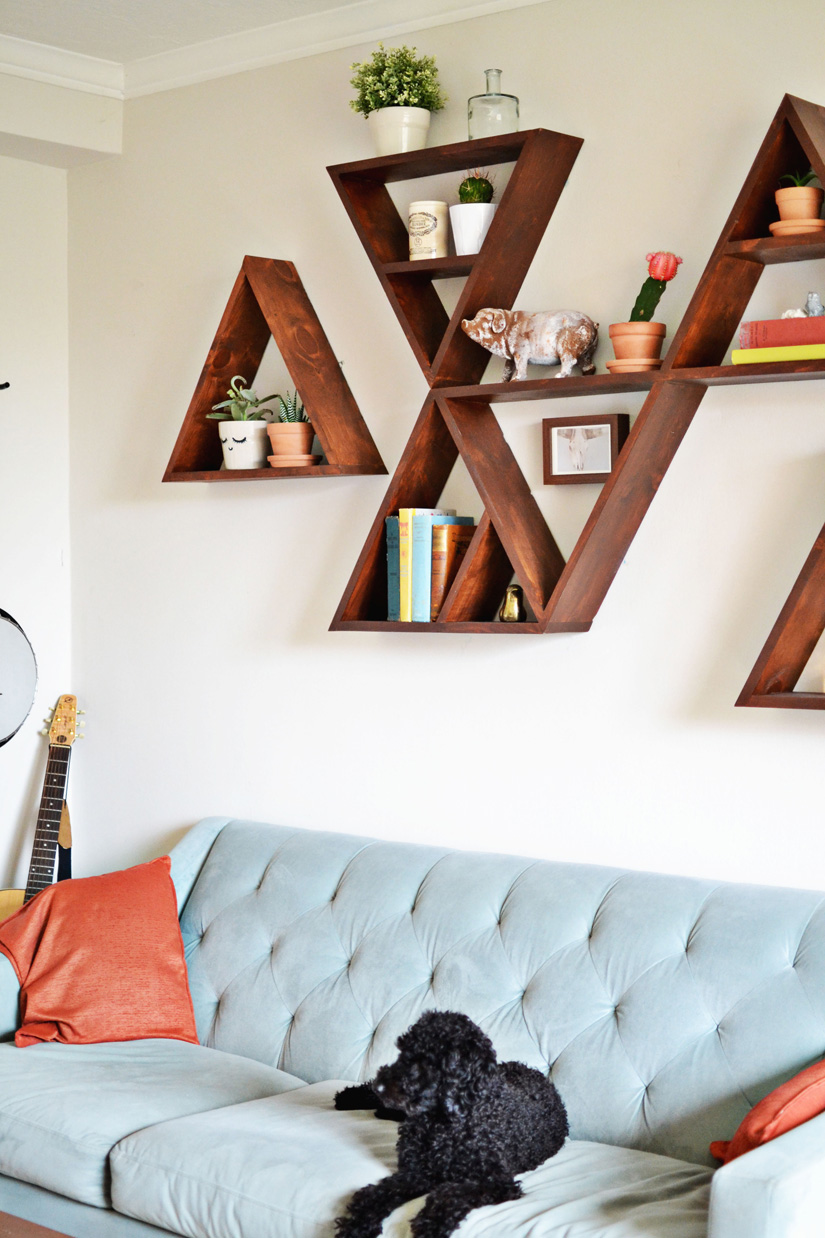 Whimsey Darling built these beautiful
  Such a unique and simple way to make
  Sarah M. Dorsey. This girl can do everything. She shared her
  Tan from Squirrelly Minds compiled a very helpful list of
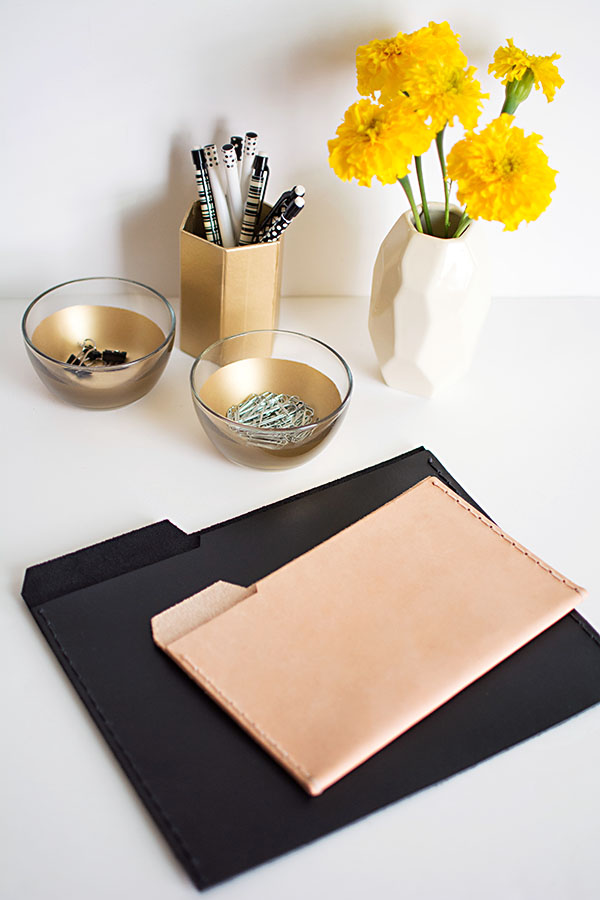
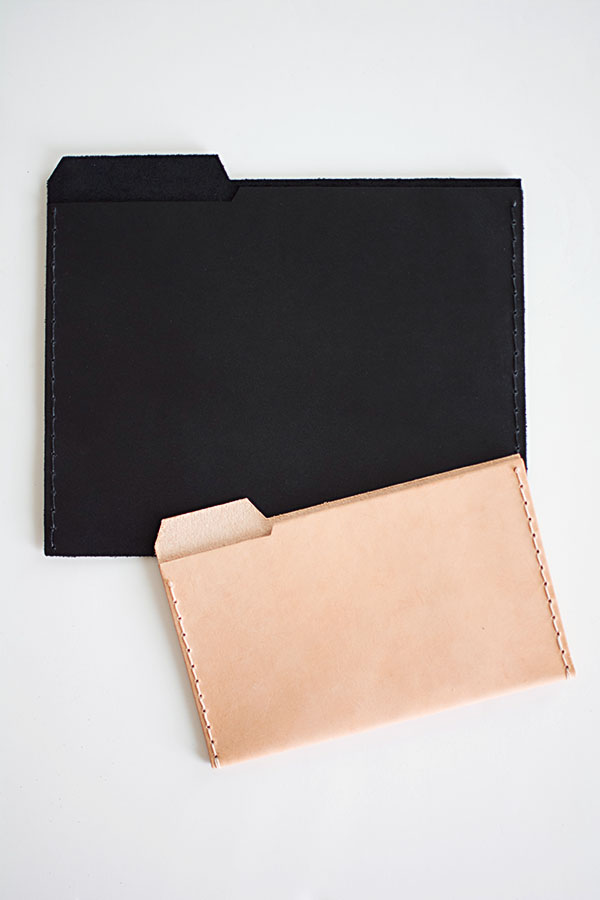
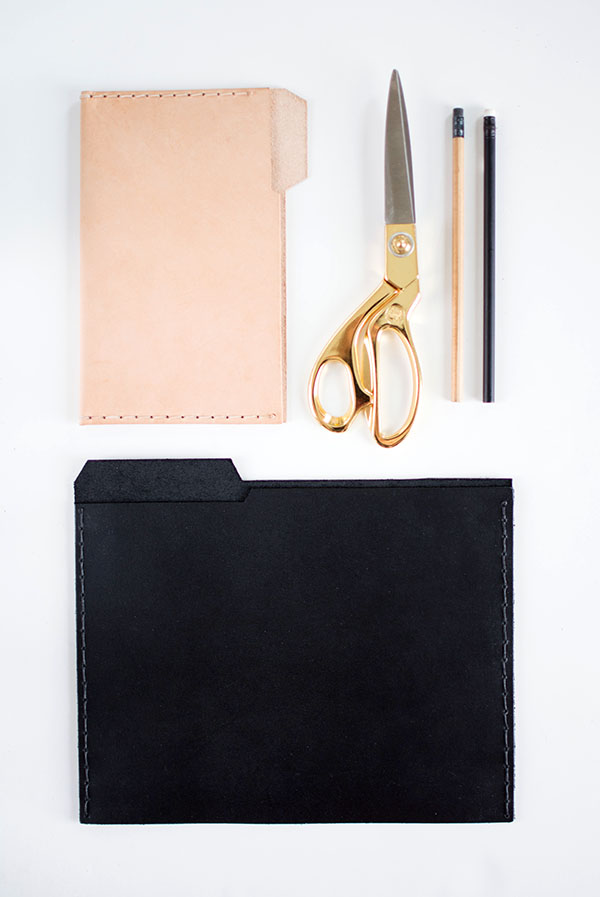
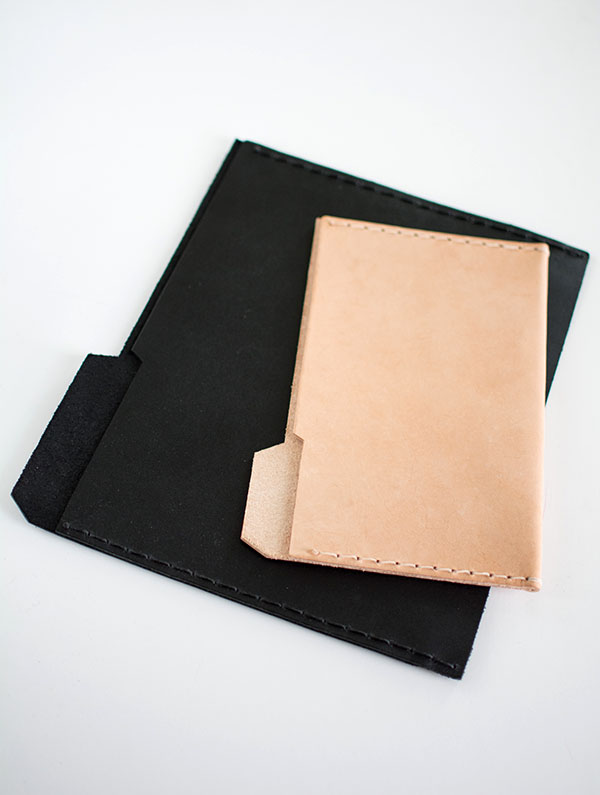 Boyfriend was even excited for this DIY because he’s been asking me for a while to make him some sort of Kindle case, which the smaller leather file folder is absolutely perfect for. Both folders would be excellent as tablet sleeves.