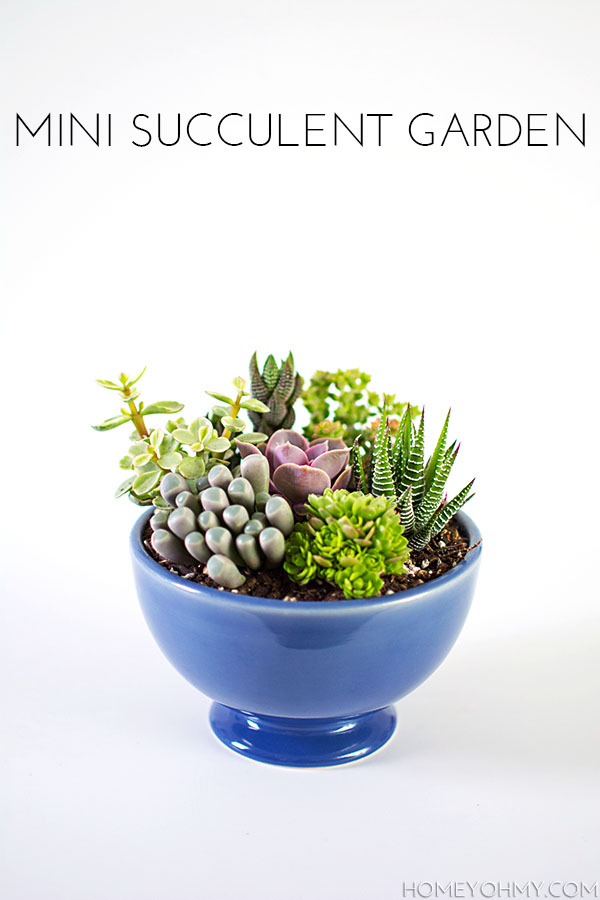
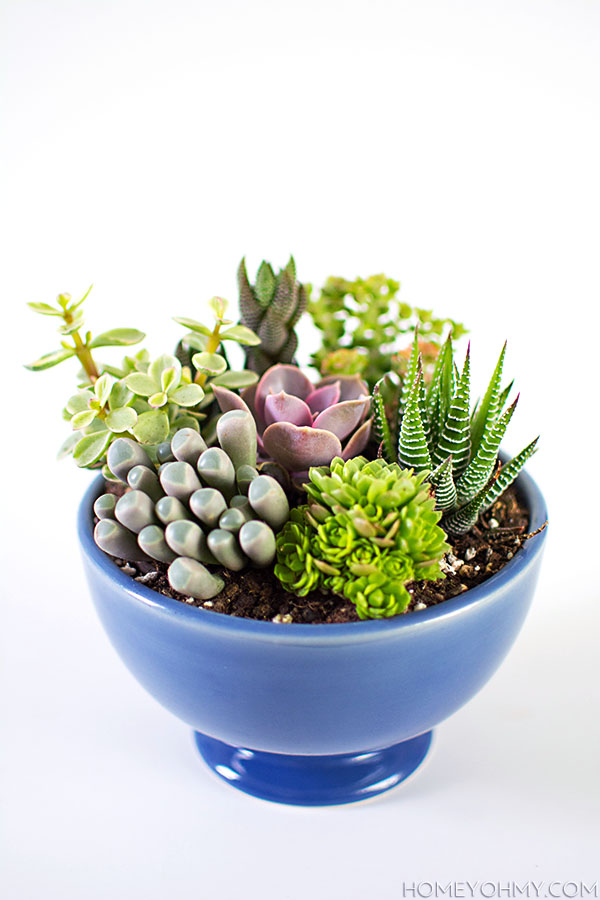
Moar. Succulents. I couldn’t help it, guys. I was at the flea market when I came across multiple booths full of succulents and they were soooo cheap and sooooooo cute. Maybe it was the hysteria of the people crowding around and packing cardboard boxes with their succulent choices that urged me to take advantage of the situation. Next thing I knew I was grabbing a cardboard box myself and making my own selections. I showed some restraint though by picking a small box to fill.
Being that the succulents I chose were mini, I kept in mind that I would probably be putting them all in the same container together to make a mini succulent garden. Consolidation, alright! So on the way home, we passed by a Goodwill and I thought hey we should drop in to see if there’s something I can plant my new baby succulents in. Unlike most of my thrifting adventures, I found what I was looking for.
Ok so I didn’t know exactly what I was looking for, but this bowl I came across was the perfect size and shape, and I LOVED the little pedestal at the bottom (so cute), and the 99 cent price tag said let’s do this.
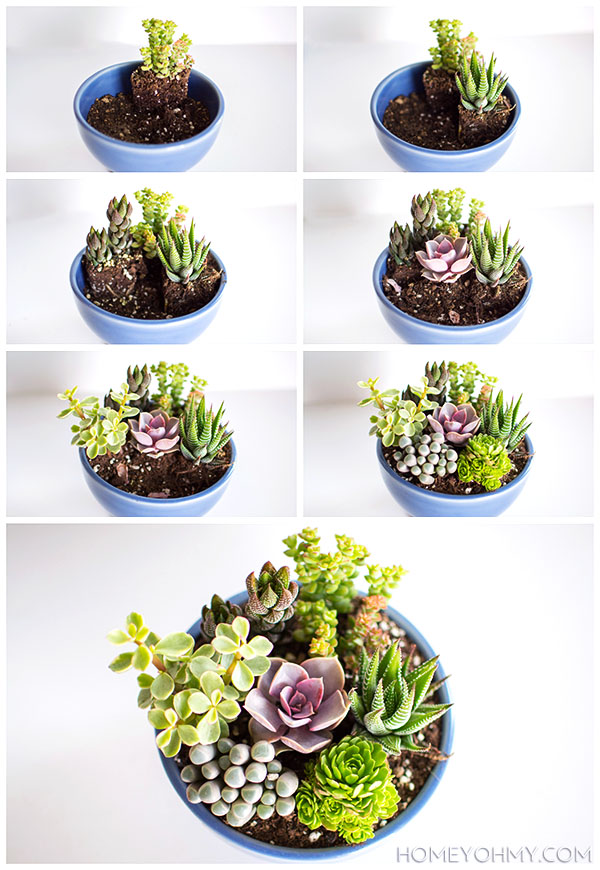
First, I roughly figured out how I wanted to arrange my succulents for the mini garden.
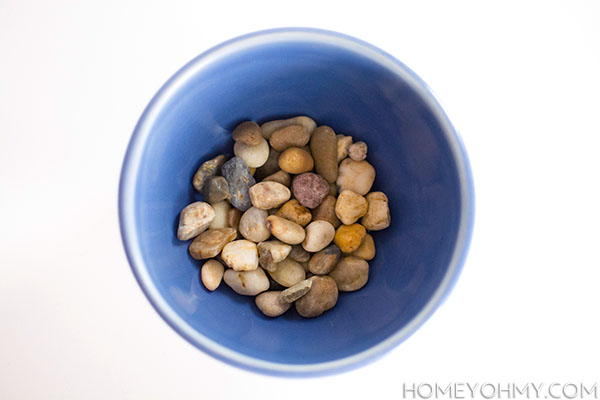
Then I filled the bottom of the bowl with rocks.
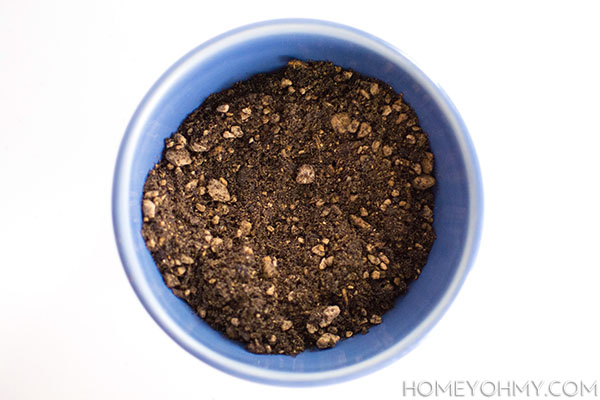
Next I put in a layer of soil on top.
One at a time, I planted in each succulent, scooping and packing in cactus soil wherever needed and pushing everything in tightly.
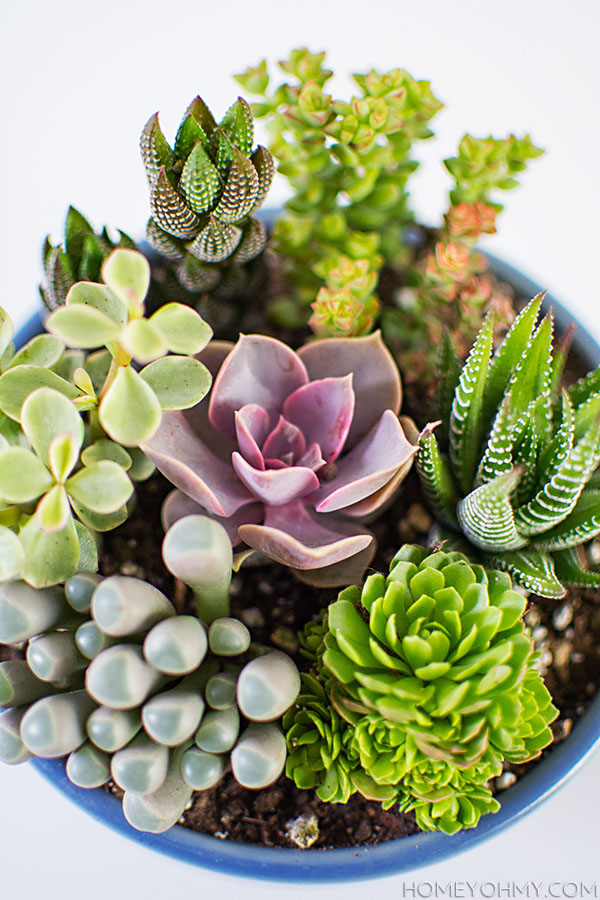
This batch of succulents was all about picking ones I didn’t already have (minus the zebra). I love every and all succulents, but I find myself drawn to the weirder looking ones, and that alien one in the front is the weirdest of them all. The guy at the booth told me it’s called Baby Toes, and I said how freaking cute. Maybe a little creepy, but I like that it’s so strange. The pale blue color is so unique, too. I think you already know it’s my favorite one.
Anyone know the name of the clustered one next to it? That one is my second favorite.
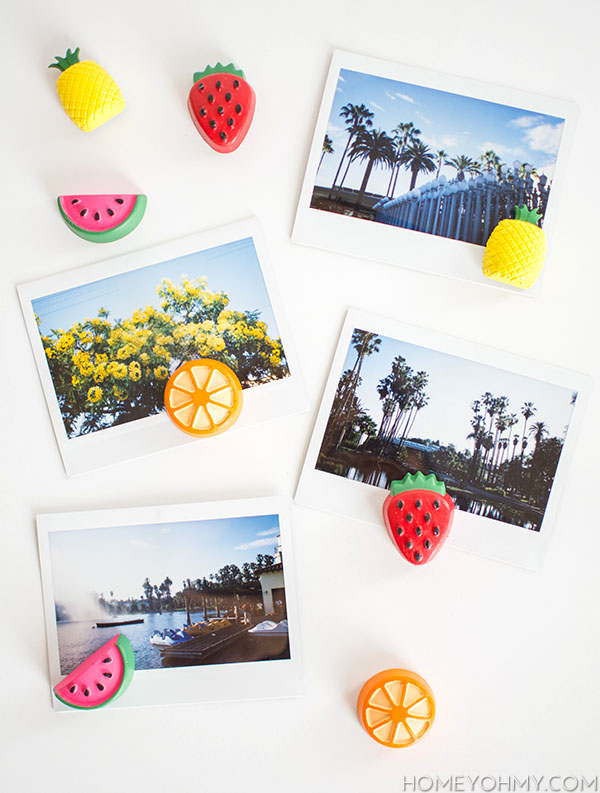
I’m PRETTY excited about this being my first fruit DIY since I get to be joining in on this mega cute summer trend. This was that “other” cement project I had mentioned being part of the inspiration for my ombre candle holders and much like that project, this one took me some time to suss out. I’ll get to the details on that in a little bit, but let’s get started with what you’ll need to make these cuties.
Materials: -fruit ice trays (I used a pineapple ice tray and an assorted fruit ice tray)
-cement (I used Cement-All)
-acrylic paint
-paint brush
–E6000 adhesive
–magnets (These ones are super super super strong, which I like, but it made them difficult to work with. If that’s a concern for you, go with weaker magnets.)
So cement. This was actually my first time using cement, before my ombre candle holders, and I learned a few things after failing this project TWICE.
CEMENT TIPS:
1) Work quickly with the cement, especially if it’s a fast drying one like Cement-All.
2) Add a bit more water to the cement than what’s recommended in the instructions on the box, until it becomes a little thinner than pancake batter. The thinner the cement, the better it will fill in all the little details in the ice trays. Be careful though- it only takes a little bit of water to drastically change the consistency of the cement.
3) Mix out all the lumps in the cement but don’t do it TOO vigorously. I did this the first time and it created so many air bubbles that after the cement dried, my fruit had tiny holes all over them :(
Learn from my fails, ok?
So it’s pretty simple, I just filled up the trays with cement and let them dry.
After popping out all the cement fruit from the molds, I glued on a magnet to the back of each fruit.
Then the funnest part- painting the fruit magnets. Seriously, it’s meditation.
You guys, I love them soooooo much, to the point where I’d be thrilled if you loved them even half as much as I do. What do you think of them? Summer trend or not, I’ll be keeping these up on the fridge forever.
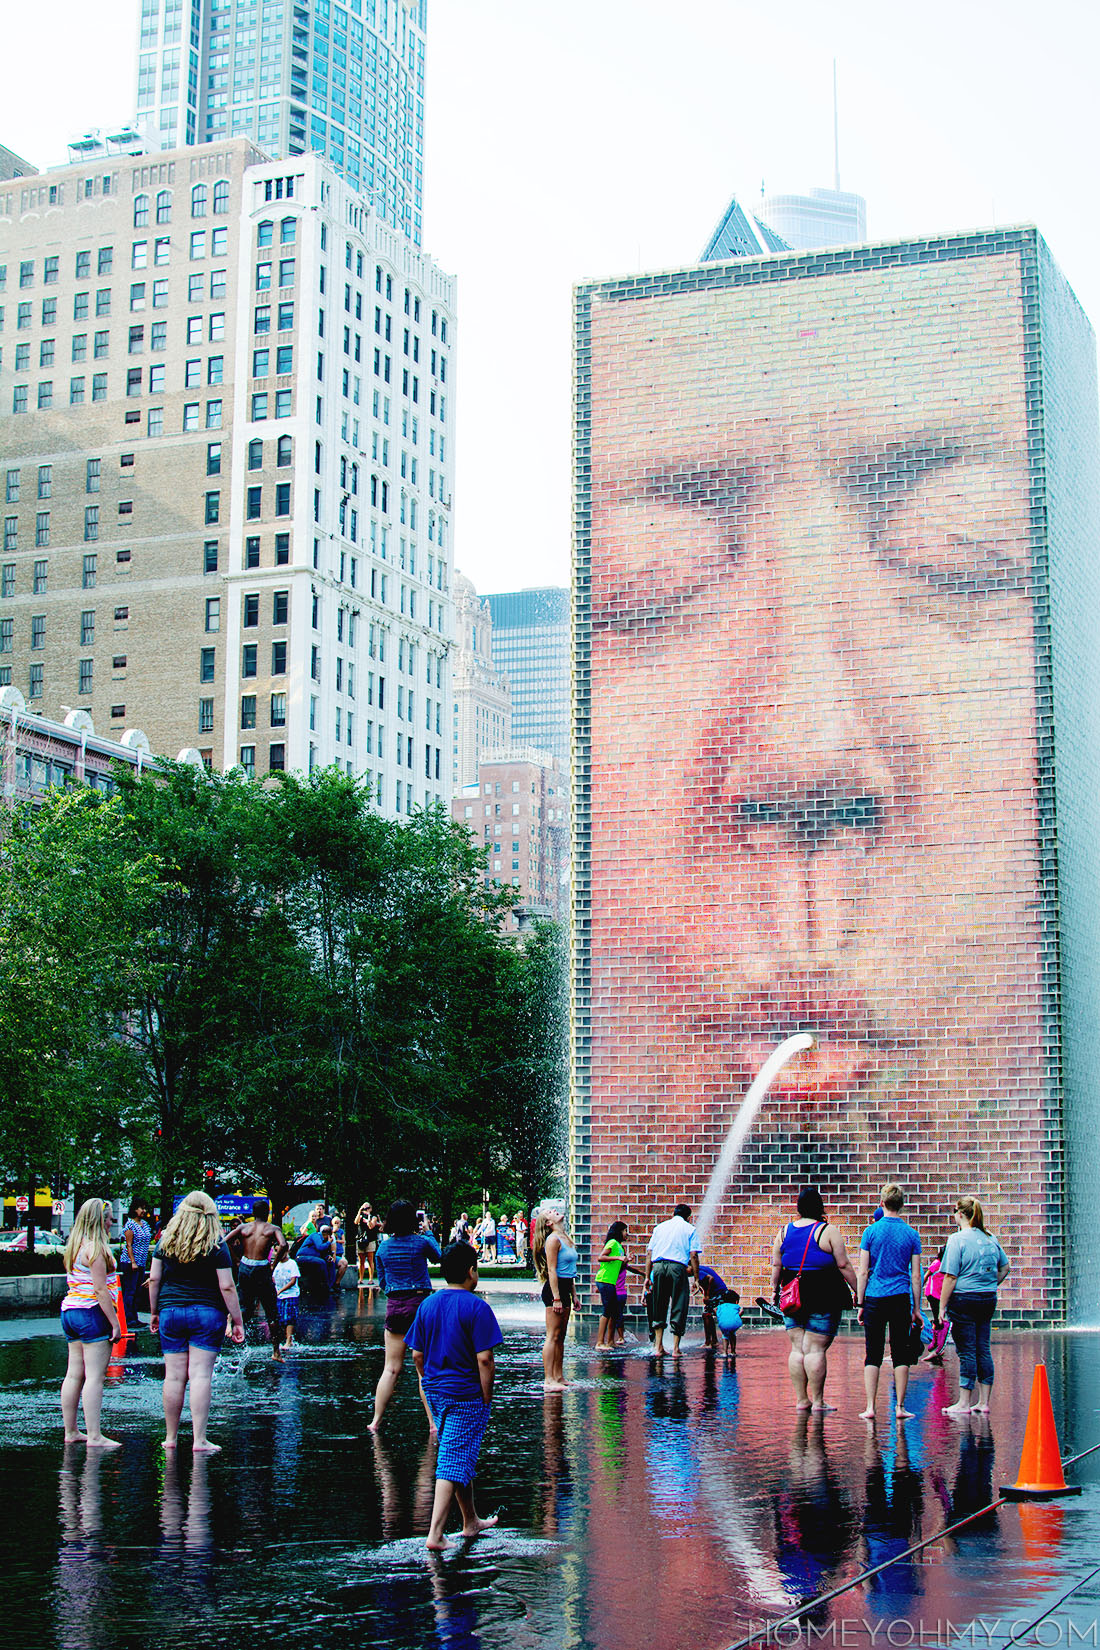
So this is what happened. I brought my camera with me to Chicago and planned on taking it everywhere and capturing the best moments of my trip, but you know how they say that the best indicator of a good time is when you forget to take pictures? Yea, I must’ve been having a pretty awesome time, because I didn’t take my camera anywhere! I only took it out on the one day my boyfriend and I went out on a touristy date, which isn’t a bad thing at all, because man are the touristy sites in this city gorgeous.
I spent the first 18 years of my life here (more specifically in the suburbs) and a trip to “the city” was always exciting, and frequent. Especially in my younger years, I followed my parents all the time to their flower shop in the city. As I got older, the city became the destination for a lot of my greatest memories, including PROM, ha! I’m still with the guy that took me ;)
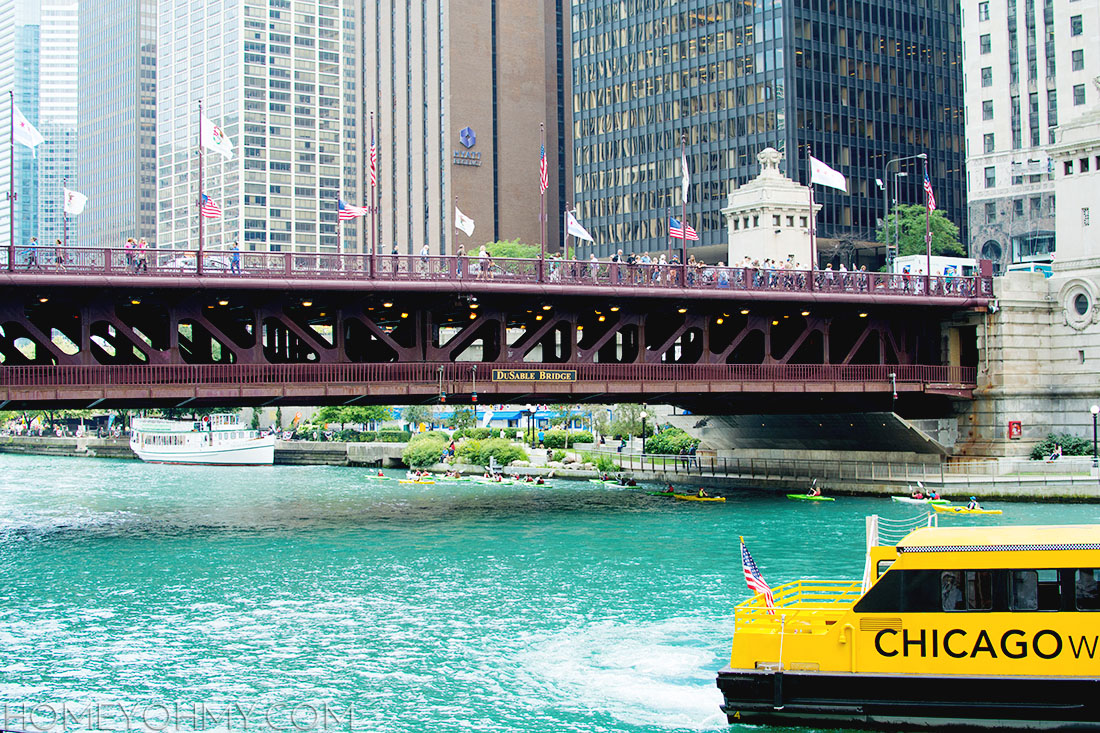
I’ve seen these sights many times, and they will never get old. The memories do have a hold on me, but even without them, Chicago has charm and beauty that’s unparalleled. This is most evidently seen in the gorgeous architecture. To take it all in, we went on an architectural boat tour, and the best part was yup, that it was educational. Aside from the bipolar weather during the tour that tossed between sunny skies and rain, it was the perfect way to reunite with the city I love.
By the way, you see those kayakers on the water? I’ve been kayaking on the river before, and it’s fun for like 15 minutes until you see all the boats whizzing past you and you think yea we should’ve just gone on a boat. It’s a great workout, though!
Talk about a fantastic spot for brunch… Slow down, life!
The Carbide and Carbon Building, according to the tour guide, was inspired in design by a champagne bottle. Interesting! Do you think the design was successful?
This is forever the Sears Tower in my book. I remember feeling devastated when I first heard the news that the name would change to Willis Tower. No.
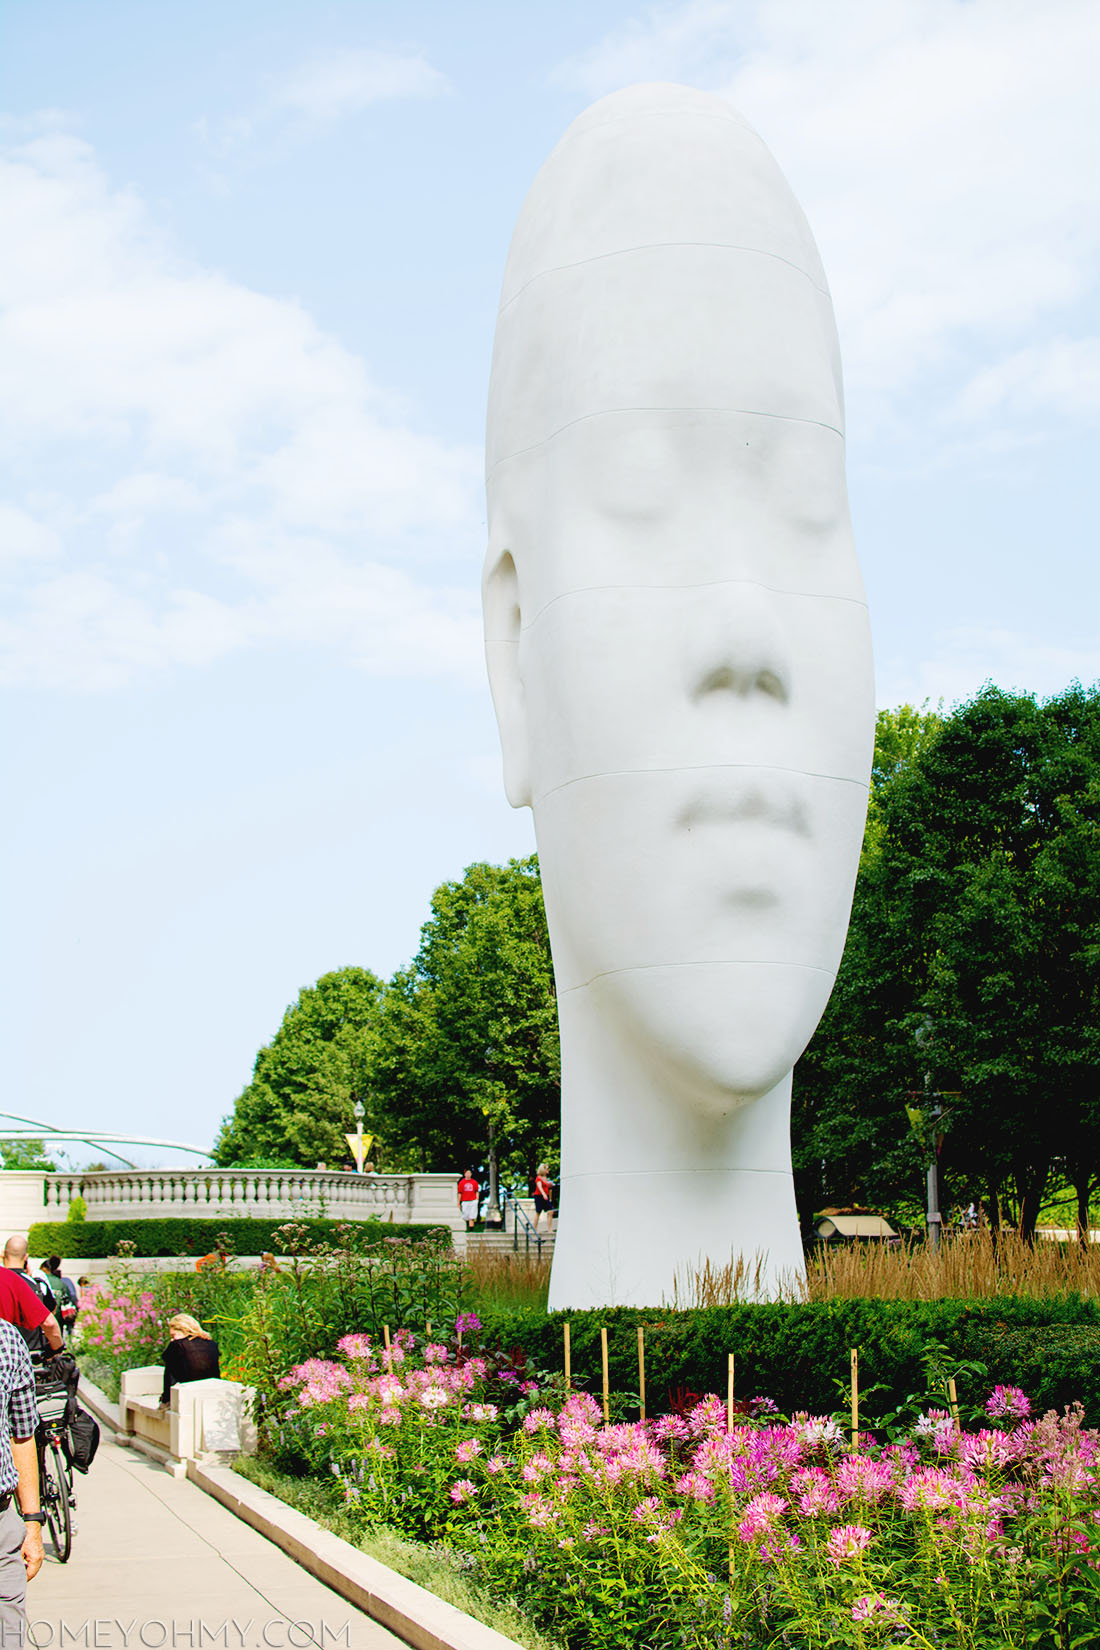
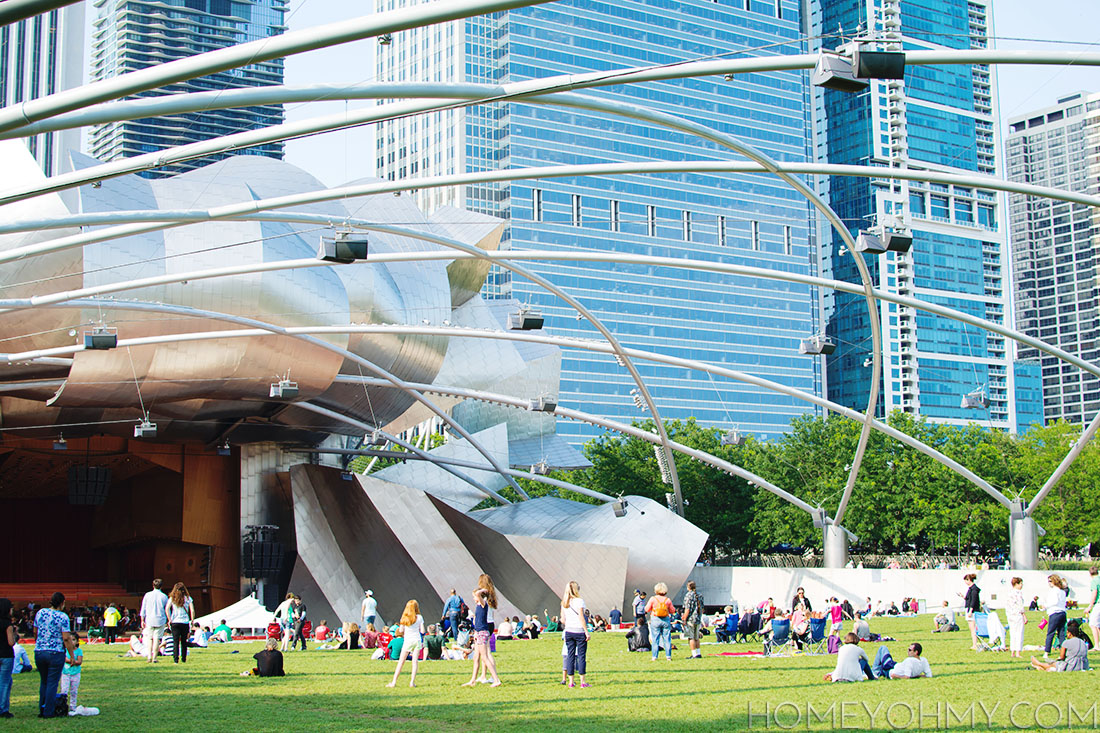
After the boat tour, we hopped over to Millennium Park.
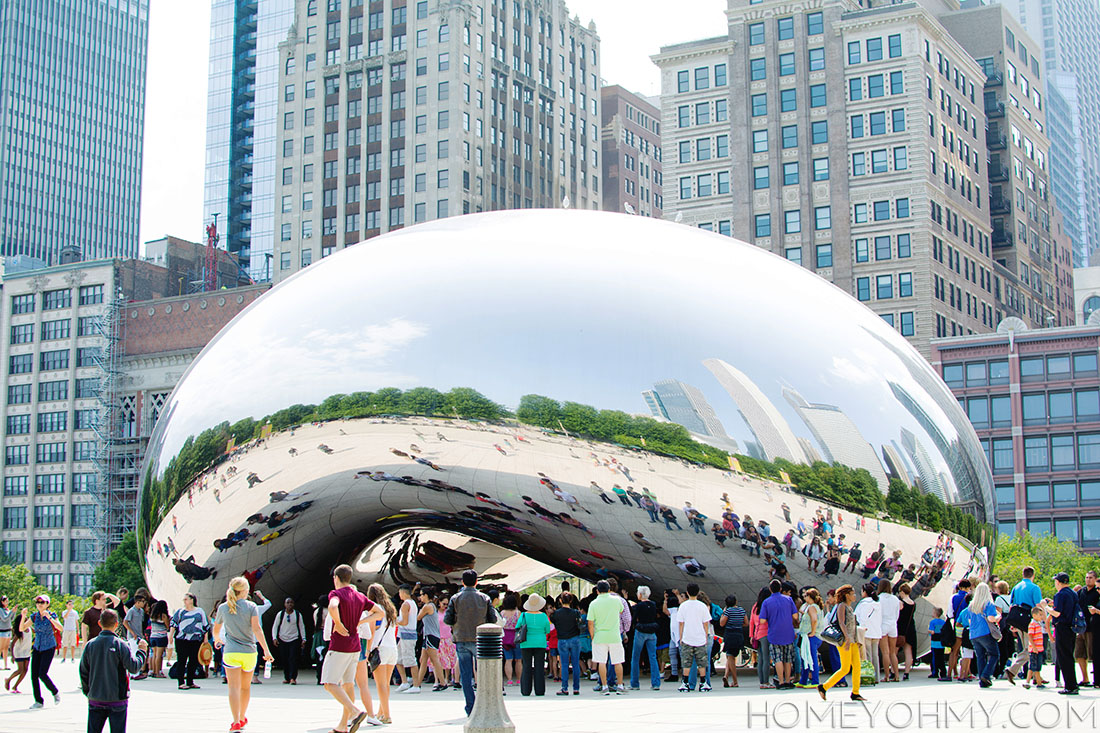
The Cloud Gate. And bird.
I’ll be back soon. We have family in Chicago, which always warrants a trip at least once a year.
Have you ever been to Chicago before? It is a must that you visit at least once!
As much as I love feeding you eye candy with DIYs or inspiring spaces, today’s post is focusing on the writing and getting more personal instead. In case you didn’t know, I’m not very good at this, so much that I really only do this when I’m prompted by an external force. That’s why when my friends Fran from Fall for DIY (jewelry and textile extraordinaire) and Carmody from Paper and Fox (clever crafter and stylish decorator) asked me to join in on this Blog Hop to show a more personal side of my blogging, I said heck yes, because I really do want to get better at showing more of who I am, so here goes:
Why do I write?
I’m going to go a bit deeper with this question, back to the time right before I started this blog. Last year, I went through a period of months looking for a new job to break into a more creative career. My biggest obstacle was lack of experience, because my work background is solely in healthcare. Interview after interview of companies describing that they were looking for “creative” and “driven” candidates, I found myself struggling to get people to look beyond my resume full of unrelated experiences. I am creative, I am driven, but truthfully, I didn’t have much to show for it. When I did finally get an offer, it just didn’t feel right, and it really wasn’t what I wanted.
What I wanted was a voice, because for a long time I felt like I had lost it, and after going through that series of job hunting fails, I felt like I wasn’t being heard either, or at least not in the way that I wanted to be. I had a lot to show and prove, to find my own definition of success, and I found it through writing this blog. I write because it helps me know who I am and what I love, which in turn connects me with amazing people I never would have known existed if it weren’t for the miracle that is the internet. I write to inspire, with the hopes that I can encourage someone to try something new and take a risk, whether it’s starting a blog of their own or going with a fabric pattern they wouldn’t normally choose :P. I write for fun, passion, and feeding my soul. It’s been a blast.
What am I working on?
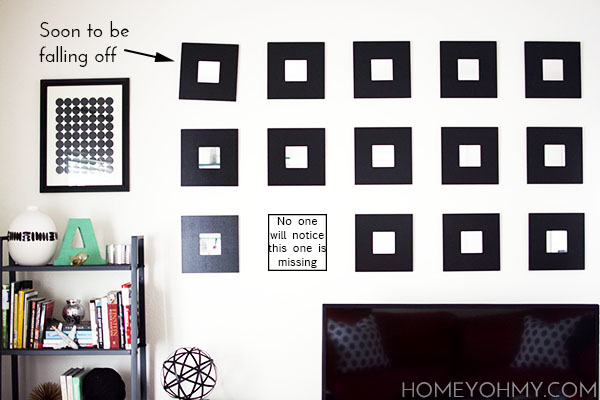
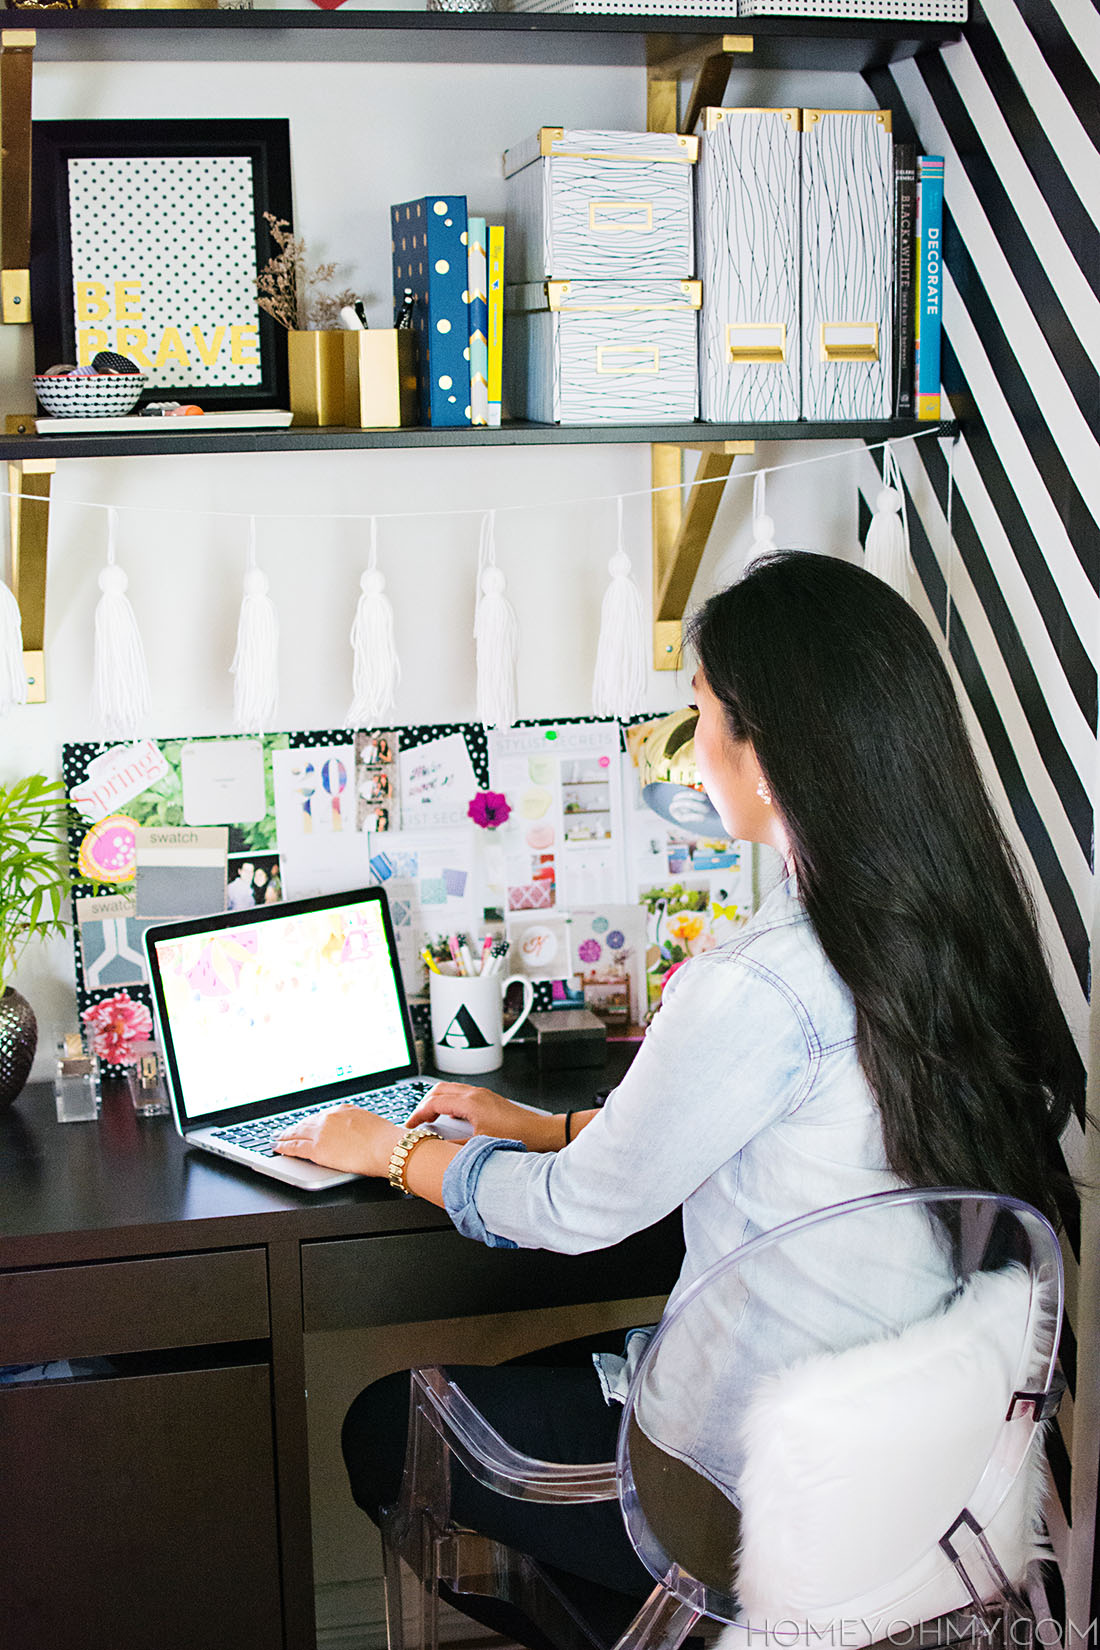
Ah, here’s a chance for me to show you something not so pretty. I’m currently working on putting up an art gallery around our TV. It’s something I’ve wanted to do since day one of moving in over a year ago, and I’ve made zero progress on it. We went with a quick and inexpensive alternative to fill up the glaring, white space with the Malma mirrors from IKEA since I knew it would take time to gather art to put up, and as you can see, they’re starting to fall off (the Command strips aren’t unsticking- it’s the paint on the wall that’s coming off!) I was positive I’d just gradually collect art and transition these mirrors out, and like I said, that has not been happening at all. SO, I’ve planned some DIY wall art ideas that are soon to come and will of course be showing the gallery wall once it’s all hung up. Fingers crossed. *update* See the completed gallery wall here.
In terms of the blog, I’m working on diversifying the content a little bit and trying out a new column or two, all while making this a more personal space where I won’t always chicken out on sharing the “behind the scenes.”
How does my work differ from others of its genre?
Can anyone help me answer this question? Please?? I’m still figuring this one out. All the advice written about starting a blog stresses the importance of pinpointing a specific niche or having a painstakingly unique point of view, and I didn’t figure much of this out before starting. I ran the red light and went on because I just wasn’t sure what my style was back then and felt like once I started, all of that would naturally unfold along the way. Here, this quote says it beautifully:
100000% on point with my perspective on starting this blog. I definitely think my work and style have evolved in these few short months, and I hope it continues to do so.
Ok, but REALLY trying to answer this question… I’d like to say everything I make has an element of chic while still being easy to do. I like clean lines and simple designs, traditional styles with modern touches. I’m big on metallics and neutral or monochromatic palettes, though this summer I really tried to challenge myself with using color and am feeling more confident about that ability. I try to do everything from the perspective of using easily accessible materials and applying simple techniques. It’s hard to say how I’m doing it all completely differently from anyone else, but what makes any work unique is the person behind it, so hey, I guess that goes back to my goal of trying to incorporate more of who I am into this blog!
How does my writing process work?
I don’t have one. Bam. I like to just write on the fly and be as casual as possible. It’s commonly advised to let your writing marinate and edit over days, which I do sometimes, but there’s something about spontaneity (if I’m being real, that word could be replaced with “the last minute”) that gets me flowing. It’s important to note that I don’t always place the highest priority on my writing, which I want to work on. I would love it if everything I wrote was beautifully composed and riveting, but I can admit that I’ll just let the DIYs and photos take the stage a lot of the time.
The way my writing and DIY process works has a lot to do with my limited free time. I work a full time job and usually all I have is a weekend day or weeknight to give it all in one go, so I do. There is definitely a lot to improve about my writing and creative process, but what it comes down to is what fits with my schedule and lifestyle, and so far this is what’s been working for me!
While we’re at it, a little update on things lately… I recently came back from vacay in Chicago (you probably already know this if you follow me on Instagram) and am feeling exhausted and soooooo behind on blogging. Unplugging is both refreshing and stressful. It was great to getaway and relax, but now I’m fighting to get back into the grind and catch up on all the stuff I missed. I know, there’s been a lack of projects around here lately and there won’t be any this week :( but those will start back up again next week! I promise! You’re gonna love it!!!
Back to the blog hop… Now it’s my turn to tag a couple other bloggers to join in on the hop!
Laurel from A Bubbly Life is exactly who you’d think she is just from her blog name. She’s a bubbly sweetheart and shares ultra cute DIY’s and party ideas. She’s also a fellow PBteen DIY contributor! I love her fun and girly style, and we share a love for hearts and gold <3.
Anu from Nalle’s House writes a crazy inspiring blog full of Scandinavian decor and DIY’s. From the second I first saw her blog, I was instantly a fan of her simple and modern style. She is also a mega sweetheart, and gave me helpful info on photography when I reached out to her after starting my blog (do you remember that, Anu??)
Both of these talented ladies will be putting up their Blog Hop posts next Monday, so you know what to do —–> follow them if you aren’t already!
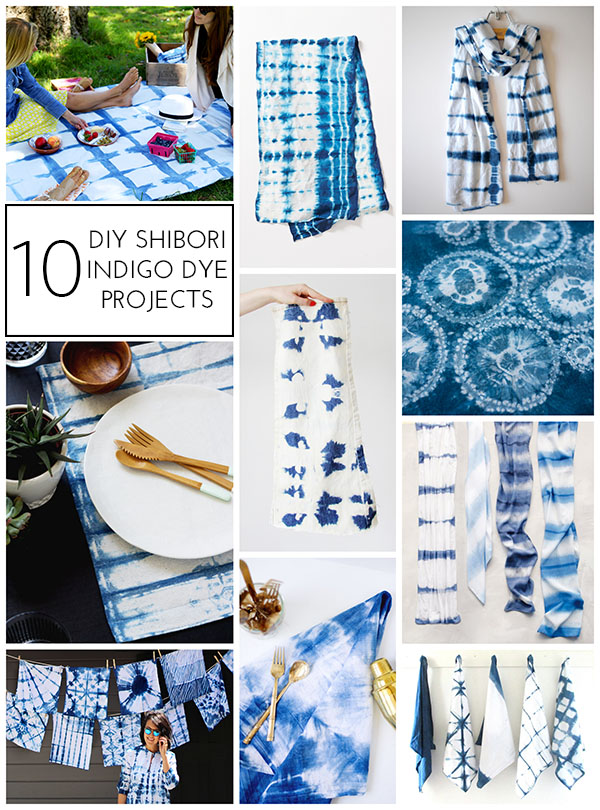
Tie dying is usually a big summer trend, but shibori dying in particular made its way into the spotlight this summer. I’ve never considered myself a big fan of tie dying in general, but the gorgeous indigo hues largely used in shibori dying was all it took to change my mind.
Shibori is a Japanese style of dying that involves different techniques of twisting, folding, binding, or stitching fabric that result in infinitely varying patterns. While I haven’t tried it myself yet, I can imagine there’s an addictive excitement of not knowing how the pattern will turn out until the grand unfolding of the fabric at the very end. From what I’ve seen, it can be pretty simple to make some seemingly complicated designs and patterns.
I’ve gathered 10 shibori indigo dye projects to share with you guys and get you inspired to try it out yourself! Some of these are DIY projects while others focus more on showing the different techniques. Either way, there’s lots of inspiration to be found at these links!
What do you think of Shibori dying? Have you tried it before? If you have a Shibori project or know of one I didn’t mention, link it in the comments below. I’d love to see it!
 Moar. Succulents. I couldn’t help it, guys. I was at the flea market when I came across multiple booths full of succulents and they were soooo cheap and sooooooo cute. Maybe it was the hysteria of the people crowding around and packing cardboard boxes with their succulent choices that urged me to take advantage of the situation. Next thing I knew I was grabbing a cardboard box myself and making my own selections. I showed some restraint though by picking a small box to fill.
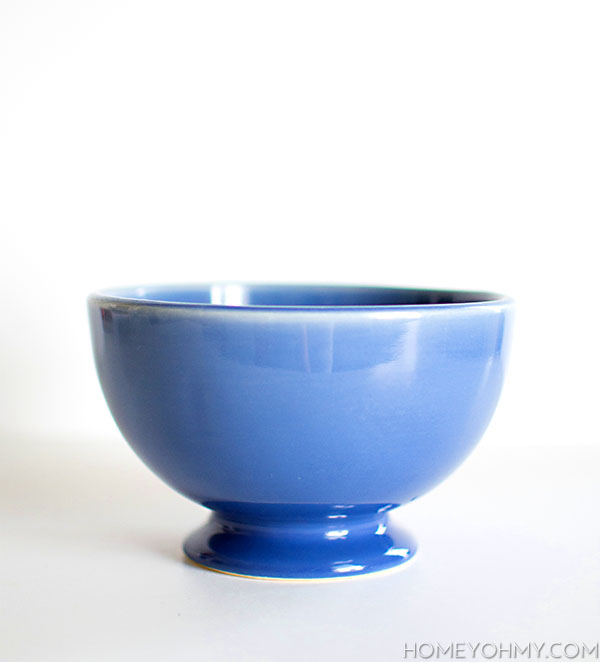

 This batch of succulents was all about picking ones I didn’t already have (minus the zebra). I love every and all succulents, but I find myself drawn to the weirder looking ones, and that alien one in the front is the weirdest of them all. The guy at the booth told me it’s called Baby Toes, and I said how freaking cute. Maybe a little creepy, but I like that it’s so strange. The pale blue color is so unique, too. I think you already know it’s my favorite one.
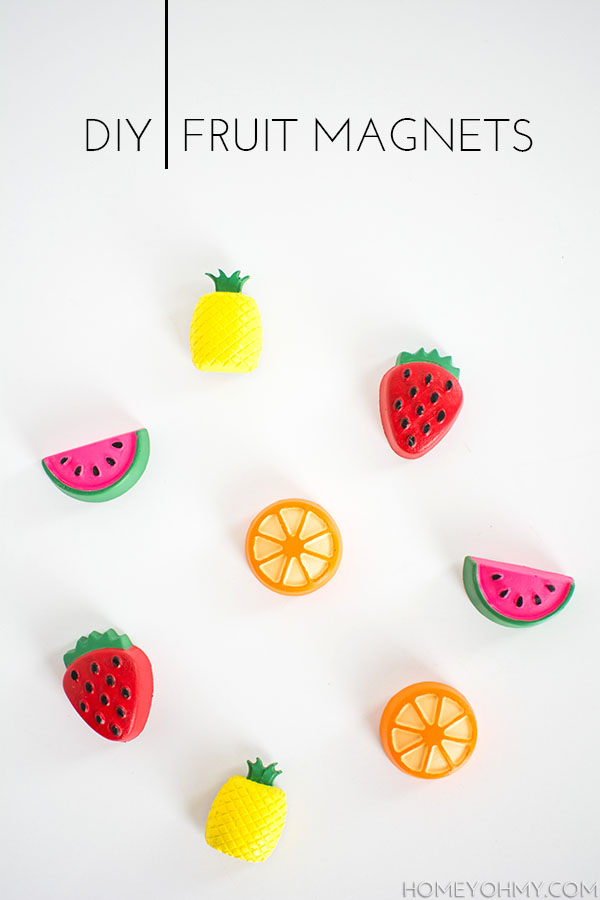 I’m PRETTY excited about this being my first fruit DIY since I get to be joining in on this mega cute summer trend. This was that “other” cement project I had mentioned being part of the inspiration for my
 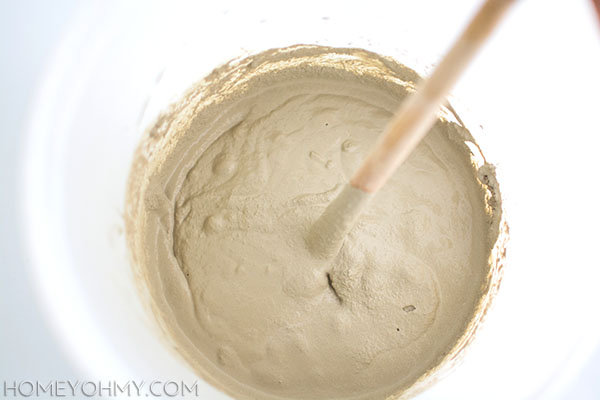 So cement. This was actually my first time using cement, before my ombre candle holders, and I learned a few things after failing this project TWICE.
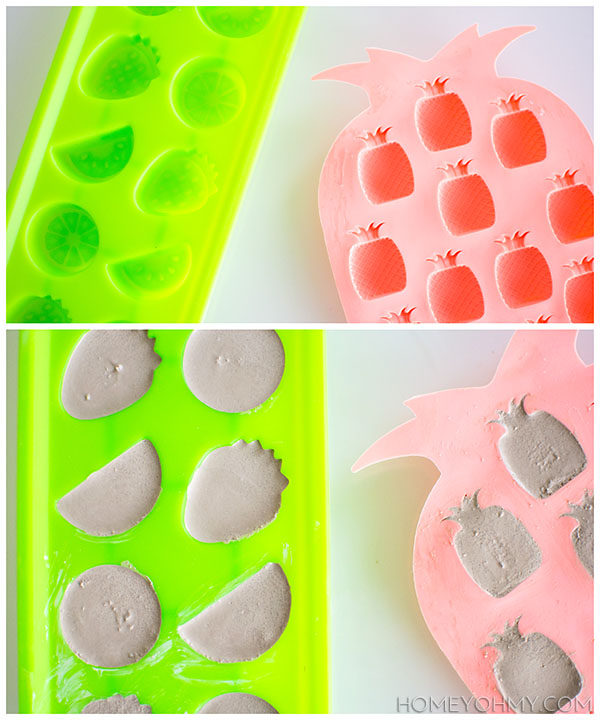 So it’s pretty simple, I just filled up the trays with cement and let them dry.
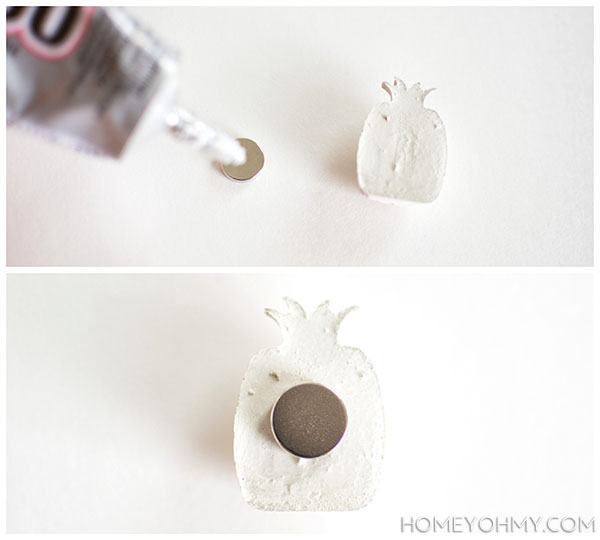 After popping out all the cement fruit from the molds, I glued on a magnet to the back of each fruit.
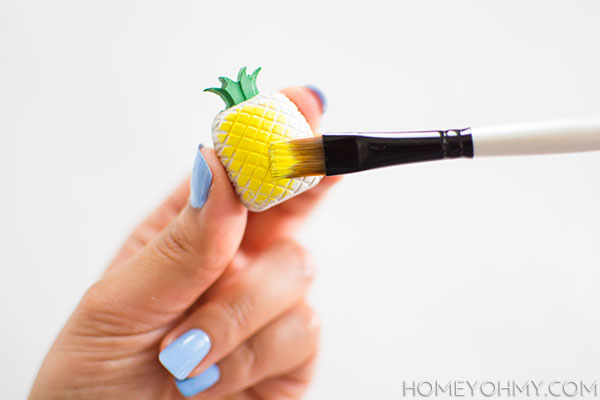 Then the funnest part- painting the fruit magnets. Seriously, it’s meditation.
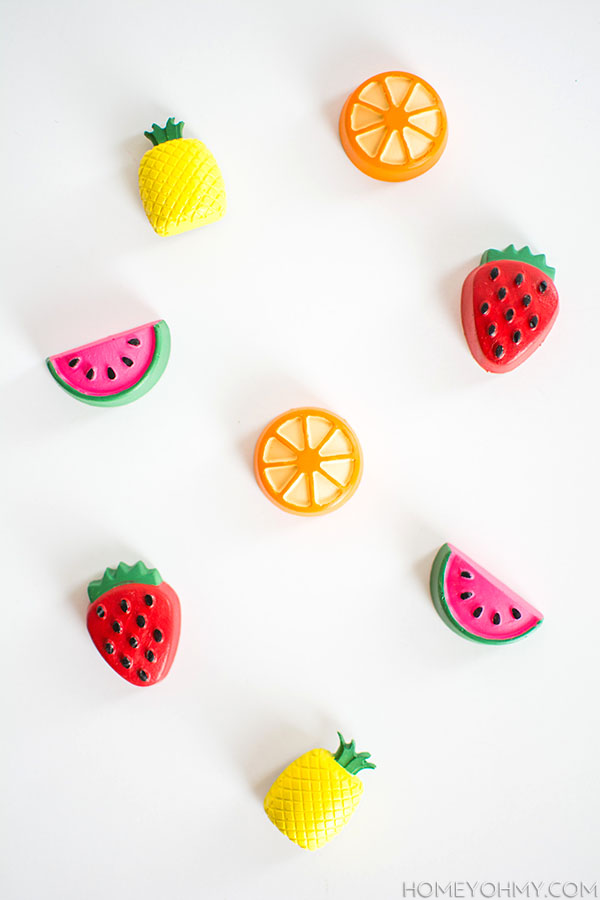
 You guys, I love them soooooo much, to the point where I’d be thrilled if you loved them even half as much as I do. What do you think of them? Summer trend or not, I’ll be keeping these up on the fridge forever.
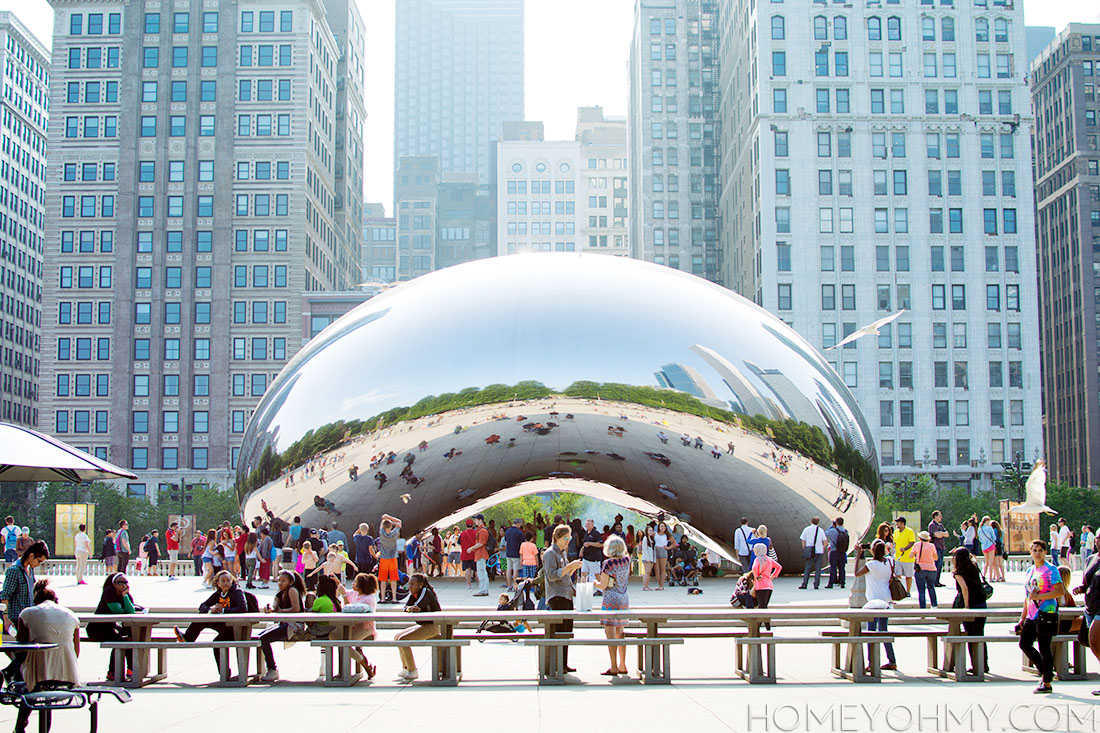
 By the way, you see those kayakers on the water? I’ve been kayaking on the river before, and it’s fun for like 15 minutes until you see all the boats whizzing past you and you think yea we should’ve just gone on a boat. It’s a great workout, though!
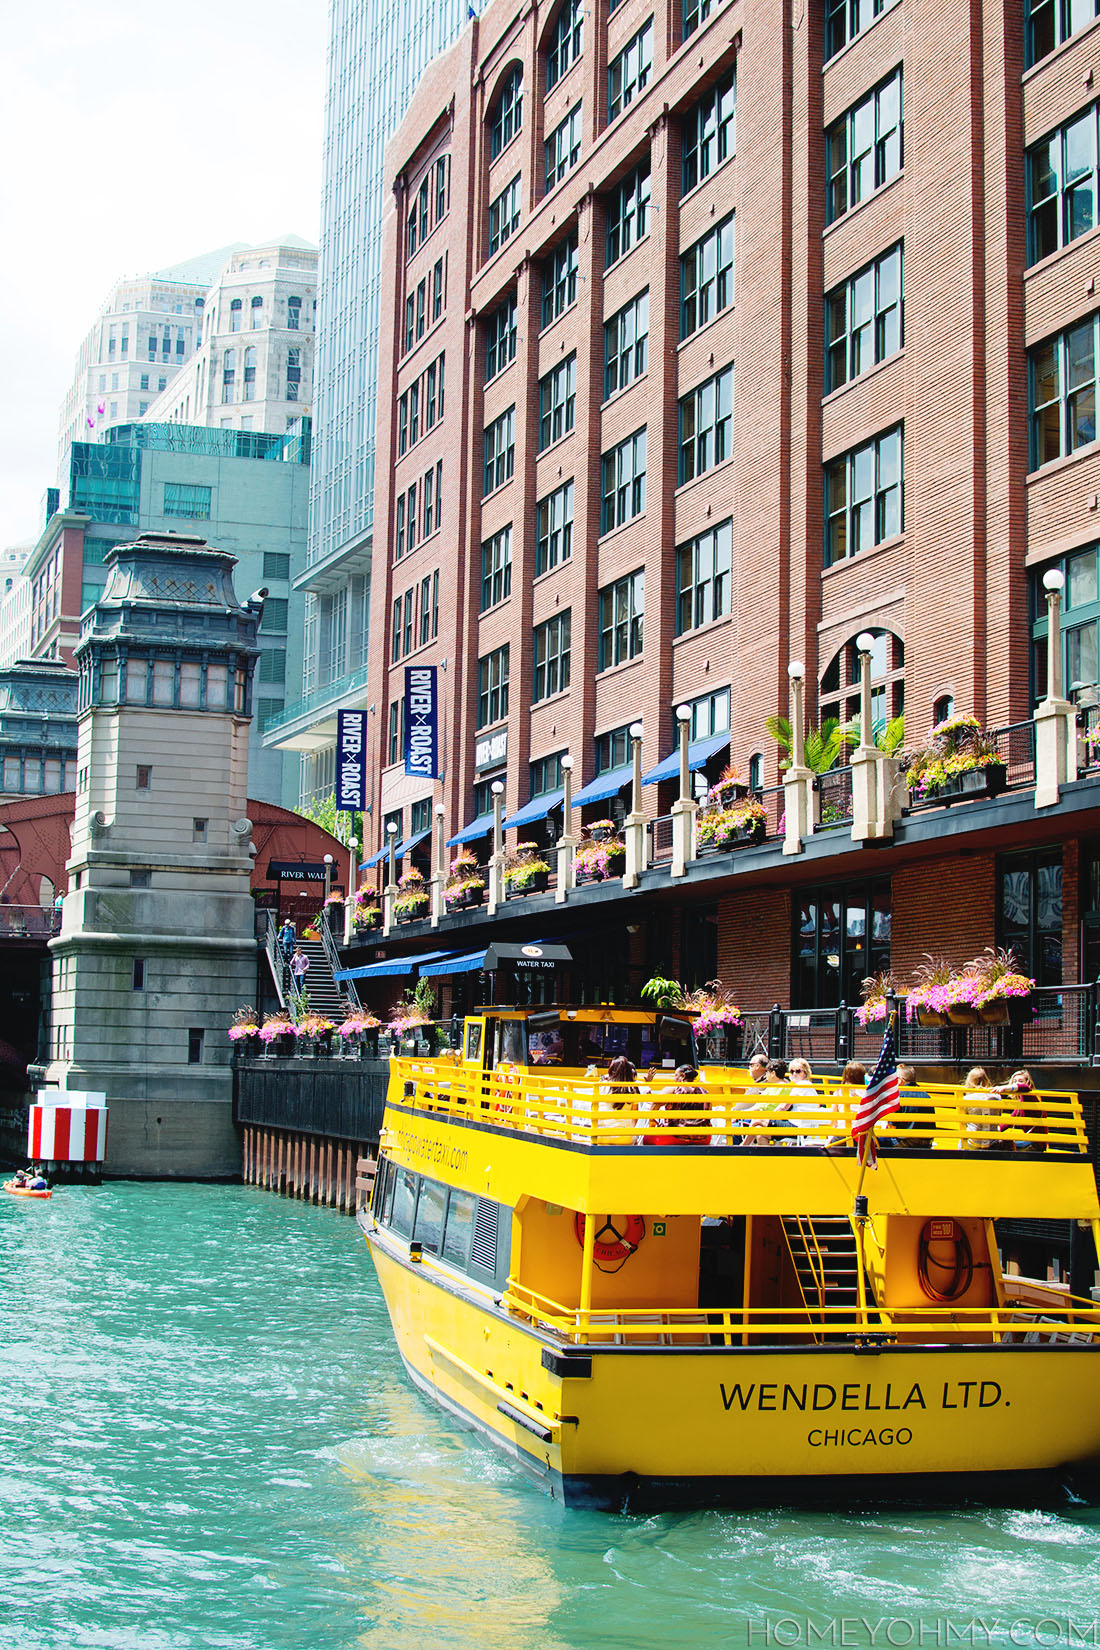
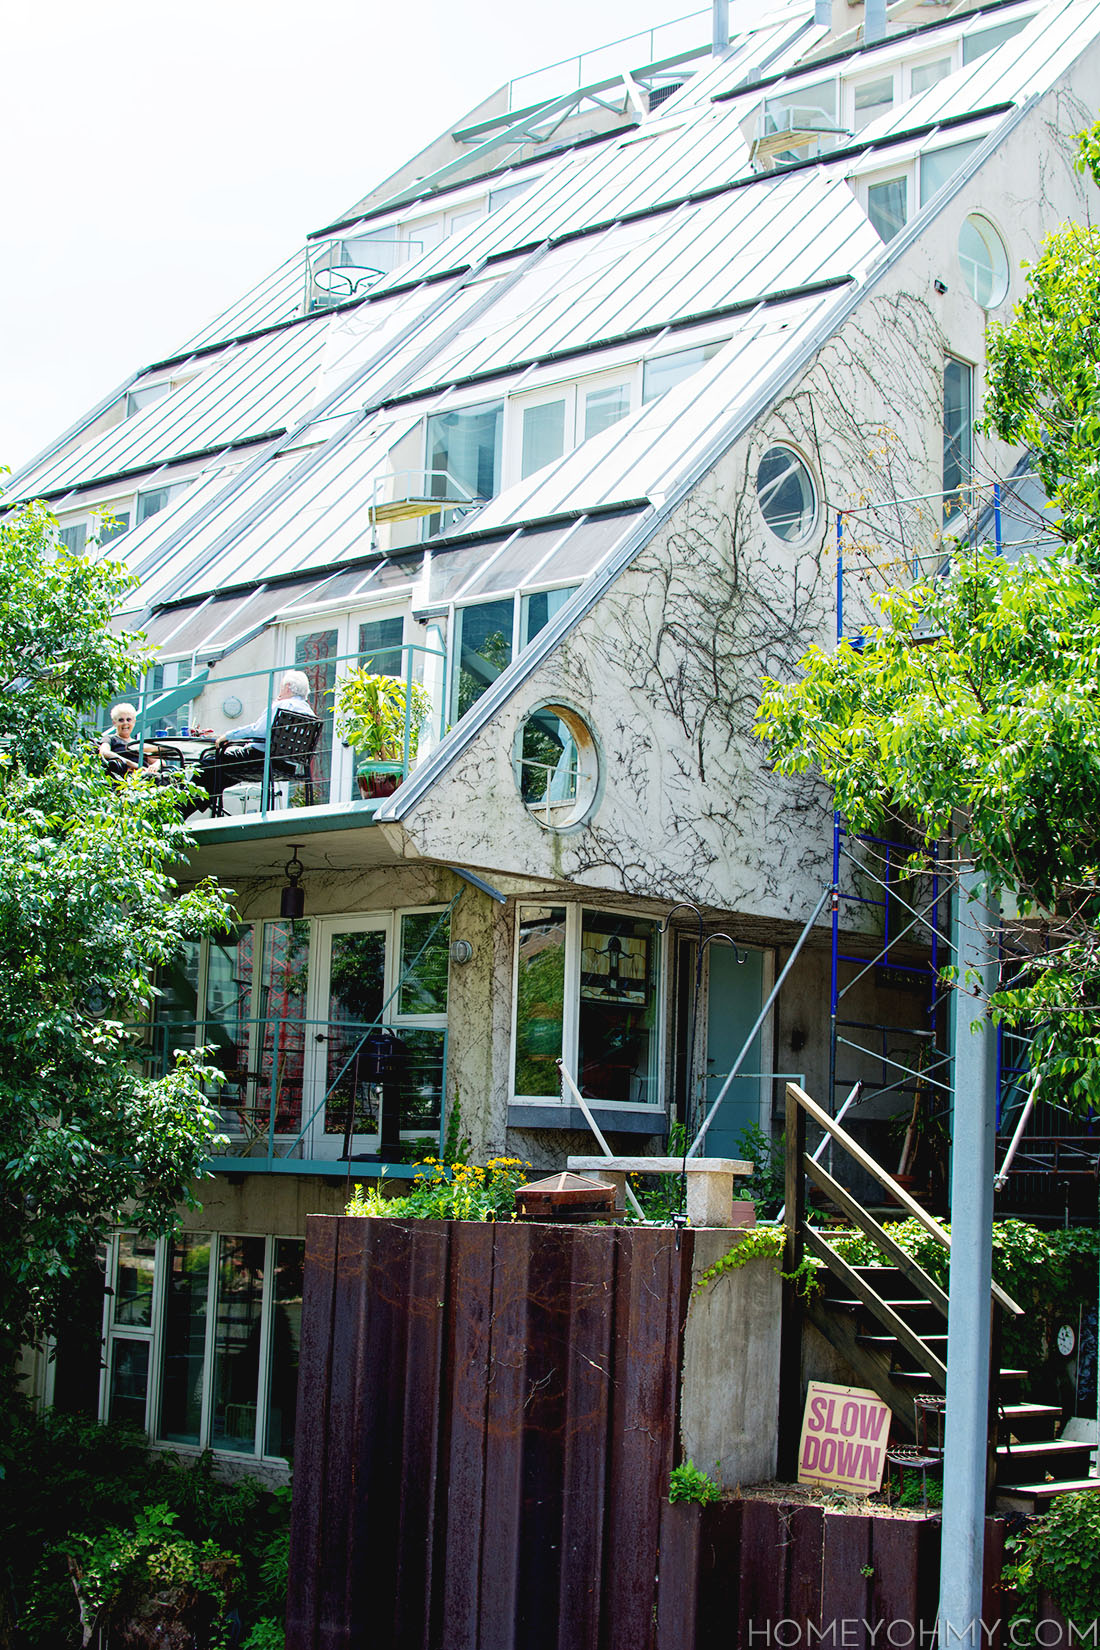 Talk about a fantastic spot for brunch… Slow down, life!

 This is forever the Sears Tower in my book. I remember feeling devastated when I first heard the news that the name would change to Willis Tower. No.


 As much as I love feeding you eye candy with DIYs or inspiring spaces, today’s post is focusing on the writing and getting more personal instead. In case you didn’t know, I’m not very good at this, so much that I really only do this when I’m prompted by an external force. That’s why when my friends Fran from