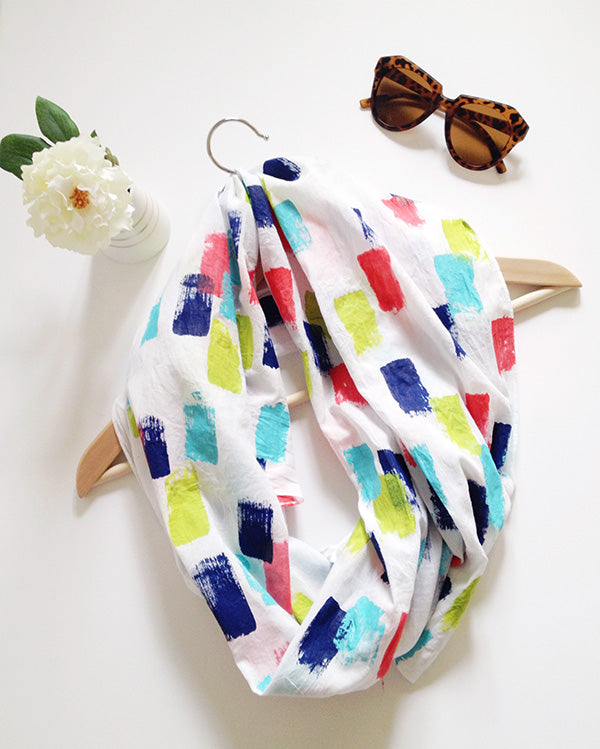
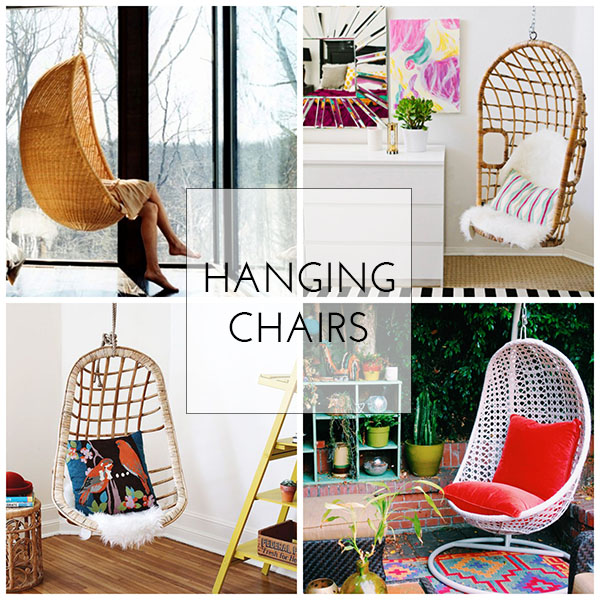
Guys, how CUTE is this scarf??? I wish I made it, but I didn’t- my friend Stephanie at Make and Tell did! She’s guest posting here for me today, and looking at this scarf, you can probably guess why I asked her to- because she’s amazing.
Stephanie has only been blogging since April and I’m already a big fan of hers. I love everything she makes and I know you guys will too. Make sure to stick through till the end of this post for links to her social media and blog!
Here’s Stephanie:
You know, I never used to be a scarf kind of girl. I’m the sort of person who likes to keep things as low maintenance as possible (i.e. I’m lazy!), and having an extra item of clothing to think about was often too much effort for my brain to cope with in the early hours of the morning.
But one day, I finally woke up and realised that scarves are pretty. They can be gorgeous statement pieces and can inject a nice dose of colour and pattern to an otherwise blah outfit. So slowly slowly (because sadly, I’m not made of money), I’ve started growing my scarf collection. And since I love to DIY, I thought why not try and decorate one of my own?
The inspiration for this project came from the beautiful brush stroke patterns I’ve been seeing around the interwebs lately. And it’s a super easy pattern to DIY, so if you’d like to try it out, grab your paintbrush and follow along!
Materials
- White/blank light cotton scarf
- Fabric paint (in any colour you like – the more colours the better!)
- A wide, flat paintbrush
- An iron (if your paint requires heat setting)

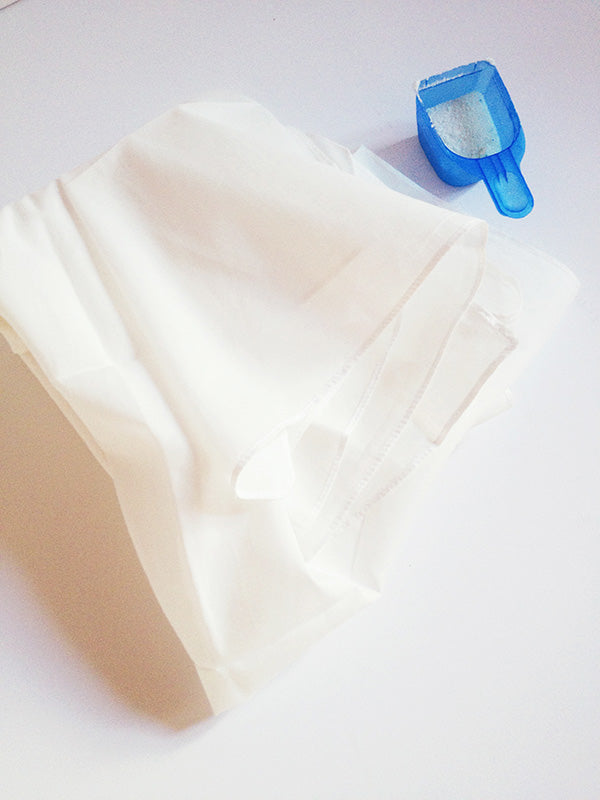
Step 1
Give your scarf a good wash (without fabric softener) and iron it before you start painting. Usually, I’m too impatient to bother with that kind of prep, but it’s important for this project as it’ll get rid of excess chemicals in your cloth and will help your paint to stick properly.
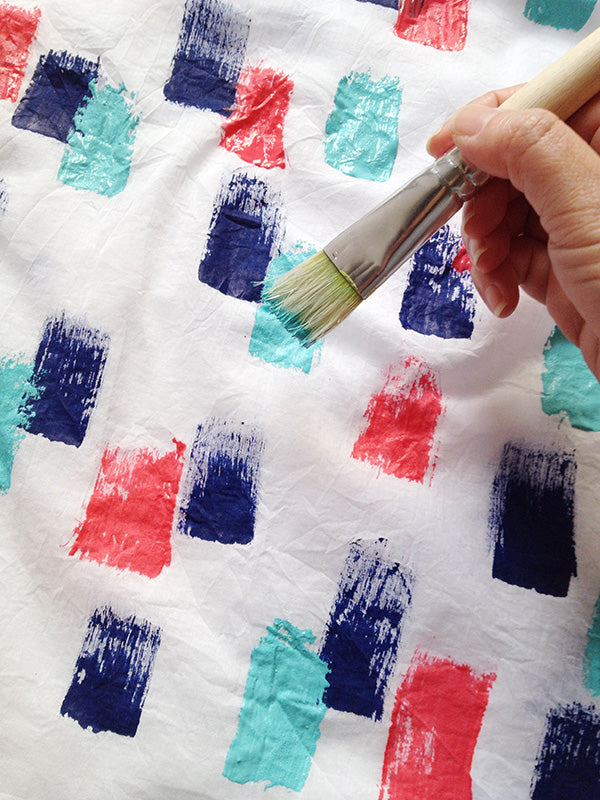
Step 2
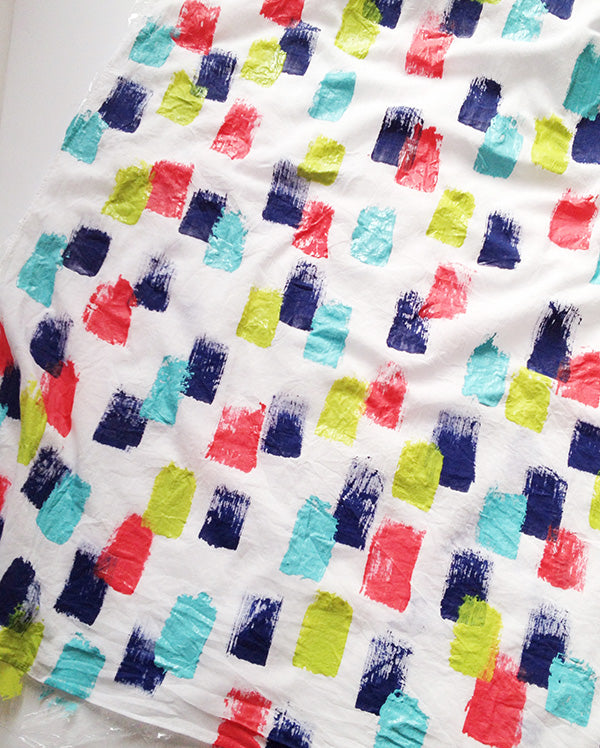
Place sheets of plastic underneath your scarf to protect your work surface from any paint that might seep through. Then get painting! Using a wide, flat paintbrush start brushing short strokes of paint over the length of the scarf, all going in the same direction. Try not to overload your brush with paint, otherwise you’ll end up with spots and blobs rather than the brush strokes we’re after.
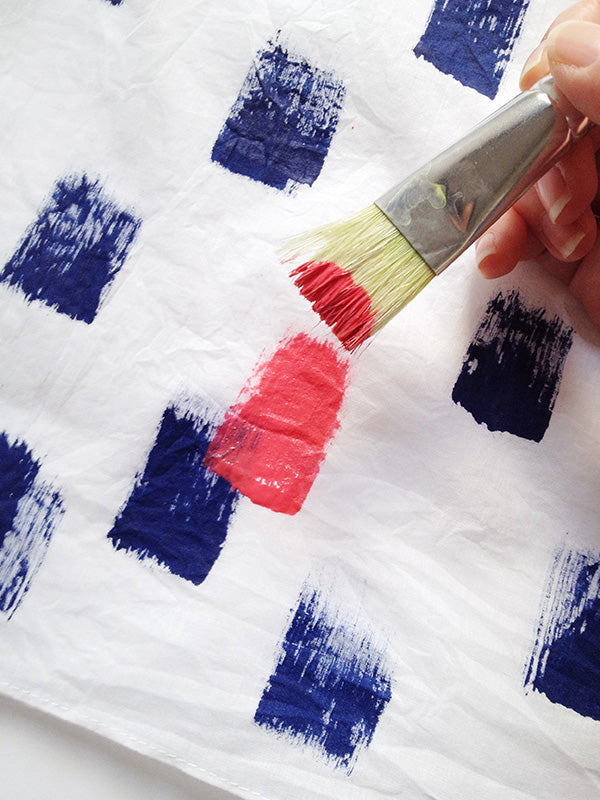
Each person paints differently, so feel free to experiment while painting to find a method that suits you best. I went with painting each colour separately, starting with the darker colours first and then overlapping those with my lighter/brighter colours. This meant that the brighter colours would be on top and more obvious. It also meant I could do all of one colour before washing my brush and starting on the next (because I only have one brush in this size!).
Step 3
Leave your scarf lying nice and flat to dry (this may take up to 24 hours) and if your paint requires it, iron your scarf on the reverse side to heat set your pattern. Make sure you follow the manufacturer’s instructions when you do this to ensure your paint is set properly.
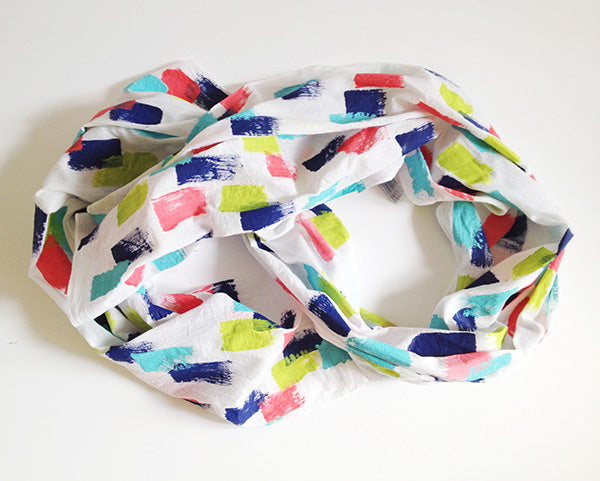
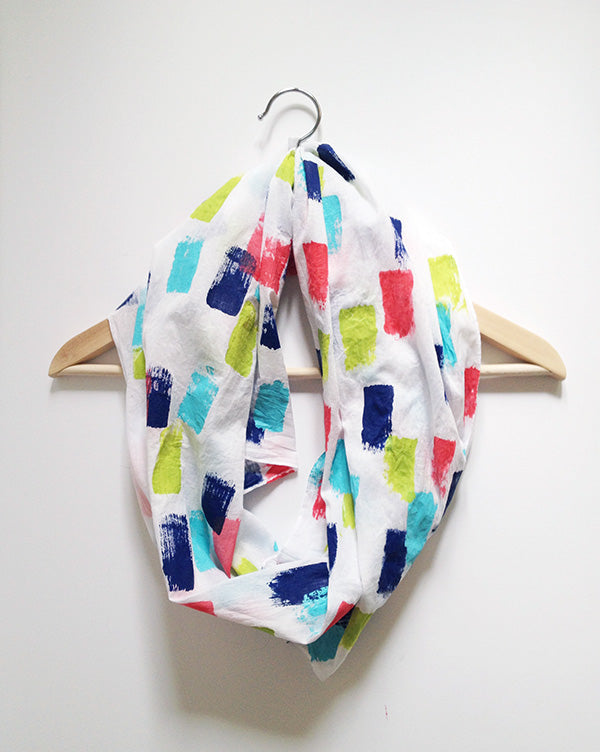
There you go, now you have a new scarf to add to your collection! And that’s not all, there are lots of ways you could vary this project to make scarves with a completely different look using the same paint – for example, you could try dragging the brush strokes all the way across the width of the scarf to create uneven stripes (like this beauty by Kate Spade) or you could wet your scarf first to make the paint bleed for more of a watercolour look. The sky’s the limit!
xx Steph

Follow Stephanie and check out all her other gorgeously simple DIYs!:
Make and Tell Blog | Facebook | Instagram | Pinterest | Bloglovin
 This giveaway will end on Friday, August 1st at 12AM and the winner will be contacted via email on August 1st. If the winner does not respond within 48 hours, a new winner will be selected. Giveaway open to US residents only.
 I get a lot of inspiration from window shopping for home decor and accessories. During this activity, I very often find myself saying hey I could make that, and then another voice in my head says “You should.” Then it becomes the thrill of the challenge. Sometimes it isn’t only about the thriftiest and easiest way to make something. Sometimes it’s about seeing if I can do it myself, and with that comes the addictive power to make my own customizations, which can make all that extra work worth it.
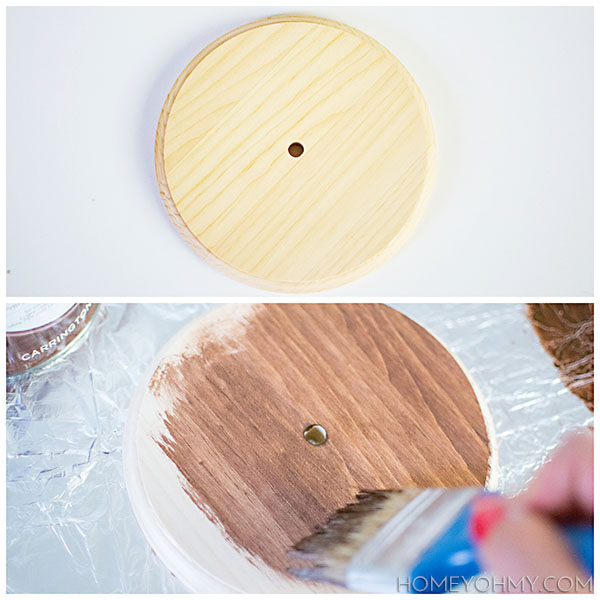
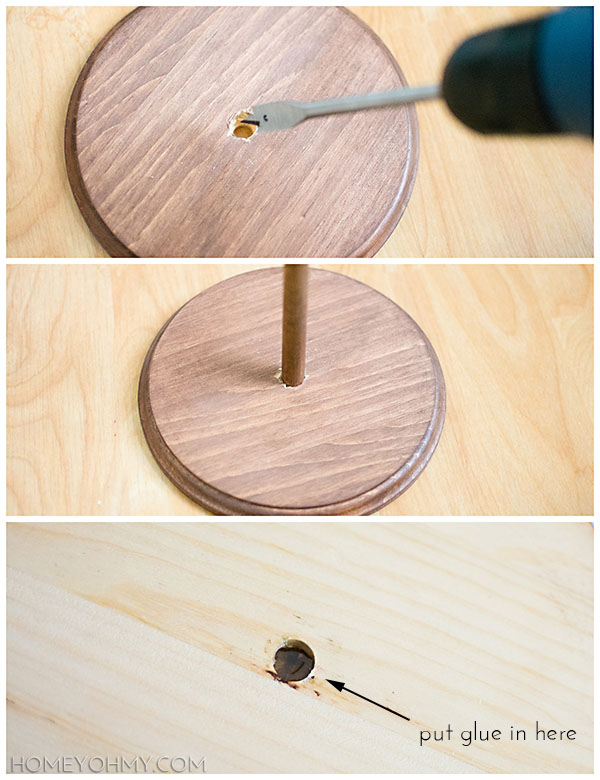
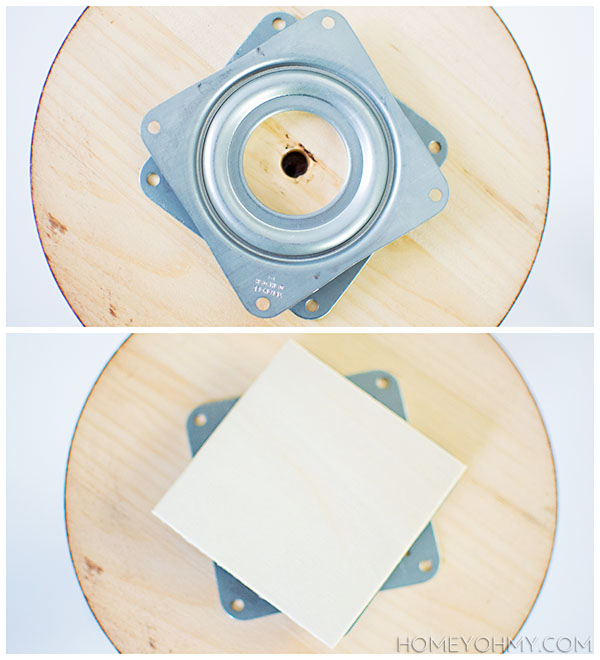 Next, I glued on the lazy susan to the bottom of the wood, then glued a 3in square piece of wood to the bottom part of the lazy susan to provide an even base for the caddy. There are holes for drilling in screws, but if I have a choice between drilling and gluing, I always go with gluing if the connecting surfaces aren’t going to endure opposing forces, which in this case there would be none. Plus, E6000 has amazing holding power. Gluing is just easier too, right?
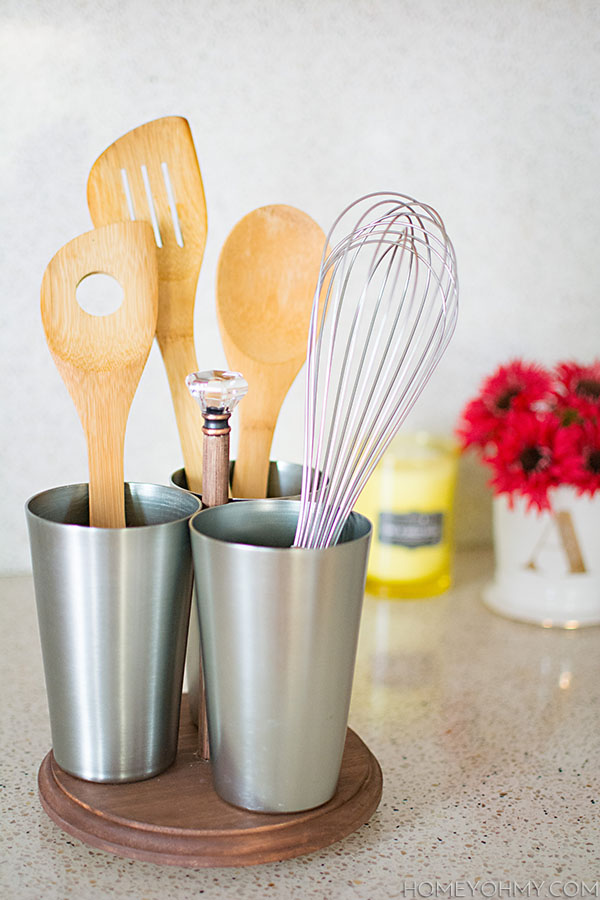
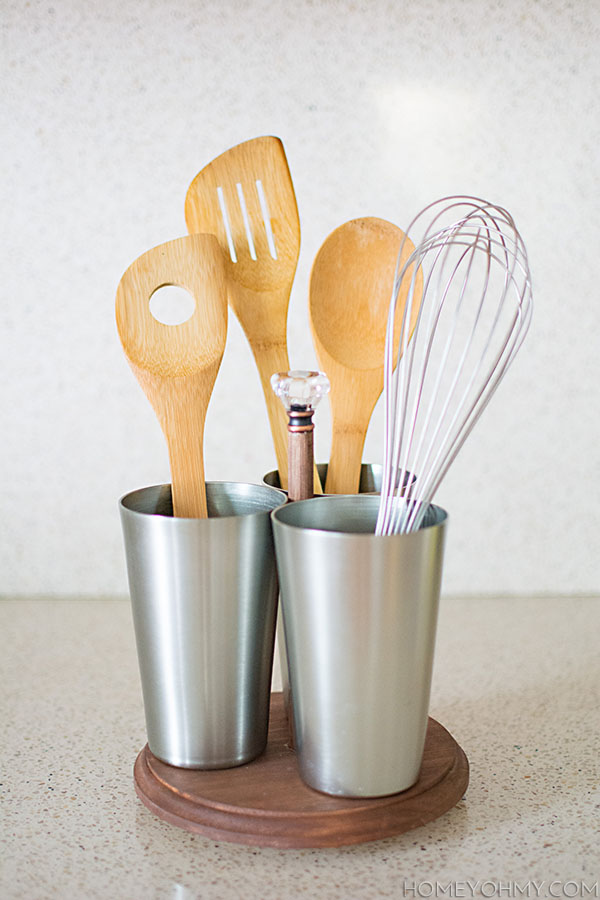
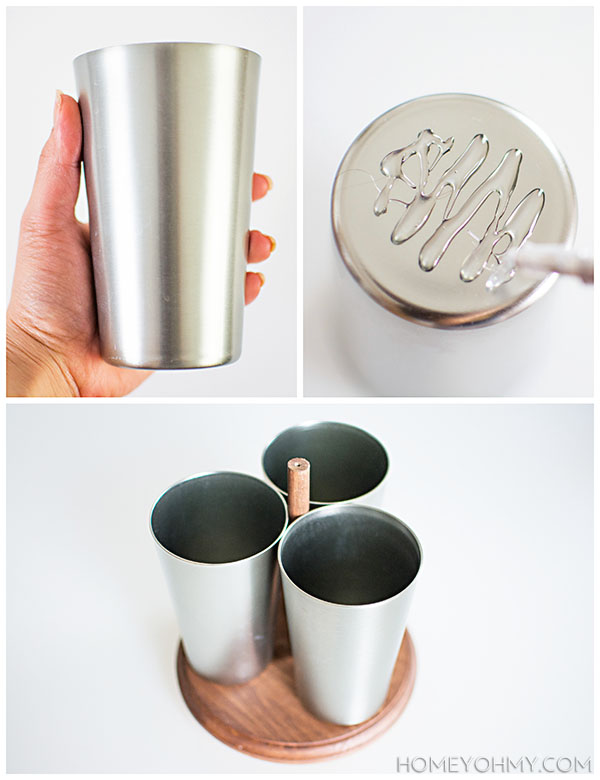 I found these aluminum cups on clearance at JoAnn’s (I go there a lot, guys. There’s one very close to me that opened up this year and it has saved me so much time!) and simply glued them onto the wood, making sure they set so that all the rims of the cups were touching each other and the dowel.
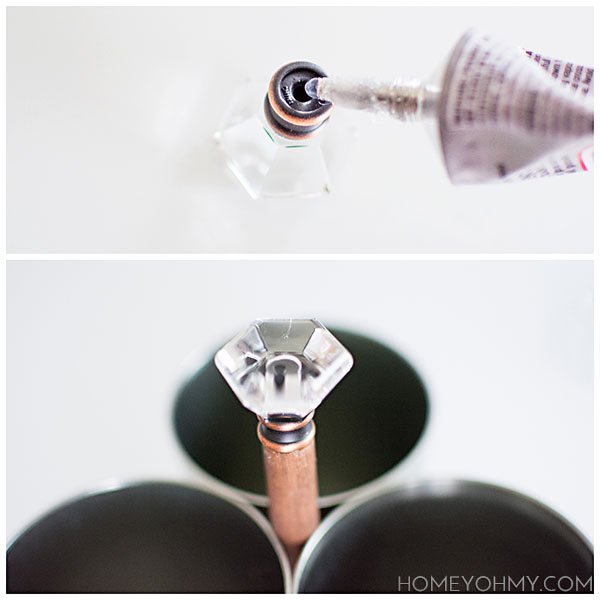 Does the knob look familiar at all? It’s the same one I used for my
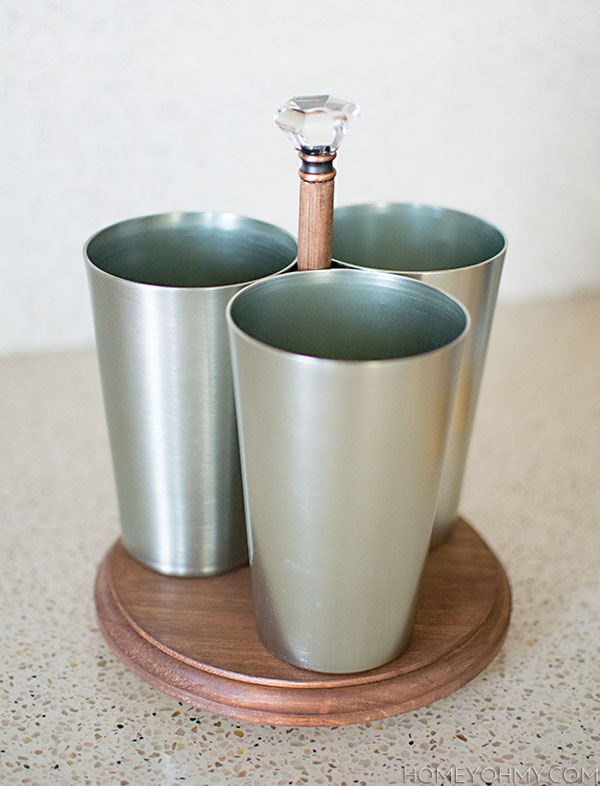
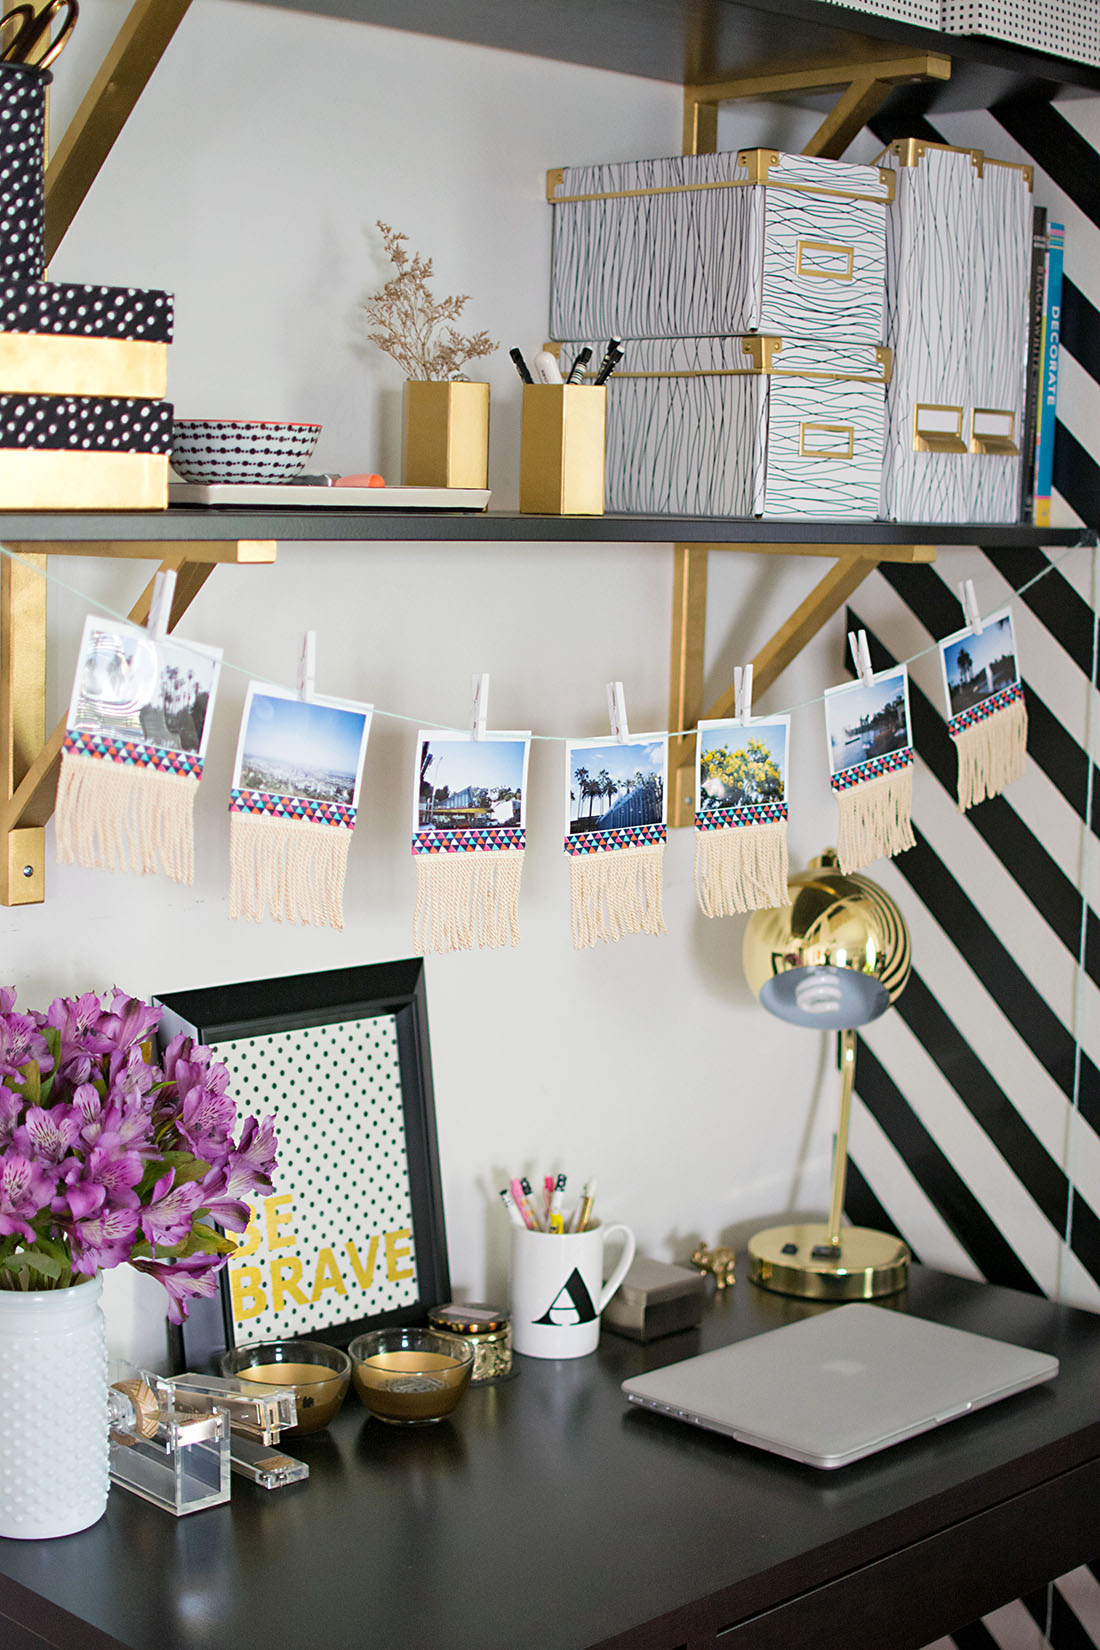
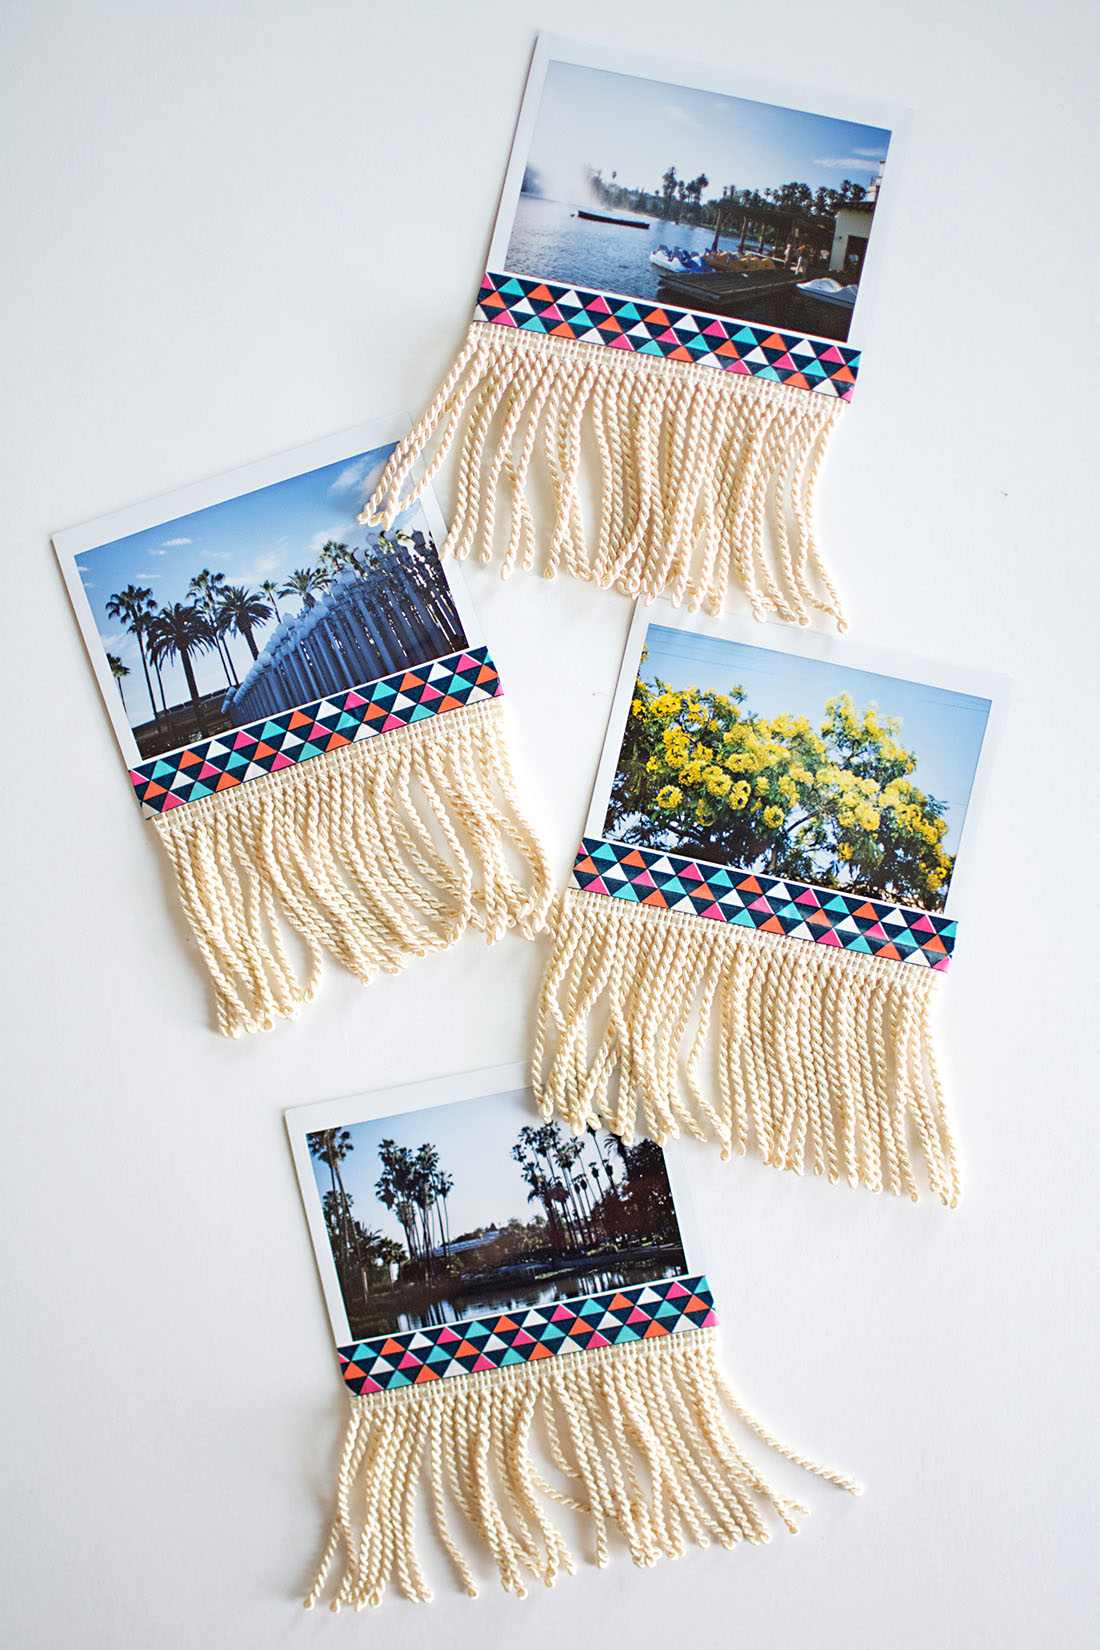
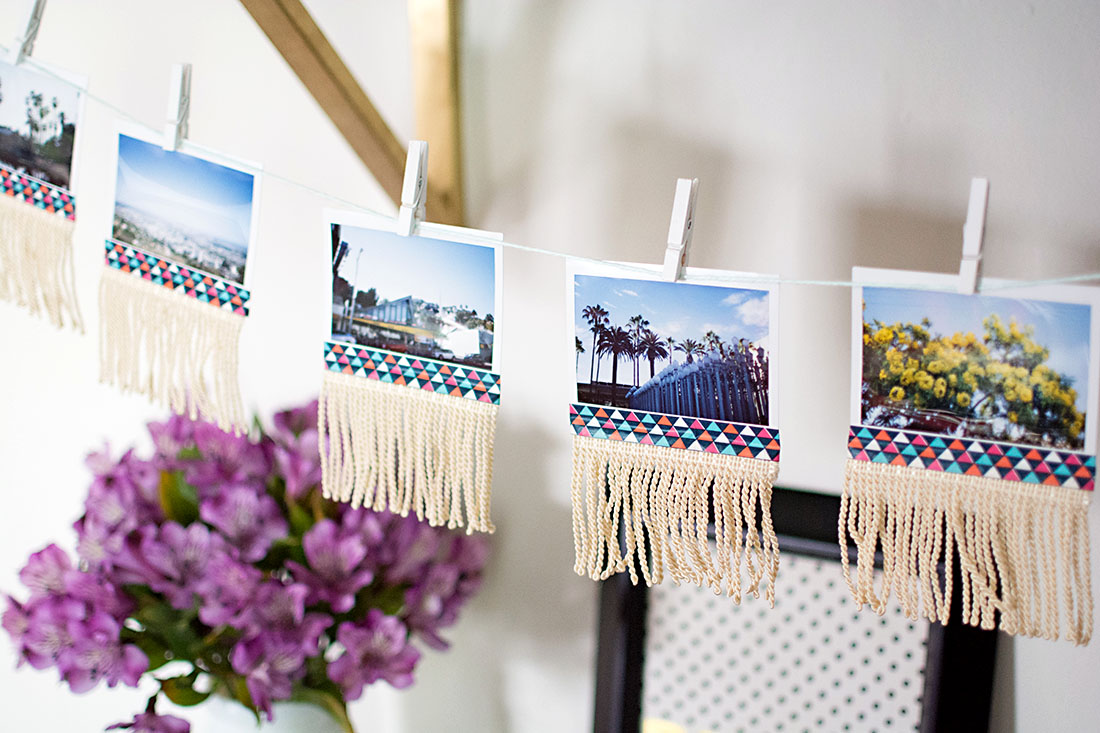 Shout-out to my friend Hanh for letting me borrow his polaroid camera!