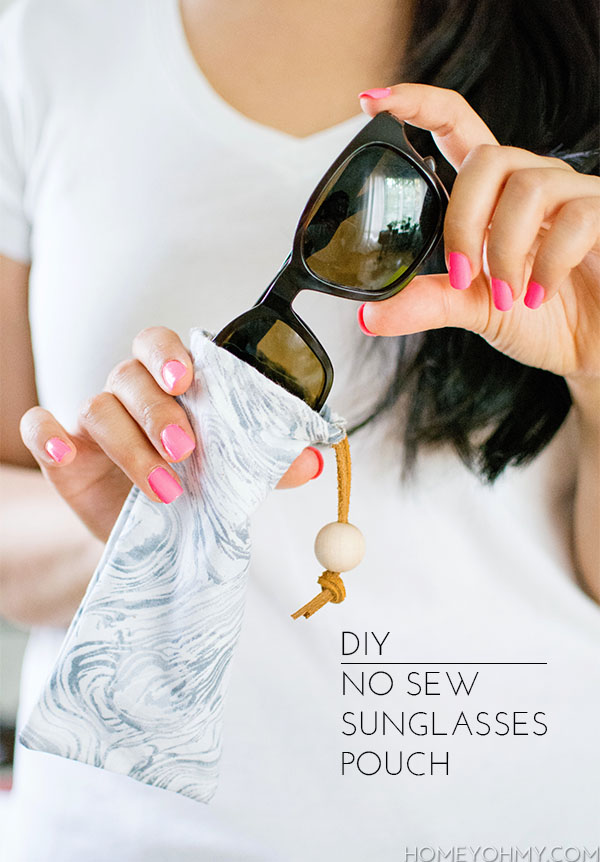
 Sometimes you don’t need to be carrying around a big and bulky hard case for your sunglasses. Sometimes you just need something simple and compact on the days where you won’t be throwing them in a giant bag to get lost and crushed under every single thing you own. All of this basically means the bag I’m carrying that day is small, so I need to consolidate. I guess I could have started this off with just that, ha, but the point is there’s more than one reason why you might want to make this leather drawstring sunglasses pouch, on top of it being so easy to make without any sewing!
Another reason for me is summer. Coping with summer heat means lightening the load for everything- lighter clothes, lighter hair, and carrying around less or lighter stuff. This pouch serves to lighten at least one thing, and maybe not by much, but that leads us to the main reason why I made it: because it’s cute. That’s reason enough for anything, right? Thanks for playing along, guys <3.
Materials:
-fabric
–Unique Stitch (Always. Forever.)
-leather lace
-wood bead
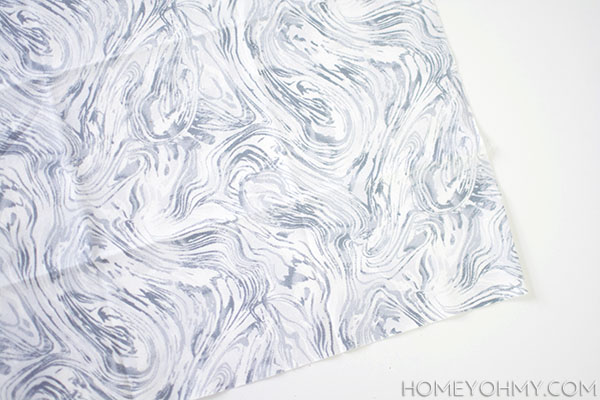 I found this fabric at JoAnn’s and it was one of those fabric quarters they have on the front ledges of their fabric shelves. Isn’t the marbled design gorgeous? I usually spend embarrassing amounts of time walking up and down every aisle until I can no longer tell where one fabric ends and another begins, but this time around, my eyes locked on it immediately and I had no doubt it was meant to be.
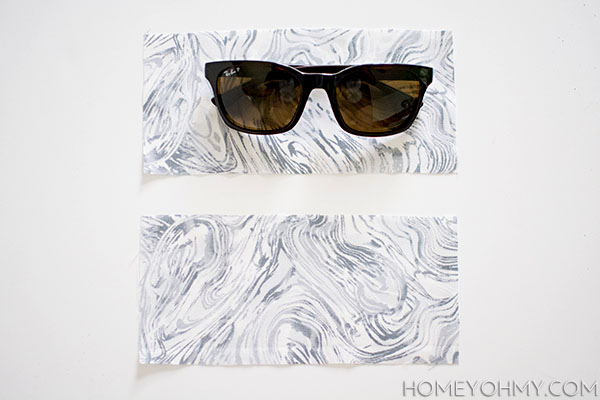
Using my sunglasses as a guide, I roughly measured that I needed two fabric pieces that were 4×8″ in size. I cut them out after ironing the fabric first.
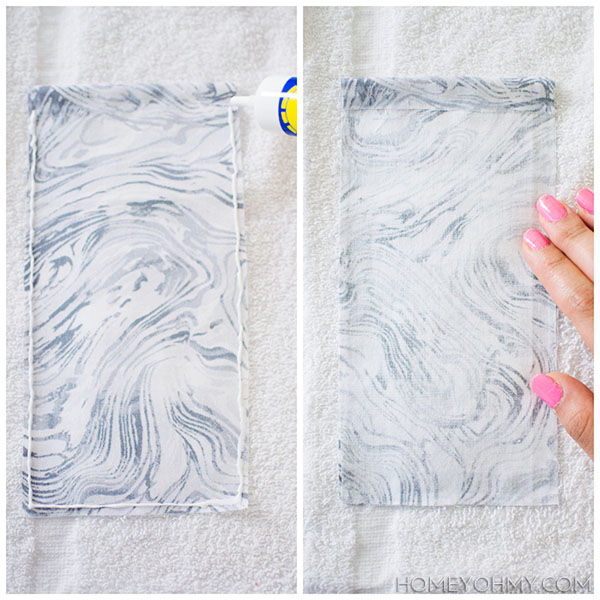
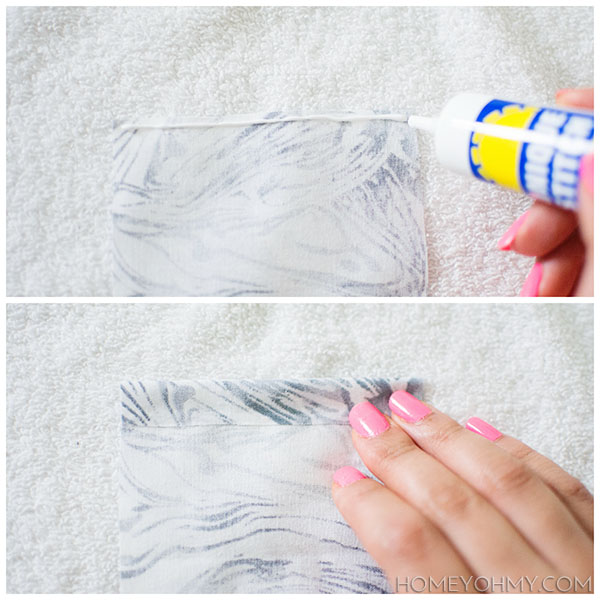 I applied the Unique Stitch glue on the back side of one of the short edges on the fabric and folded it over about a 1/2 inch, pushing down on the glue and making sure it lightly seeped through both layers of the fabric. This creates the openings where the leather lace will be strung through later, and this was done to both fabric pieces. As shown in the photo, I’m working on top of a protected surface aka a scrappy, old towel.
 On the front side of the fabric piece, I applied glue on the edges below the folded edge I previously glued down, then placed the other fabric piece on top (face to face) and pushed down on the edges for adhesion.
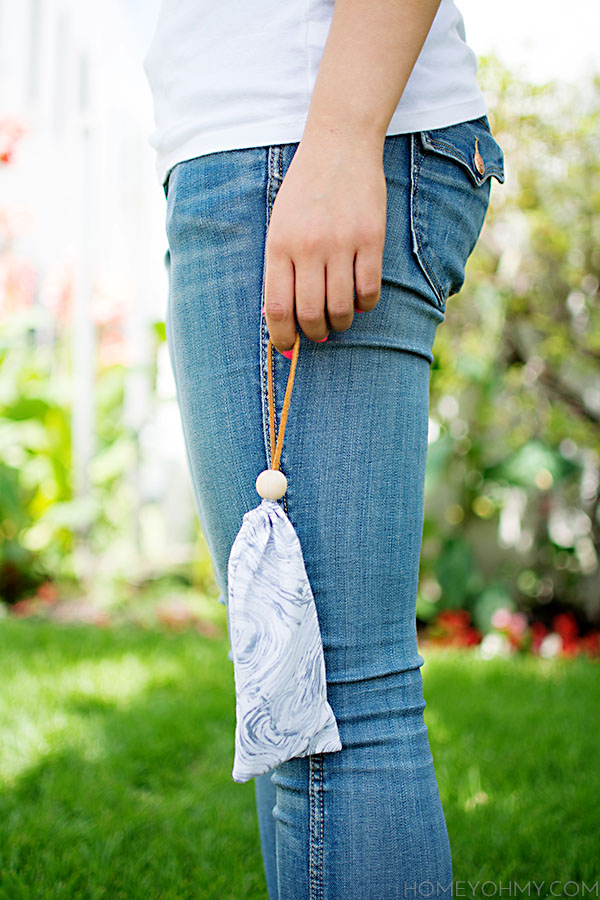
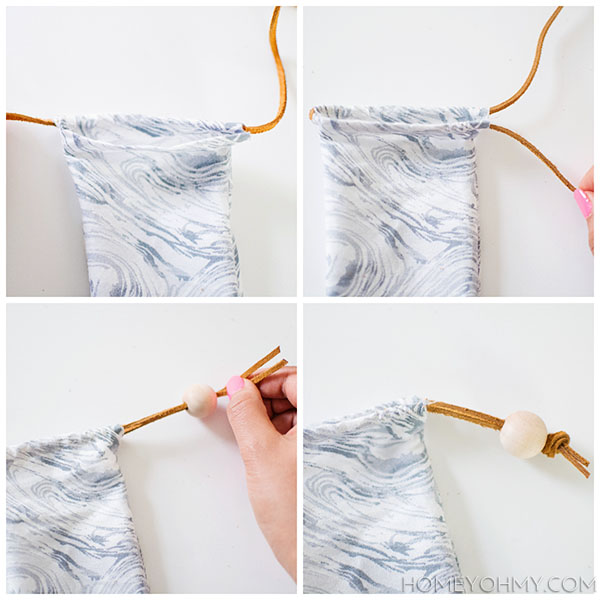 After letting the glue dry for a little bit, I flipped the pouch inside out and strung the leather lace through the openings on one side of fabric, then strung it back the opposite way through the openings on the other side of fabric. I cut the leather, slid on a wood bead, and tied a knot.
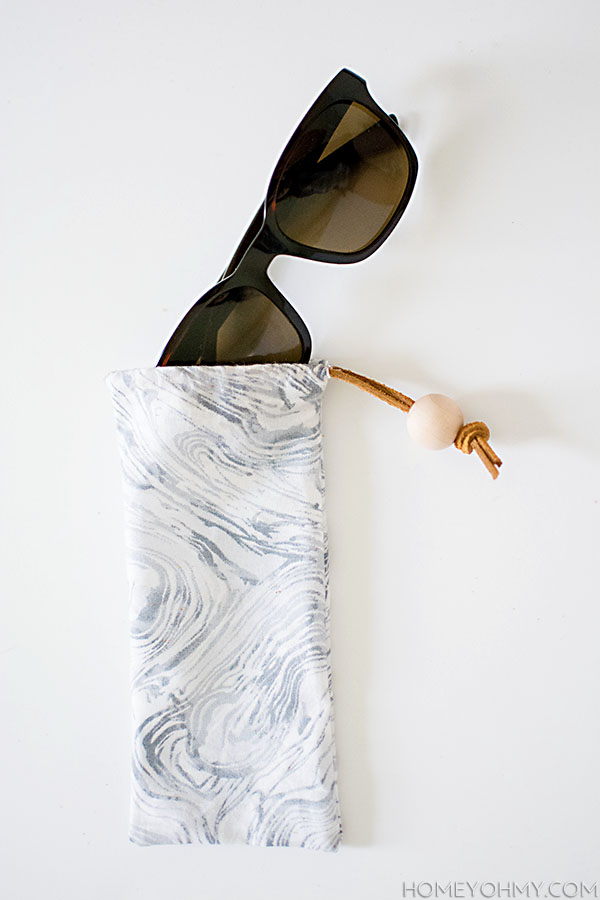 And then it was done.
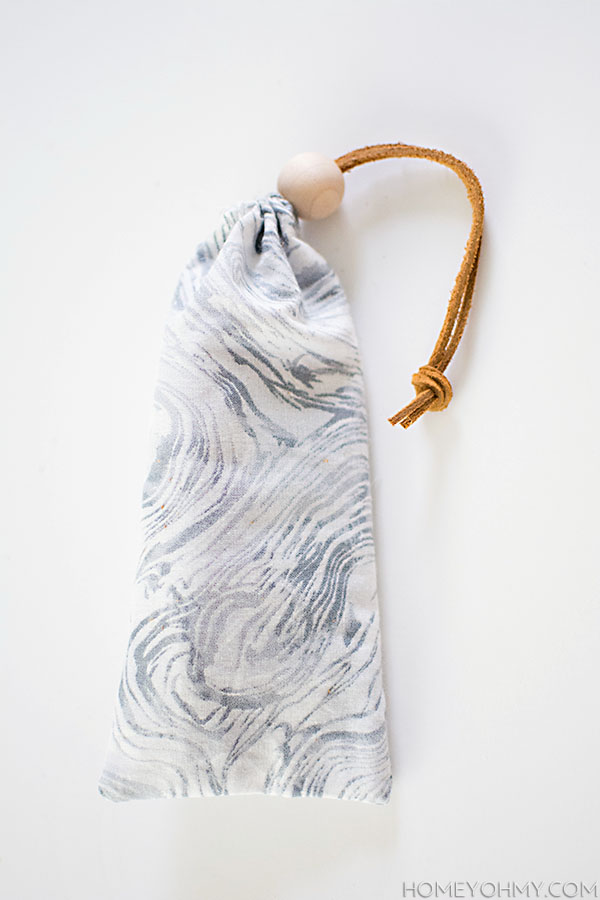
And then I pulled the leather drawstring shut and closed the pouch.
 Will I ever carry it around just like this? Probably not, but I think it’s a fun idea.
Speaking of fun, here’s a fun fact- I worked at a Sunglass Hut when I was in high-school, and after seeing so many sunglasses that were wrecked from people wearing them on their heads, I swore I’d stop doing it myself. Unfortunately I haven’t come close to achieving that ever. I bet you wear your sunglasses on top of your head, too!
So what do you think of this pouch? Do you have a use for one this summer?

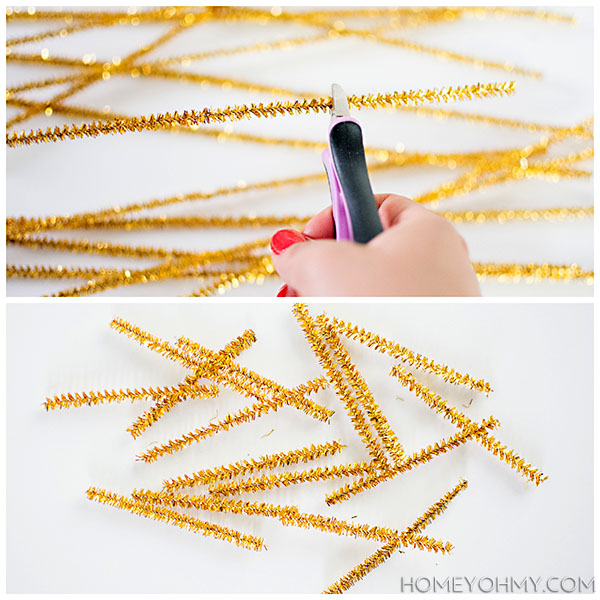 First, use wire cutters to cut each pipe cleaner into four, roughly even pieces. Shake off any excess tinsel that was cut.
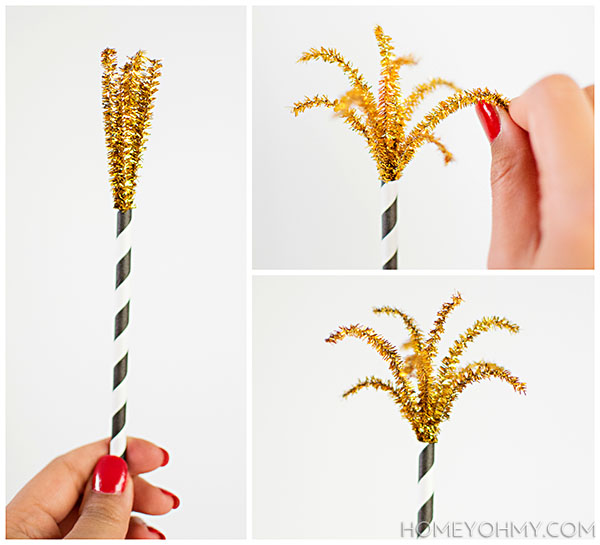
 That’s all there is to it. I swear. Makes me way too happy how such a simple craft can be so fun and festive. You too?!
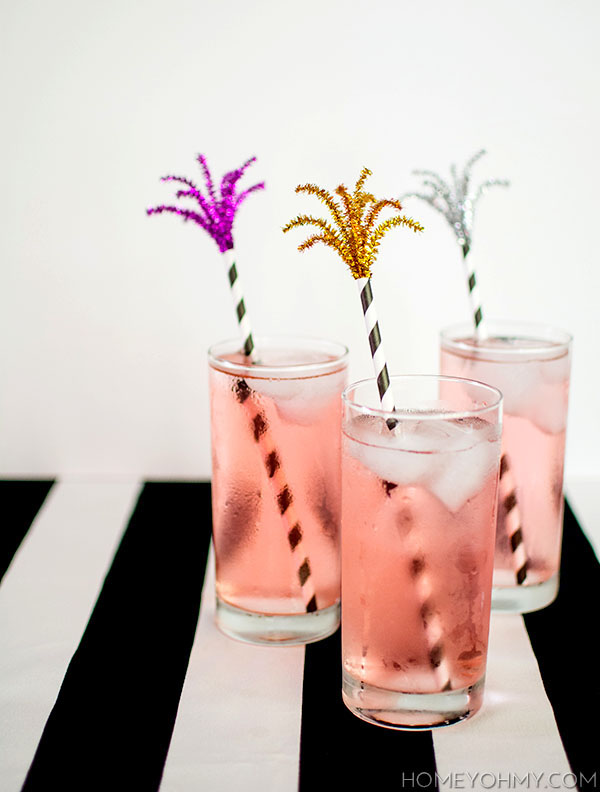 I like how my first ever 4th of July project isn’t red, white and blue, which for me was an easy challenge since gold remains a viable option <3. I also LOVE the glint and gleam of the tinsel on the pipe cleaners. Really helps the imagination see them as fireworks ;)
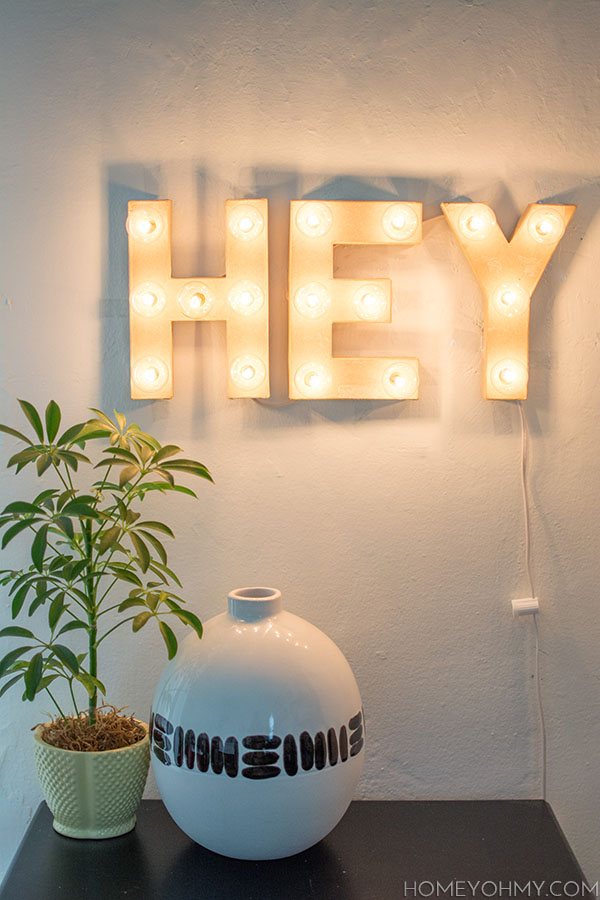
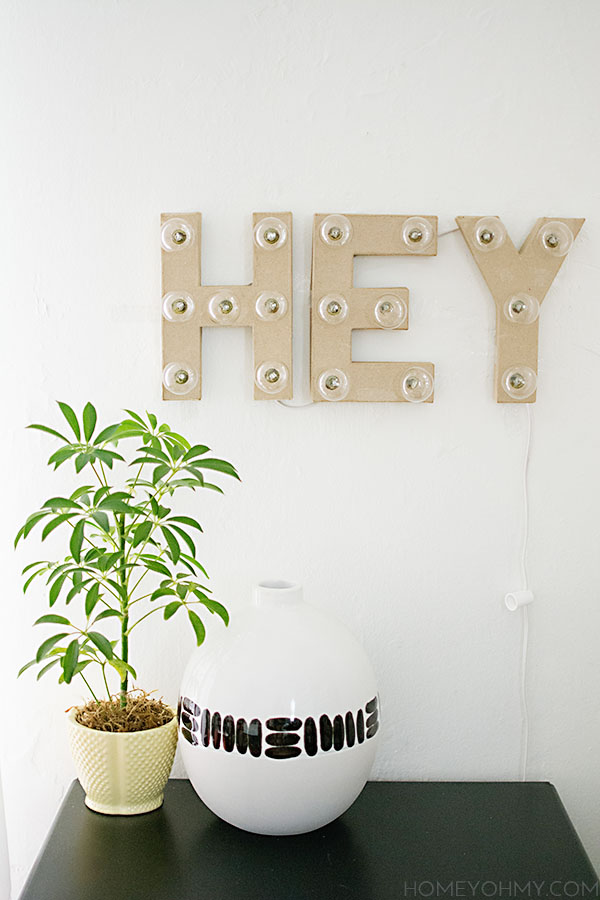 Yo! I’ve been itching to make a marquee sign for a long time now, and this summer season is finally kicking me in the butt to do it since it makes a great summer decor piece. Now… there are a million and one marquee projects out there, and this one isn’t anything new, but I still had to do it, especially with how simple I knew it was going to be. I imagined it going above a bar cart, which I still don’t have (boo!), but for now I like it just hanging on the wall, and for potentially using it as party decor. Hey now!
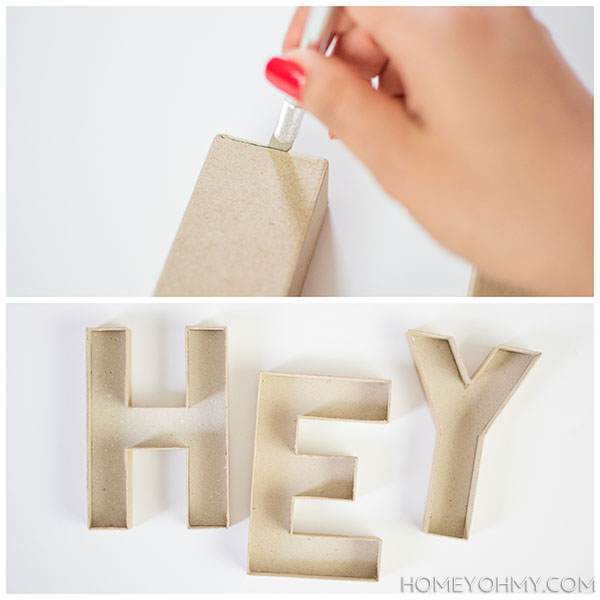 I started by cutting out one side of each of the cardboard letters with an X-Acto knife. This was pretty easy to do and was a fairly neat process.
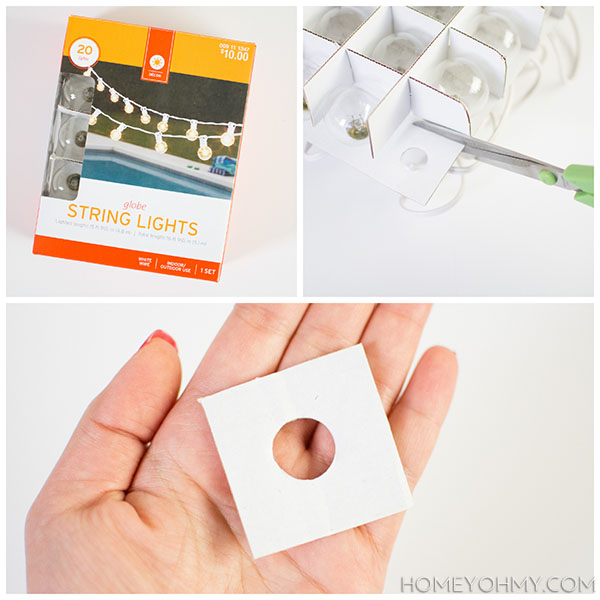 In the string lights packaging, the light bulbs were sitting in a cardboard tray, and I figured the holes in them would make the perfect tool to trace perfectly sized openings onto the cardboard letters. So, I cut one of them out to use as a tracing guide.
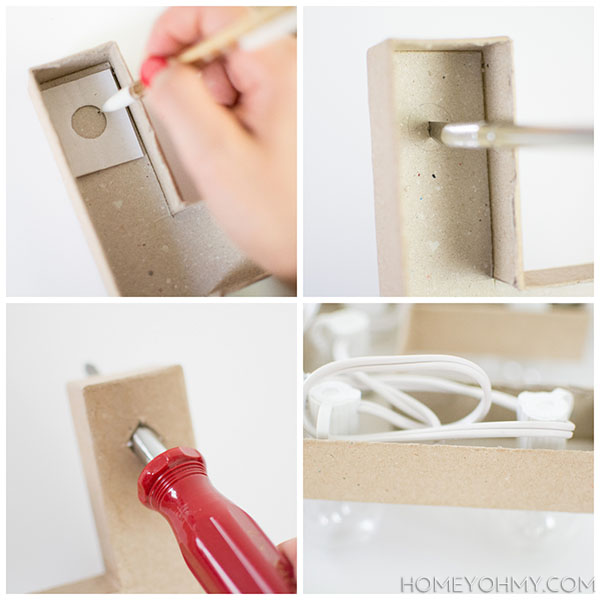
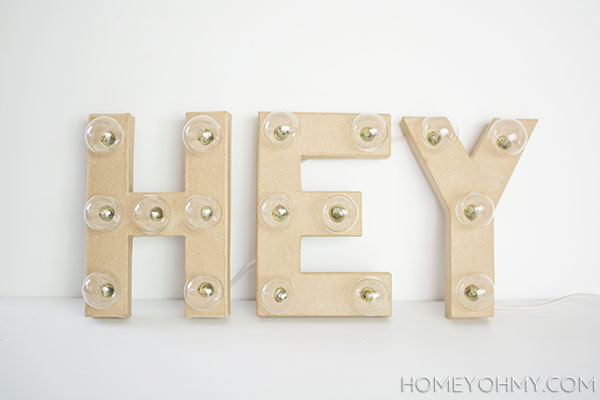
 I did think about just doing one letter, or the widely beloved ampersand, but neither of those excited me more than this one. I don’t exactly remember how I thought of using this word, but it is one I use often, and I liked the playfulness of it. Seriously, it would work so well above a bar cart, right? In that case, I’d also add a “girl” marquee beneath it ;). That’s something I say a lot, too! And not just a Ryan Gosling tribute.
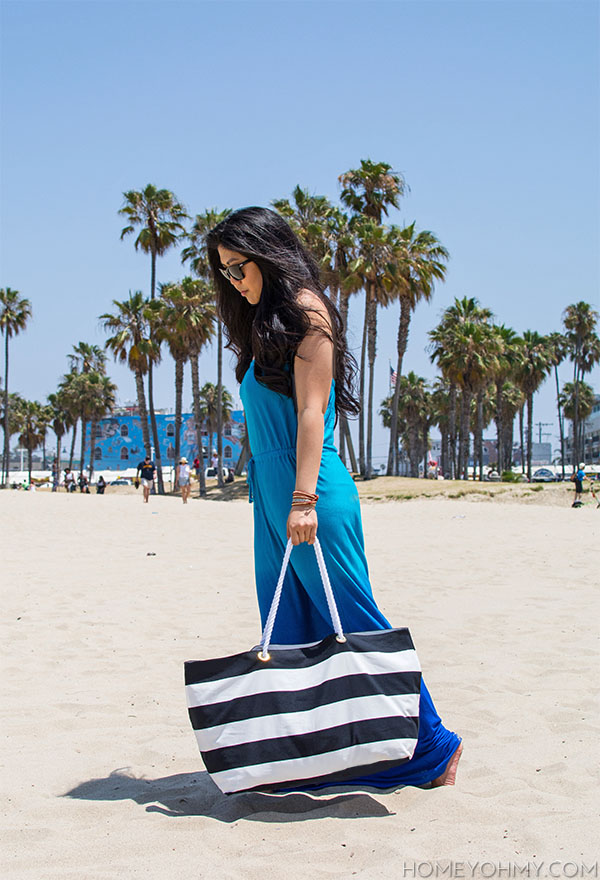
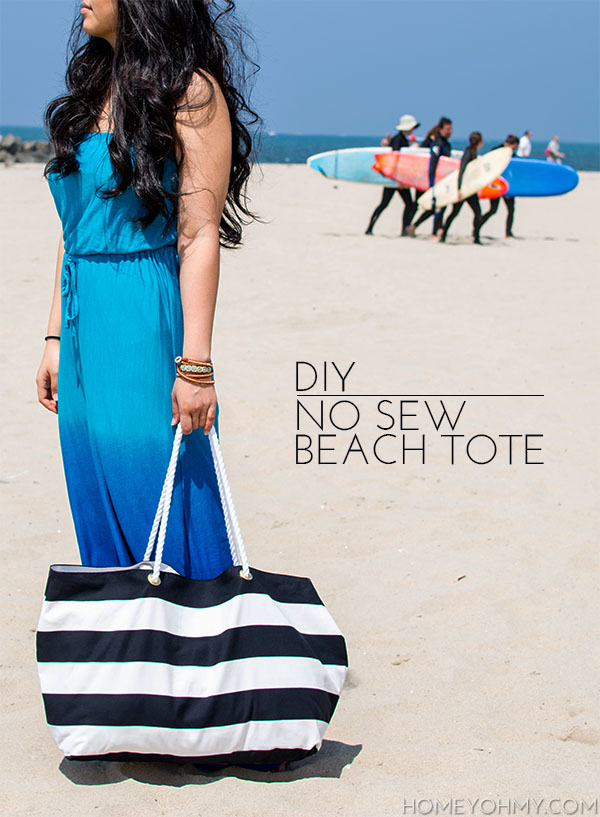 You guys. I love this tote. And the beach. Can I just quickly talk about this photo, which is one of my favorite photos ever for this blog? My beach day photographer (boyfriend) had me standing still here and told me to wait, which I reluctantly did, only to find out later that he was waiting for the surfer dudes to enter the shot in the back. Isn’t that neat?? Good job, boyfriend <3.
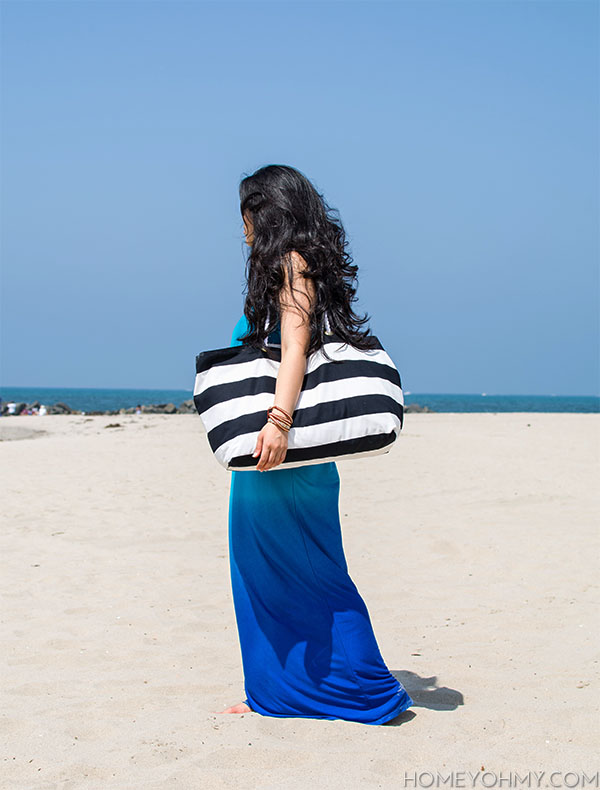
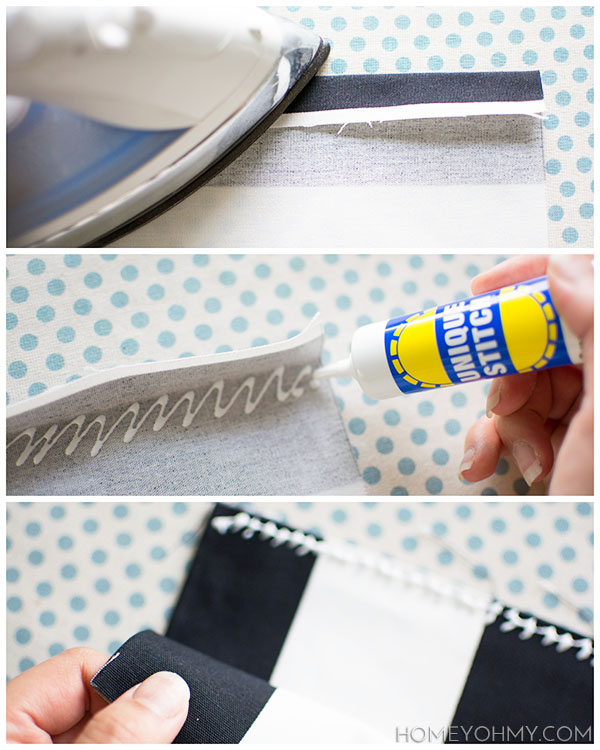 First, iron out the pieces of fabric. The rest of the steps will be done to each of these pieces. Fold back about one inch of the fabric on one of the sides that’s 27 inches long and iron it down. Apply the Unique Stitch underneath the fold and glue it down, then glue the fabric pieces together face to face, making sure the edges that were previously folded and glued are matched up (this is the opening of the bag). All three of the other edges should be glued together.
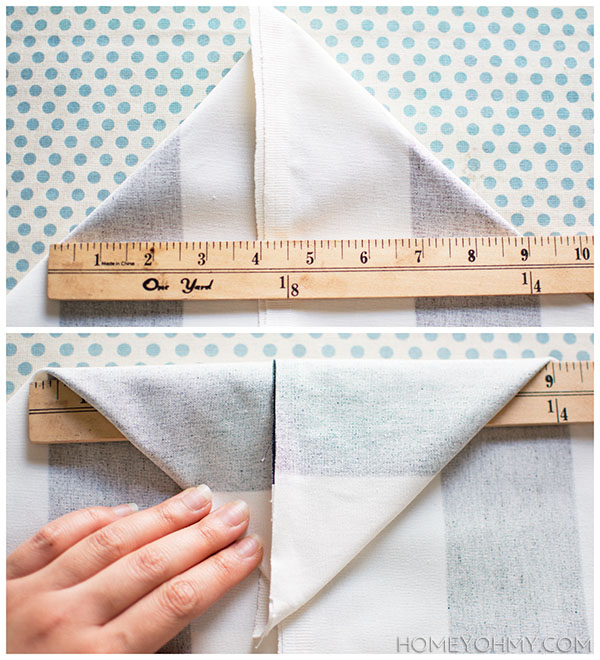
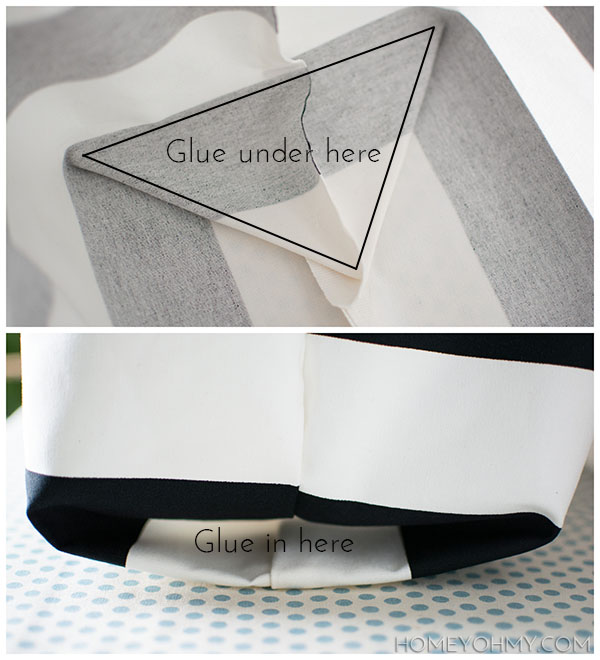
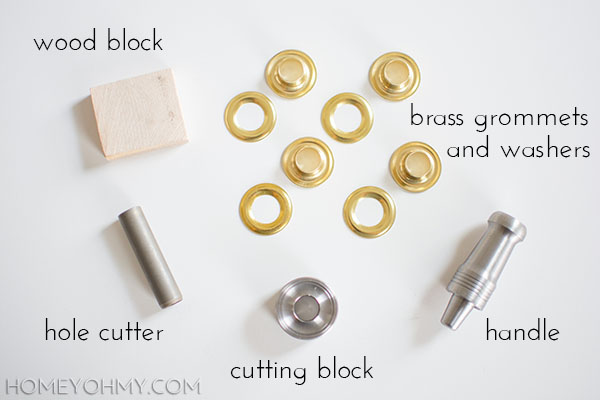
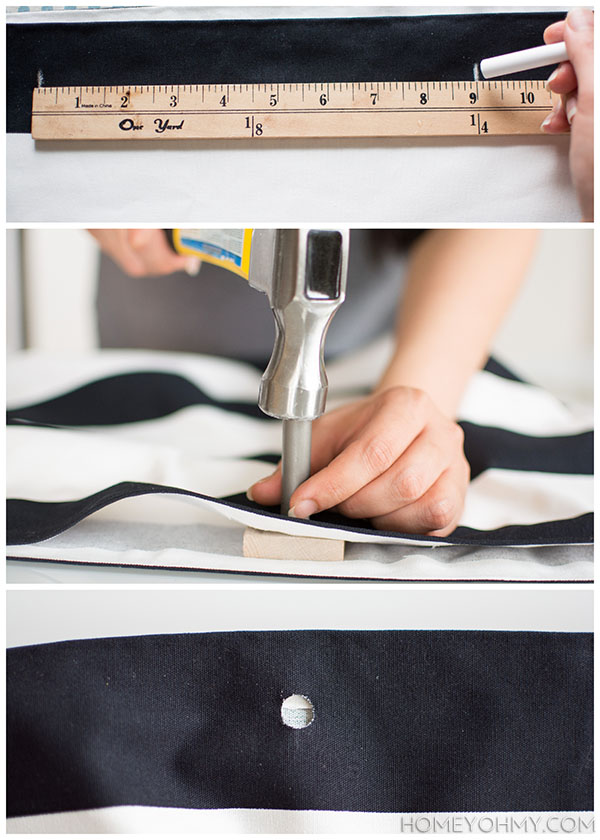
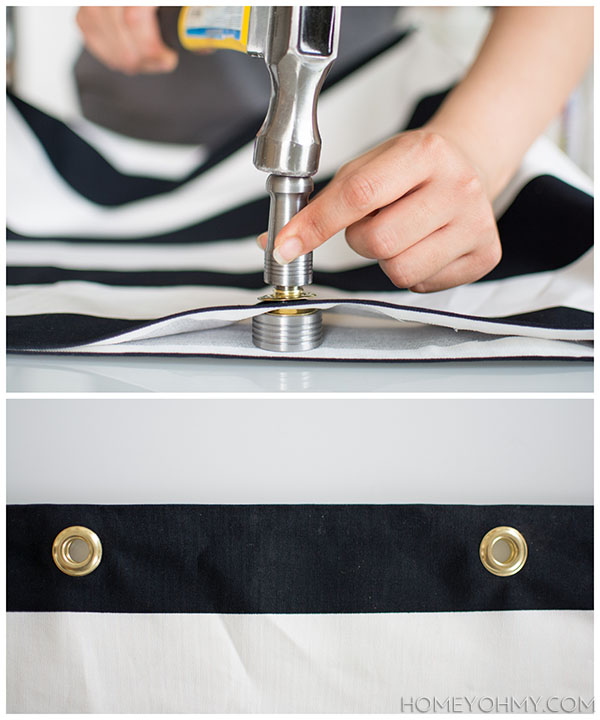 Next, all you do is hammer a grommet shut through each hole. NOTE: The way I’m doing it in the photo is incorrect. The side you hammer will be the back of the grommet, so you should set it up so that you’re hammering from the back side of the fabric, not the front like I’m doing in the photo. The layers from bottom to top are the cutting block, grommet, fabric, washer, handle, and hammer.
 Finally (finally!) pull both ends of a 3 foot piece of rope through the grommets on one side of the bag and tie them into knots. Repeat on the other side. Apply super glue into all the crevices of each knot to secure them in place.
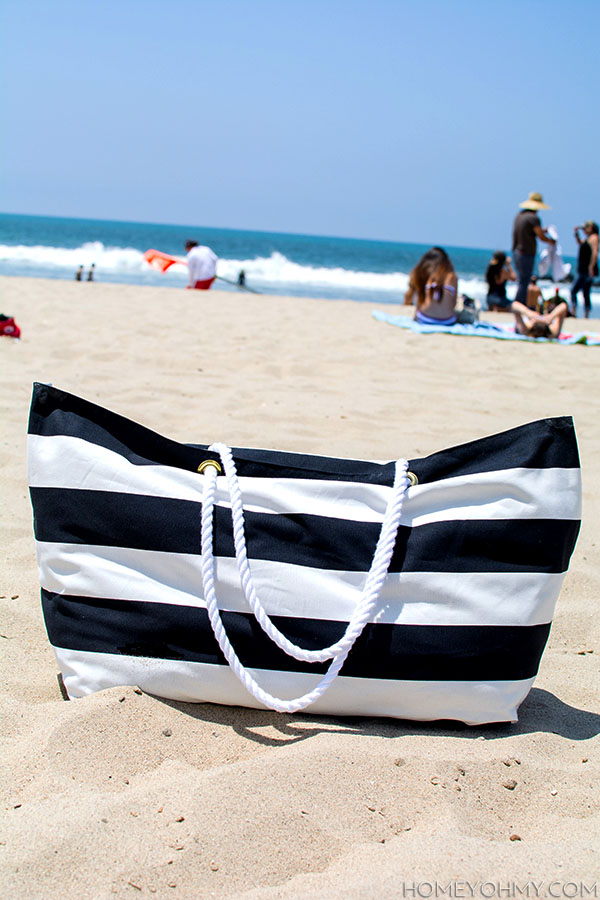
 Yes, I did actually take it with me to the beach and it was perfect. So much room and it fit everything I needed and more (snacks, snacks, and more snacks). Here was my little set-up, just for fun.
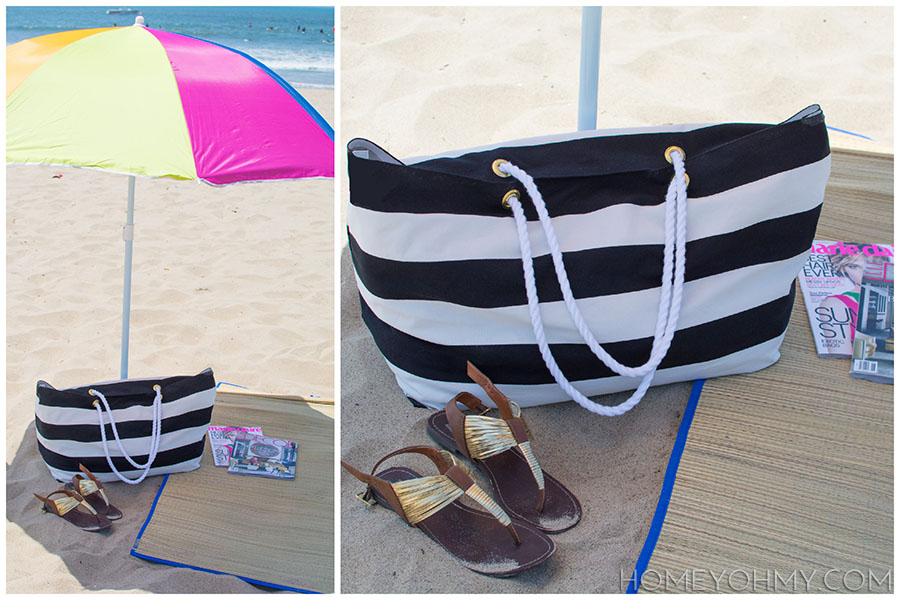 Guys, this is the first time I’ve ever owned a beach umbrella and it is a game changer. My intolerance for the sun and turning into a lobster is no longer a concern and now I can comfortably stay on the beach all day. How did I not know that the solution was so easy? Thank you, last minute Walgreens umbrella impulse buy!