Before we get started, I need to say THANK YOU for all the sweet comments you guys left on my blog birthday post!! It’s been amazing reading through them and knowing how much you guys are enjoying being here, which makes my heart soar. I wanted to go through and respond to each comment, but then realized that would clutter up the “entry” aspect, so decided against it, but hopefully all of you are reading this and know how overwhelmed with gratitude I am for all your love! That post is going down in my book as my favorite, because reading through the comments will be my go-to pick-me-up forever. You guys are the best!!!!!!!!
Ok, blah blah blah, I’ll get on with it.
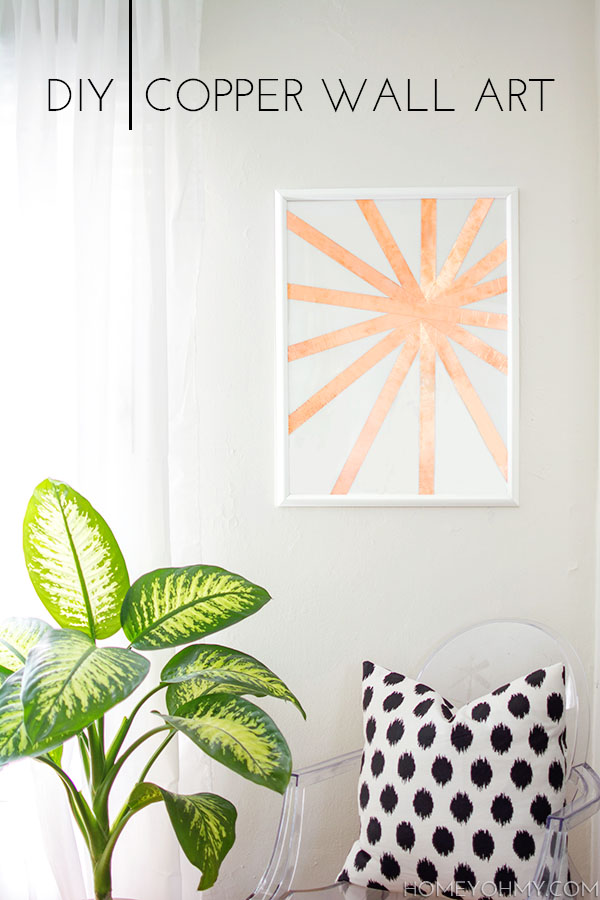
Wall art project number two! Although I will say, I’m really liking the way it looks here in this corner, so much that my original plan to have it go on my future gallery wall is probably not happening anymore. So while this isn’t going towards project gallery wall, I still feel the need to to share with you how crazy easy it is to make this chic copper art.
The inspiration, very simply, came from wanting to use this copper tape.
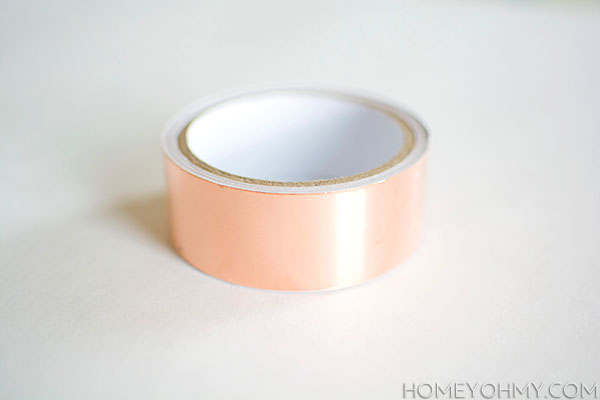 It’s been hiding in my closet for almost a year now, which is what happens with most things I get without knowing at all what I want to do with them. I always trusted the idea for this tape would hit me eventually, and in this case it took me a year, ha!
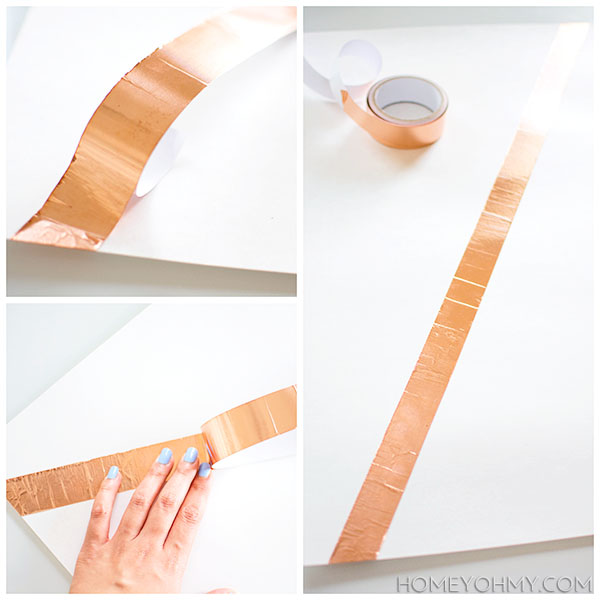
I traced the frame insert onto poster board, then cut it out to act as the canvas. For the copper tape, I peeled of the backing just on the end of the tape and wrapped it over the edge of the poster board. While peeling off the rest of the backing, I slid my hand over the copper tape to stick it onto the poster board diagonally like so. I repeated this all around in a radial design, making sure each strip of copper tape intersected at the same point.
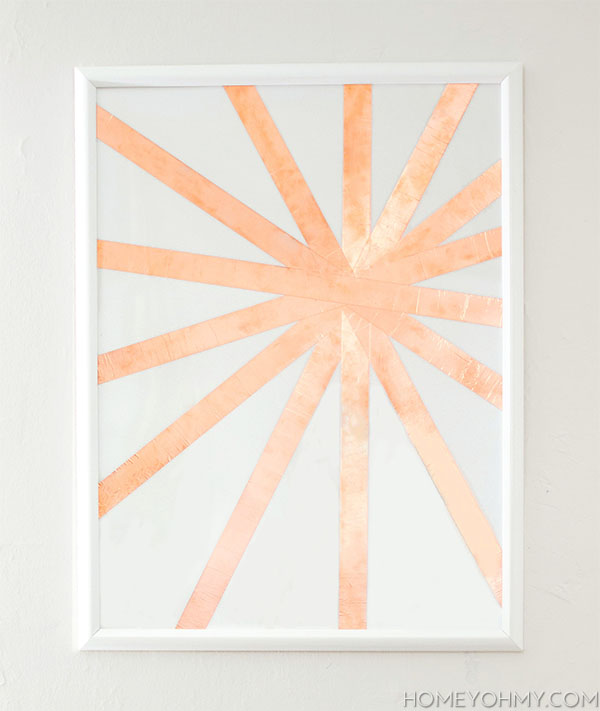
Easy, right?
A couple notes on using copper tape:
- Wear gloves. I didn’t realize it at the time, but my fingers were making fingerprints on the tape, which are visible at certain angles, but still I would have rather avoided this.
- The tape is very delicate, making it impossible to preserve the perfect sheen it has while on the roll, so it ends up having the look of copper leaf, which I like! If you are looking for even texture though, copper tape will not achieve that.
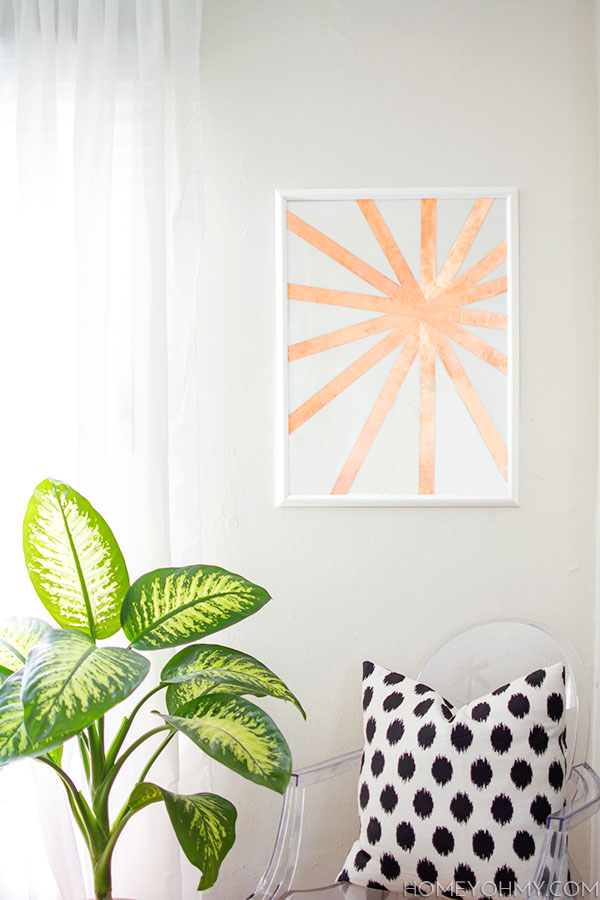
I was thinking about the Japanese sun when I was creating this, and when I showed it to my boyfriend he said hey it’s like the Japanese sun. I guess it’s an abstract, copper take on that!
How soon-to-be-fall appropriate, too. Seems like I’ve favored copper a lot this year and I see myself using a lot more of it this fall.
More wall art to come, guys. This gallery wall is taking a lot longer than I wanted, but I’d rather have it that way if it means it will turn out just the way I want it to. Do I even know anymore what I want it to turn out like?? I’m feeling more and more antsy to get it done, but I know that rushing these kinds of things is exactly what not to do. Then again, sometimes you have to put a cold hard deadline on something or else you’ll spend forever trying to perfect it, right?

Hahaha I love that the copper tape is a snug and snail repellent!
Such a pretty piece, what a great idea! :)
I KNOW! The packaging made me cringe a little, but once that’s out of sight it’s all good ;)
Thanks, Leigh Anne!
Laaaady. Simple and stunning!
Thanks Amyyyyy! <3
So pretty! I love the radial design you created.
Aw, thanks Caitlin! Couldn’t not go with the radial- it was too easy ;)
This is so glam yet so simple! Every project that you do is fantastic. I love your design aesthetic. It’s what I aspire to have myself. Thanks for the tutorial! There are so many others that I plan to use as is or at least as inspiration. Thanks!!
Sarah
thesloppyperfectionist.blogspot.com
Aww thank you, Sarah!! HUGE compliment. I’d love to see what you end up making yourself!
Just curious. Where would one procure this gorgeous tape if one was so inclined to make beautiful art with it?
Hi Marcia! You can get the tape here.
LOVE this Amy! Simple and awesome. I really like that it’s textured too :)
YAY! Thank you, my fellow simplicity-loving friend <3 I'm glad you're on board with the texture, too.
Is there a way to keep it smooth? Will it always have crinkles?
I wasn’t able to achieve it with just my hands, no. You could try sliding a credit card across the tape as you peel off the backing, but I didn’t try this because I thought it might tear the tape since it’s so delicate. See if that works for you and let me know!
So pretty!
Thank you, Julia!
Amy, you never cease to amaze me with how you can take everyday objects and spice them up into something beautiful and eye catching! I have never heard of copper tape but I’m definitely going to keep my eye out for some!
AMY!! So nice, thank you!!! I only heard of copper tape because it was getting pinned everywhere last year. I’m for sure going to be using it more ;)
Yesss, you know I love me some copper! I never knew copper tape like this existed and I’m pretty sure I need about 10 rolls in my life. I love the texture it has and the simplicity of it! Another amazing creation, Amy!
Oh yes, I know that you are a fellow copper-loving friend. Thanks, Bre!! I know you could do something AMAZING with copper tape!
I love this, Amy! It’s so pretty and easy!
Thank you so much, Selene!
Hi Amy,
LOVE your DIY Copper Art! It looks stunning in that cute little corner and the pillow is pretty great too :) I found you over at the Hit Me with your Best Shot Link party this week and am so glad I did. I look forward to following along… Have a great day, Rachael
Hi Rachael, and welcome!!!! So happy you found me, and thank you so much for loving my art and for taking the time to let me know!! I’ll see you around ;)
What a fabulous idea! This turned out so pretty! Thanks for sharing your project on the Monday Funday Party!
Thanks, Pauline!! And thank you for coming by!
Amy, this art turned out so awesome and I can’t believe it’s tape! Love it!
copper tape?!!!! NEED!
Modern, easy and fun! Love it! Pinning and would love to have you link up with us at The DIY’ers!
Thanks, Ashley! And I love the DIY’ers :) See you there!
I am just wondering the size of the art piece. Very beautiful!
Thanks, Abby! The size is 18×24″.
I just featured this beauty at our link party this morning. Be sure to stop by and grab a feature button.
http://www.delineateyourdwelling.com/2014/09/link-it-or-lump-it-party-56.html
Hi! I am planning to do this gorgeous artwork, and I was wondering the dimensions of the frame you are using??
Thank you so much also, you inspired me to do so many diys, and most of them from you!
Hi Taylor! The frame is 18×24.
Thank you for being here, Taylor. Happy to help inspire you to DIY <3