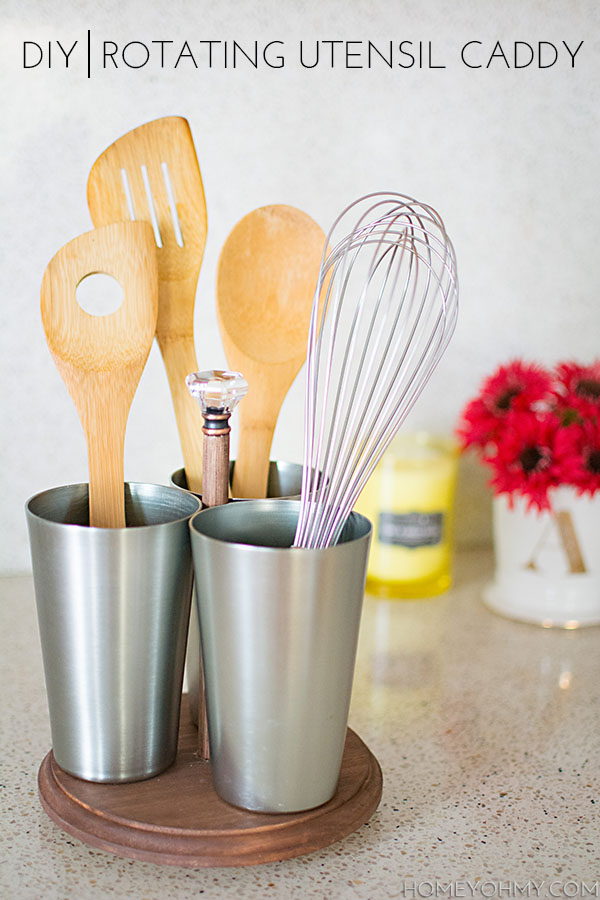
 I get a lot of inspiration from window shopping for home decor and accessories. During this activity, I very often find myself saying hey I could make that, and then another voice in my head says “You should.” Then it becomes the thrill of the challenge. Sometimes it isn’t only about the thriftiest and easiest way to make something. Sometimes it’s about seeing if I can do it myself, and with that comes the addictive power to make my own customizations, which can make all that extra work worth it.
That’s what happened with this utensil caddy. I was looking at one at Target and was mentally picking apart all the things I wanted to change about it- I wish the wood was darker, I wish the compartments weren’t mesh, I wish there was some metal or shine, I wish it could rotate. Instead of trying to look for one that fit all my criteria, I accepted the challenge to make it myself!
Materials:
-6 in. wood circle
-drill
-wood stain
-staining brush
-3/4″ wood dowel, 7″ long
–E6000
–ball bearing lazy susan
-3 in. wood square
–decorative knob
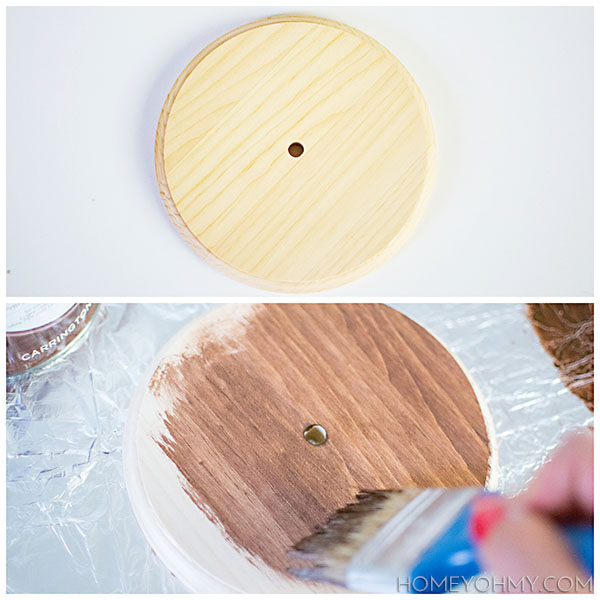
I got the wood circle from JoAnn’s, and it’s supposed to be for crafting a clock. I thought it would be helpful that it already had a hole in the middle, but I’ll show you in just a bit what happened with that. First, I stained the wood and the dowel and let them dry.
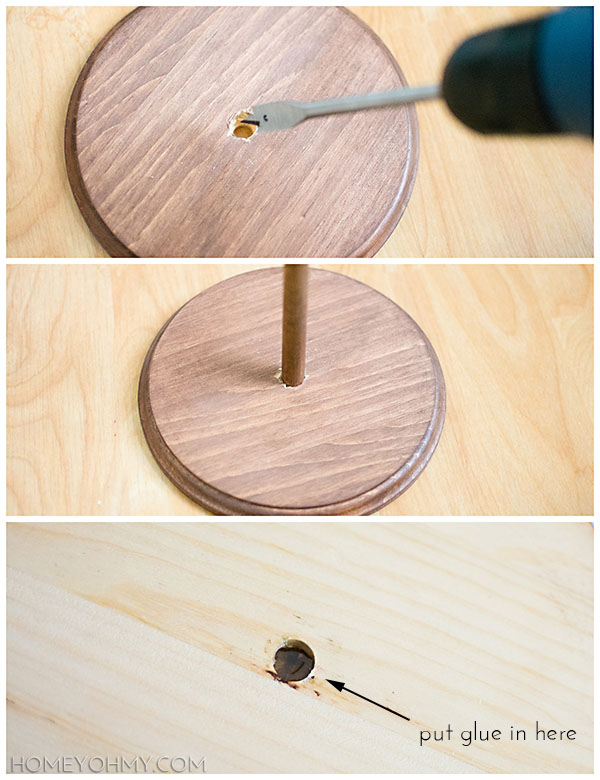
So I thought I could just stick the dowel in the hole, but turns out the dowel, which was 3/4″ in diameter, was bigger than the hole, something that I absolutely could have figured out in advance and don’t know why I didn’t. I should know better! Since I had stained everything already and didn’t want to repurchase correctly sized materials, I went to plan B and used my drill to make the hole big enough for the dowel. I drilled the hole through the top, about half way down into the wood circle, stuck in the dowel, then from the under side I poured in some E6000 into the hole to secure the dowel in place.
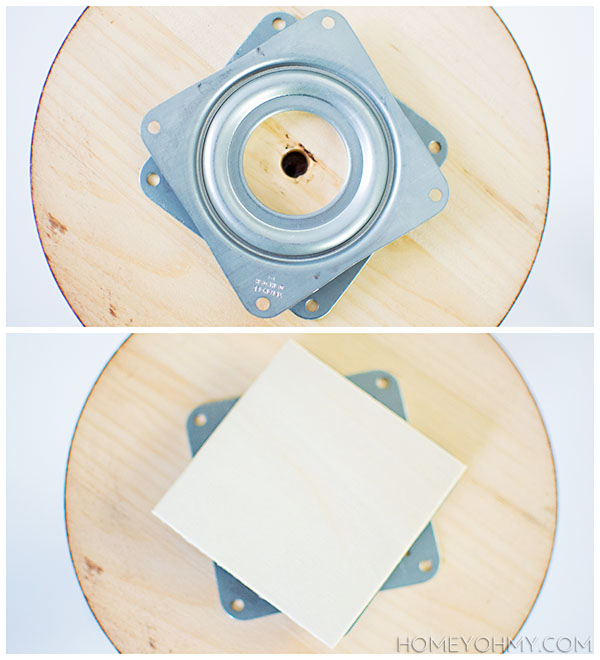 Next, I glued on the lazy susan to the bottom of the wood, then glued a 3in square piece of wood to the bottom part of the lazy susan to provide an even base for the caddy. There are holes for drilling in screws, but if I have a choice between drilling and gluing, I always go with gluing if the connecting surfaces aren’t going to endure opposing forces, which in this case there would be none. Plus, E6000 has amazing holding power. Gluing is just easier too, right?
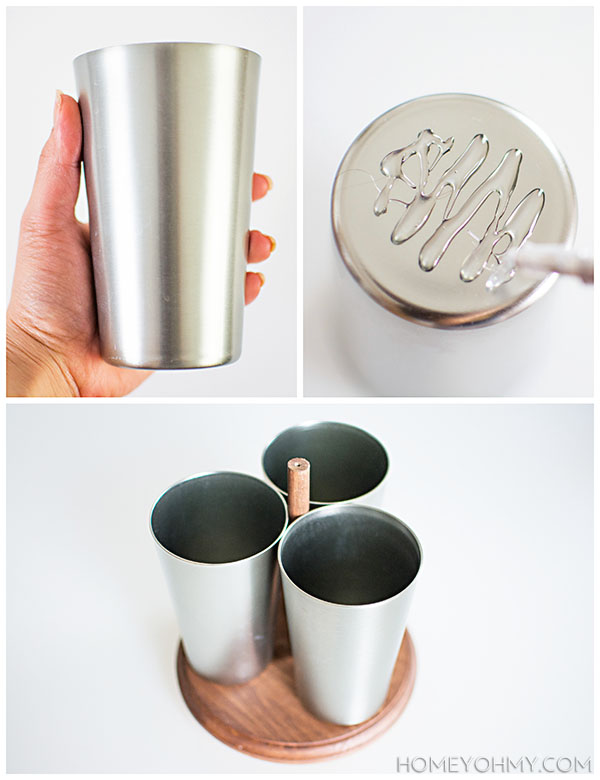 I found these aluminum cups on clearance at JoAnn’s (I go there a lot, guys. There’s one very close to me that opened up this year and it has saved me so much time!) and simply glued them onto the wood, making sure they set so that all the rims of the cups were touching each other and the dowel.
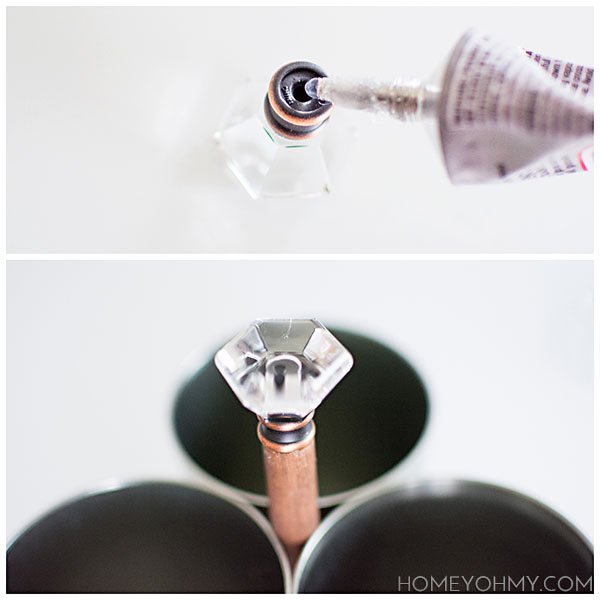 Does the knob look familiar at all? It’s the same one I used for my mirror jewelry wall hangers and I looooove it. The lucite, the copper details, the hexagon shape, love, and I knew it would look perfect on this caddy. All I did was, yup, glue it to the top of the dowel.
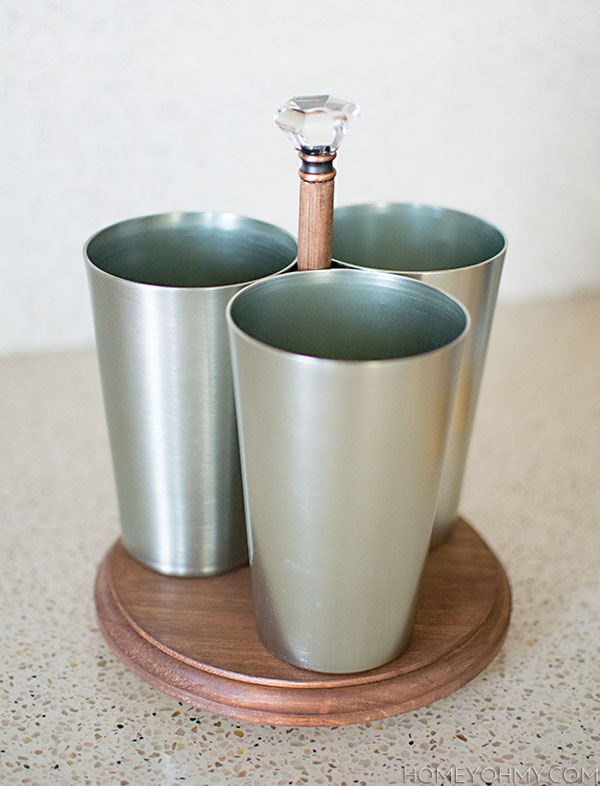
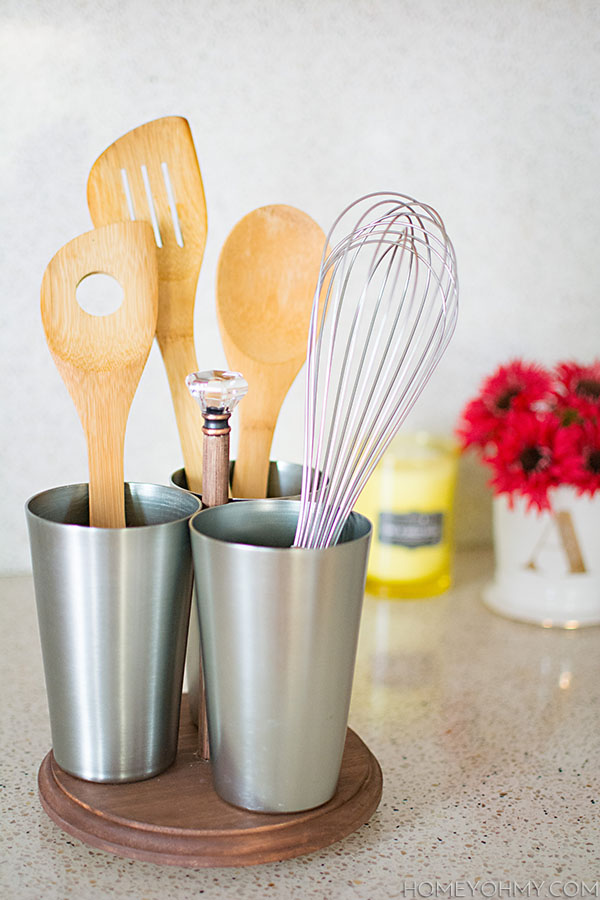
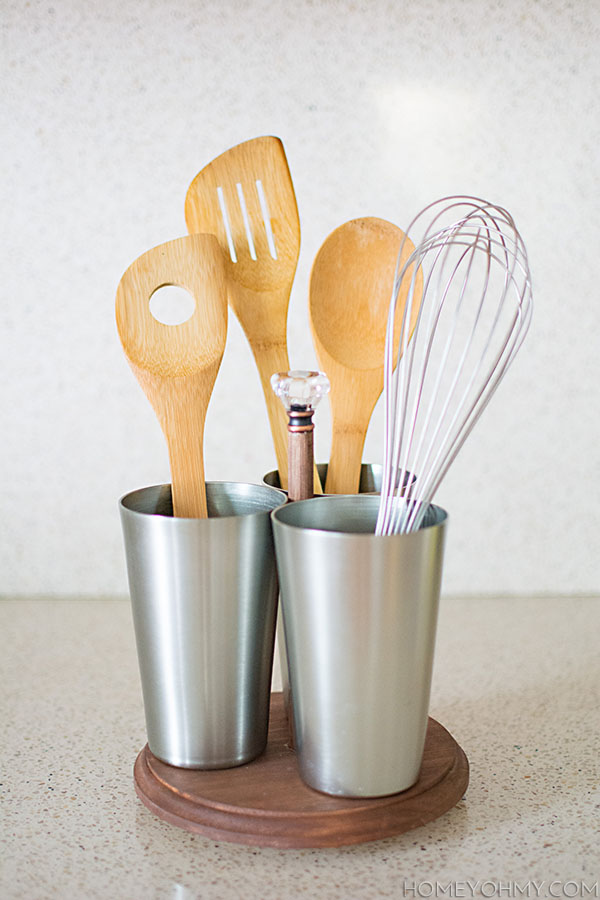
I really, really love it guys, but I’m going to be honest- this one took some time, mostly from trying to find the right materials and also compensating for my mistake with the hole in the wood. I would rate the difficulty as moderate, though overall still pretty simple because of all the gluing, but if you’re someone that knows exactly what you want, then I wholeheartedly believe you should go for it, whatever your criteria or customizations might be!

This is such a great idea! I love how it turned out (and especially the little jewel on top – gorgeous touch!)
Yes, my little touch of sparkle ;) Utensil caddies can be glam, too! Ha! Thanks, Stephanie!
I love this project Amy!! I need one of these to save my utensils from the jumbled mess they are in now. Pinning- xo
Tanya
I hear ya. We have one dedicated drawer for all our cooking utensils and it gets so jammed up it won’t even open sometimes. Not anymore! So happy you love this project, Tanya. Thank you!
It looks nice! I like the little knob on top! It’s a pretty touch.
Yea, it’s definitely my favorite part of the whole thing. Thank you!!
Oh Amy, I have those conversations with myself all the time! ALL. THE. TIME. Actually I often find myself staring off into space while working on a different project or shopping, and Alan will ask me if I’m thinking about another idea again. So thank you for helping me feel like I’m not the only crazy person! :)
LOVE this cute utensil caddy! It’s such a great way to personalize something like this, and I love that you shared that all you need is some parts and perseverance to make your home decor truly your own!
Yessss, always getting sidetracked while working on another project. I also always stare off into space and move my mouth because I’m talking to myself in my head. Crazy is me.
I may have taken the emoji out of you fingertips, but you took the words out of my heart <3 Thank you for understanding my point with this post and saying it better than I did!
Love this Amy! What a cute little addition to your kitchen. And go you for taking on the challenge! I do that often in my head too. Sometimes I give in and just buy the darn thing but of course I love a good DIY challenge ;) Pinning!
I give in and buy the darn thing a lot, actually. Sometimes I can be realistic and just say yea yea I’ll save time and just buy it. It’s easier though to convince the boyfriend on something if I make it myself, because then it’s like well I HAVE to for the BLOG ;)
Thanks for pinning, Bre!!
You knocked it out of the park again! This would make a really great housewarming or bridal shower gift — along with a new pack of mixing spoons.
There you go with your amazing ideas again. I should have you write the sections of my posts that talk about all the other great ways to use the DIY. Gifted with a set of spoons- SUCH a cute idea! Thanks, Rachel!
I always forget to measure something or figure wrong when I do DIY projects…that’s probably the main reason, I always end up putting them aside and never finishing them. :( The rotating utensil caddy is very cute – I’d probably have to use smaller containers and add a bit of color to it. It would be perfect for makeup brushes, etc.
I actually did set this one aside for a bit after realizing the hole wasn’t the right size! I come close to giving up on a lot of projects, but I’ve always found that those are the ones that end up being great when I finish them :) Love your idea to use smaller containers for makeup brushes. The smaller containers would even be great to make it a desk organizer!
What a great idea! Chic and beautiful. Love the addition of the jewel on top!
Thanks, Ashley! Was hoping it would turn out chic, so it’s great to have you confirm that it did!
This is a great idea! I love how you explain everything, it’s very clear to me!
Oh wow, that’s so good to hear!! Thanks so much, Monique!
oooh…. I really love that it rotates. Kudos to your for figuring it out. Go, Amy, Go!
Thanks, girl. I’m pretty happy I stuck through it. <3
What a fun caddy! You are so ingenuous to think it up!! :)
xox, Crystelle
CrystelleBoutique
What a creative idea! I would love to have you link it up to my Feature Friday Link Palooza!
Danielle @ Blissful & Domestic
http://www.blissfulanddomestic.com/search/label/Feature%20Friday%20Linky%20Party
What a fashionable way to display your favorite and useful kitchen utensils. My favorite is the big crystal in the middle, glams up the entire holder. Love this idea!