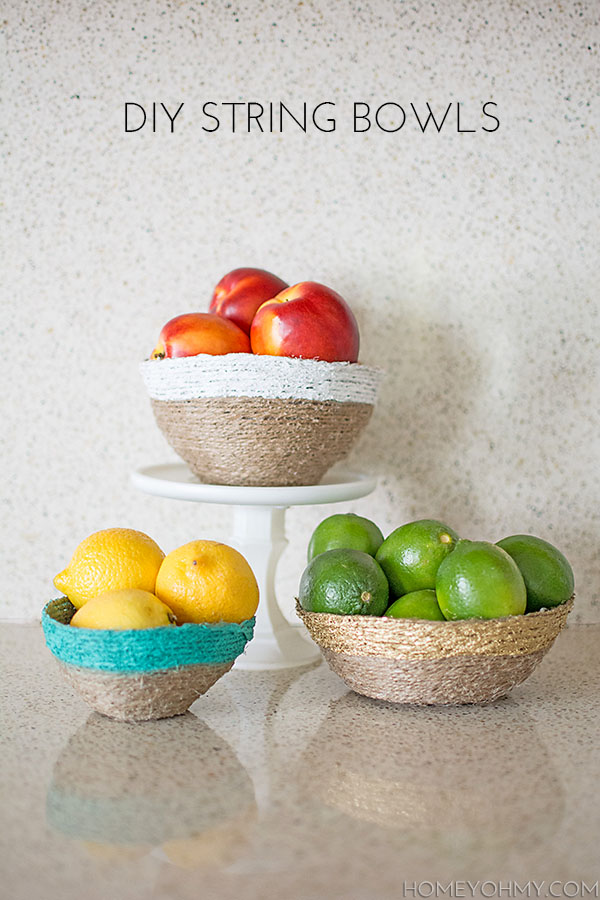
 June already!! I know, I say that about every month (and I say THAT after I say that about every month), but it’s seriously insane how we’re already fast approaching the half-way point of this year. Thinking about it that way really puts into focus how fast time is flying, right?
So with summer here (according to the solstice it isn’t officially summer, but to me, my first day back at the beach for the year marks the beginning of summer) I’ve got a bunch of fun, summer DIYs lined up, starting with this one. I came across this tutorial for making string bowls at Laughing Kids Learn and while it’s aimed at kids, I think this is a lot of fun for anyone to do. Plus, it’s super easy and doesn’t require a lot of materials. Win win win.
Materials:
Plastic wrap
Bowl
Jute twine
Mod Podge
Foam brush or bristle brush
Spray paint
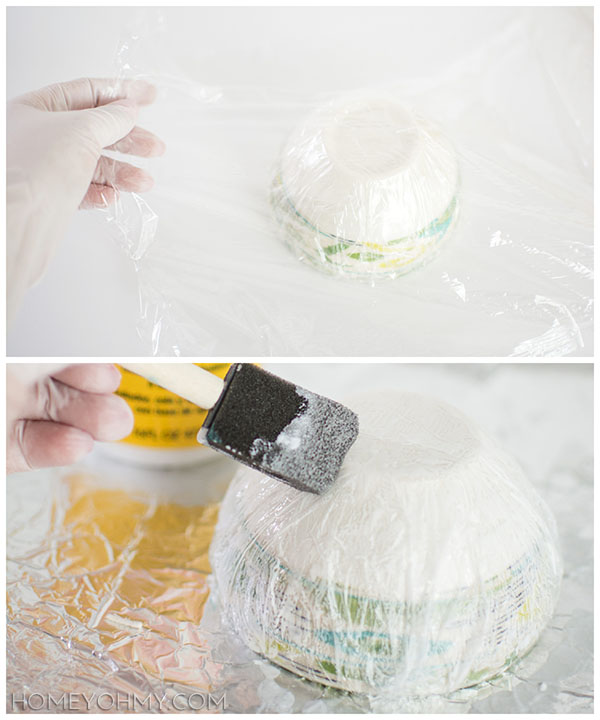 I recommend wearing gloves if you want to get hands-in with the string and possibly adjust it after you’ve slathered it in glue. First, wrap three layers of plastic wrap around a bowl. I saw later that the extra layers really help with the removal process of the layer that comes in contact with the string. Next, slather on Mod Podge over the plastic wrap. This will help the string stick on to the bowl.
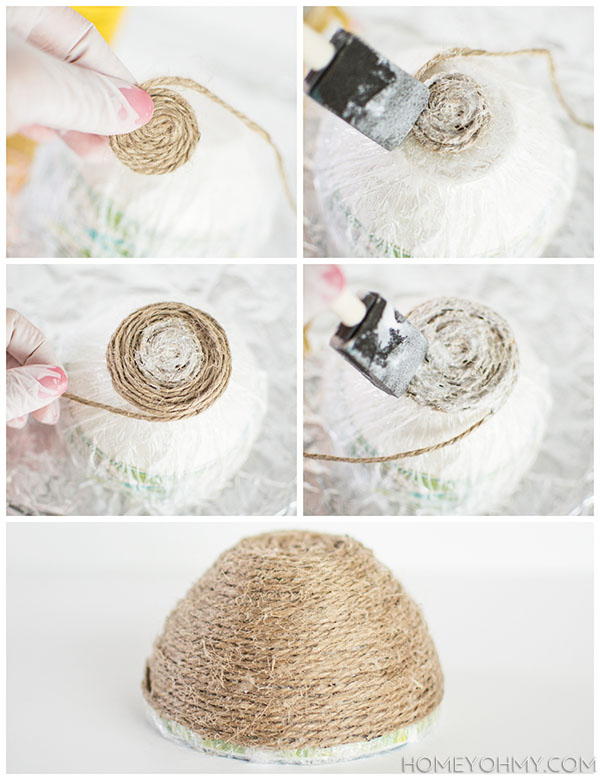
Coil the string until you make a small disc, then stick it on to the center of the bottom of the bowl. Glob on Mod Podge over the disk, then continue wrapping the string around the bowl while globbing on more Mod Podge all over the string. By globbing, I mean apply the Mod Podge generously! Make sure not to wrap the string all the way to the edge of the bowl. You’ll need this edge to grab onto in order to remove the bowl.
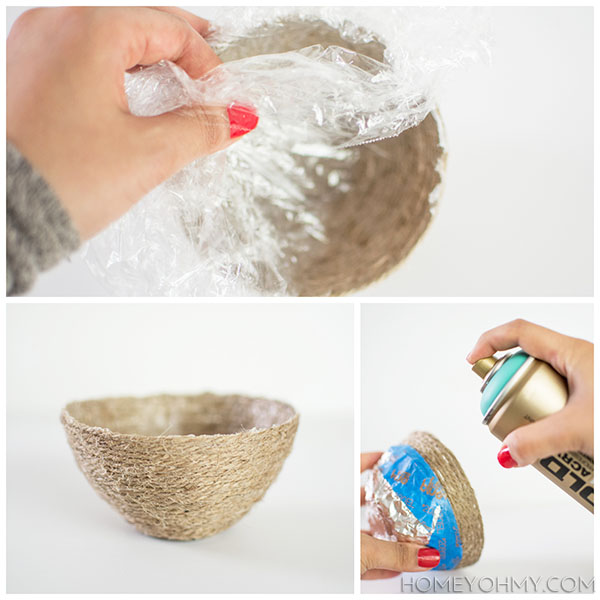 Let the bowl dry completely, then pull down at the plastic wrap while holding the edge of the bowl to remove the string bowl, rotating it so that you pull at every edge and angle. If I were to do this again, I’d probably spray a light coat of cooking spray on the bowl for easier removal, but you can do without it with just a little bit of patience. Remove the plastic wrap, then tape on a design of your choice. I kept it really simple and just spray painted the rims of the bowls, using painters tape and foil to cover the bottom of the bowl.
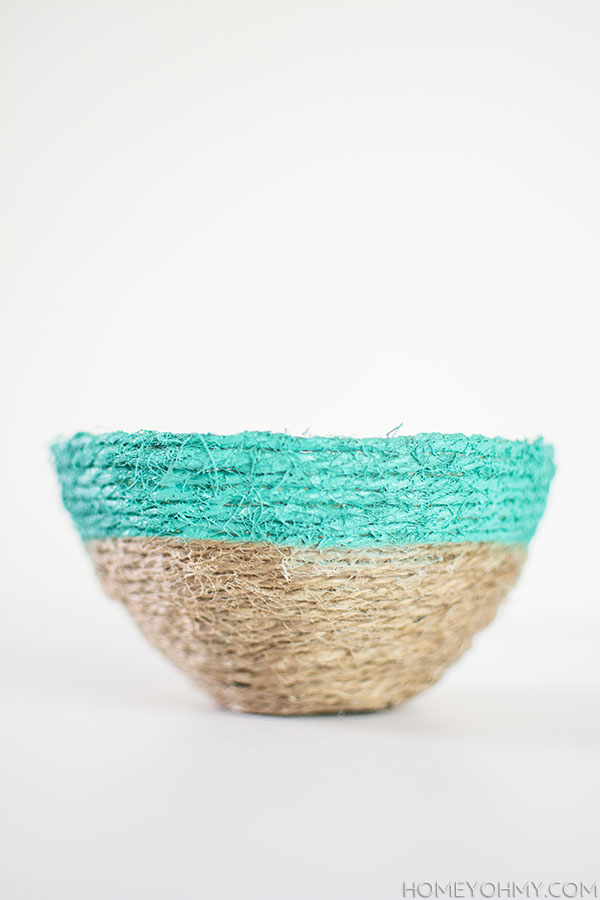
String and glue. Isn’t that neat? The bowls are pretty flexible and warp under weight, but they’re still pretty sturdy and hold well.
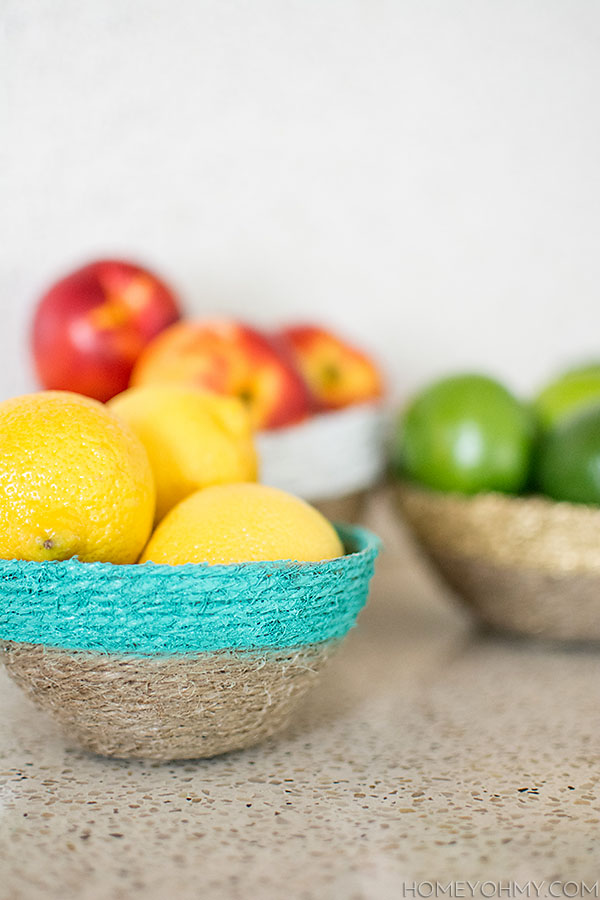
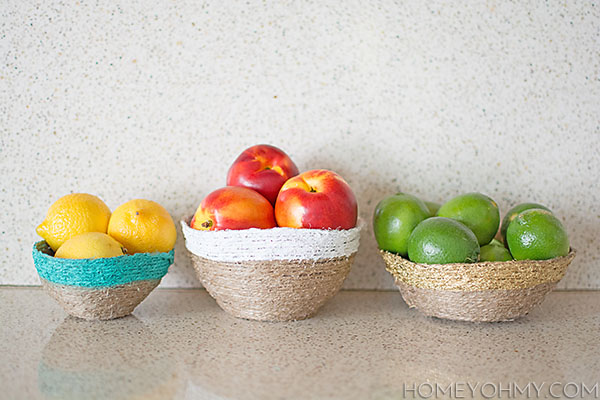 Aside from being functional, they make a cute, summery display when filled with fruit. I can see myself also using the smallest one as a catch-all, though I already have a bunch around the apartment. Having a container everywhere to throw random knick knacks into is my favorite way of “organizing”.
What do you think of these bowls? What would you use them for?


These bowls are cute to put your fruit in. I like the little bit of color you added to the rim of the bowls.
These turned out great! I love working with jute string.
Super cute, Amy! Love these. They look way more expensive than they really are. So, definite win there.
I LOVE these bowls! They add such a wonderful pop of color to the kitchen. I really love the colors you picked, they would be my pick too!
Gorgeous!!!! I’m so glad I was able to inspire you to create such beautiful string bowls. I absolutely adore what you’ve done. X
Love how you add bright colors at the top part! I can feel the “summer” on them!
LOVE these Amy, especially the pop of color at the top of each one!
LOVE! And they look so cute with the fruit in them :) They would look great on a bar cart ;)
How cool! I actually have a spool (if that’s what they’re called) of jute and have been trying to think of a way to use it. I may have to try this out. And loving the painted rims (especially since you’ve picked my 3 favorite colors, basically :) ).
Love these bowls! So pretty and all around fantastic.
You are one creative lady! Love it!!
LOVE these SO much! I can’t wait to make some for myself! Super excited to share these with my favorites from the week this Friday. Watch for it here: http://www.makingitinthemountains.com
Once again, a super cute project! I love the pops of color.
I love Modge Podge, but I never considered using it like this. It is like paper mache, but so much better because it’s twine!
Wow! I love these! The pop of colour is just perfect. I think I’ve found my weekend project :)
These are so cute! I’m definitely going to have to try this idea:)
So darn cute!!! Also featuring this one!!!
What a super neat idea! I love them! I have to try these! Just found you through Work It Wed link party :) I am starting to co-host a link party on Mondays… Would love you to come share this or any other DIY project :)
These are so cute and so chic! I love them :)
That is the sweetest rope project I’ve seen in a long time! Great project!!
Totally loved this! Congrats because you are featured on this week’s Do Tell Tuesday link party and have been pinned to our features board! Feel free to grab a button and link up this week too. :) http://www.vintagezest.com/2014/06/do-tell-tuesday-27-with-features.html
Diane @ Vintage Zest
These bowls are super chic!
I LOVE these! Approximately how much jute twine and mod podge did you use for your three bowls?
Thanks, Kait! It’s hard for me to remember, but I’d say I used less than half of the roll the jute comes in, meaning if you were to get a roll of it at Michaels let’s say, it should be more than enough to make three. Hope that helps at least a little!